CRMJetty Portal-Installation
After purchasing the “CRMJetty Portal” plug-in for the SalesforceCRM, you need to install the package. You will get the link to install the package in your email ID.
After clicking on the link, you will be redirected to the Salesforce login page. Log in using your Salesforce credentials. Now, from the Installation page, you need to select the “Install for Admins Only” option.
Tick the “I acknowledge ..” checkbox and click on the Install button to install the “CRMJetty Portal” package. Once the installation process is completed, you will see the “Installation Complete” summary in the popup.
To complete the installation, click on the Done button to finish the installation process.
By clicking on the “Done” button, you will be redirected to the Installed Packages Here, you will see the installed CRMJetty Portal listed in the ‘Installed Packages’ table.
Once you installed the package, log in to CRMJetty Portal and you must configure CRM Authentication to start syncing the data with Salesforce.


Admin Login
When the Super admin logs in the first time, enter the email that is registered with CRMJetty Portal and click on verify to set the password. The super admin will get the link on the registered mail and by clicking on the link, the super admin will be redirected to set the password.
Forgot Password:
Admin users can reset the forgotten password. They need to insert the registered email with the portal to get the password reset link.
The new users will get the mail of the reset password only on the registered email id.


Admin Dashboard
When you log in to the portal being a super admin, you will navigate to the static dashboard from where you can check all the activities in the form of graphs and counters as per the given rights.
You can check the active & inactive portal users from the chart.
You will get the counter for the ‘New Contact’, ‘Total Users’, ‘Outstanding Invoice’ & ‘New Cases’.
– New Contacts: You will get the no. of new customers that are created from the portal & CRM or registered on the current day.
– Total Users: You will get the no. of the total admin users.
– New Cases: Get the no. of new cases for the current day.
You will get the charts for 1 day. 1 week, 1 Month & 1 Year. By hovering the mouse on the specific chart, you will get the detail as a popup.
You will find the “Quick links” for Manage Customers & Design Portal to perform quick actions from the Dashboard.


CRM Authentication
Being a super admin, you must configure the CRM Authentication, once you log into the Portal after verifying the email.
You need to authenticate the following configurations:
– Environment: You can connect with Live or Sandbox CRM instances to connect the CRMJetty Portal.
– Client ID: Insert the Client ID for your selected Environment.
– Username & Password: Insert the credentials of the portal.
– Security Token: Insert the token that you have got from the relevant environment Live or Sandbox.
– Client Secret: Insert the client secret key.
– Test Connection: You will find the Test Connection button on the CRM Authentication page. It will verify whether the entered credentials are correct or not.
By clicking on the ‘help tip’ icon, you will see the link on how to get the Security Token. Once you have configured the CRM Authentication details, save the changes.


Portal General Settings
Navigate to the Settings → Portal Settings to set up your portal details. Also, from the ‘gear’ icon, you can navigate to the General Settings. You will have two different settings here: General Settings and Sync Layout settings.
General Settings
You can set your portal details under General Settings. You can set the general details as follow:
– Portal Name: Describe your Portal Name (Title).
– Portal Logo: Select the image to display as a logo. The selected image logo will appear there.
Admins also have an option to display the site under the maintenance page if your site is under maintenance. Enable the Site Under Maintenance switch and select the page you want to display when your site is not working so that your users are not able to access the portal.
Sync Layout
You can configure the Sync Layouts to make the process faster for getting data from the CRM. It will sync the CRM object layouts (metadata) like objects fields, views, forms, relationships, etc.
If the admin users made any changes to the CRM Object, they must Sync the data with the portal in the CRMJetty Portal admin.
You will see the two options to sync the Object’s data: Sync All Objects or Sync Specific Object.
– Sync All Objects: If you want to sync all enabled object data from the CRM, you need to select this option.
– Sync Specific Object: If you want to sync the data of the specific Object, you need to select this option. When you select this option, you will get the Object drop-down selection of the enabled Objects.
– Select Object to Sync: Select the Object from dropdown selection to sync the CRM data.
Once you select the Object, click on the Sync button.


Portal User Settings
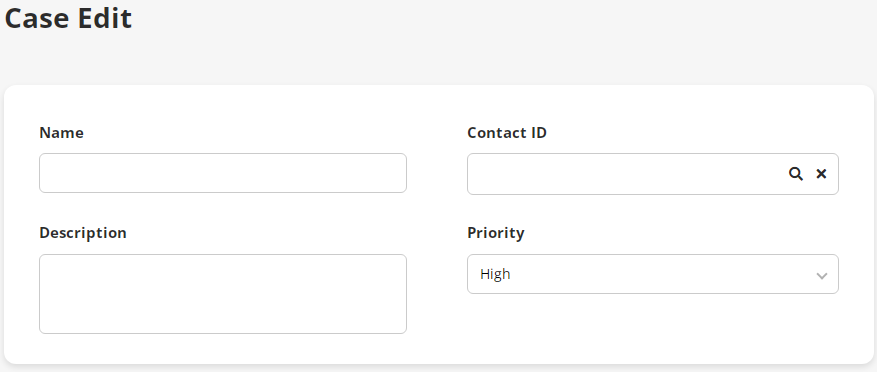
Super admin/admin users if they have rights, can define the layout for the “Contacts” page records that are used to display in the admin backend only.
You can design the layout of the “Contacts” for the Add/Edit page & List page. For the List page, you need to drag and drop the required fields under “Fields”.
By clicking on the Add/Edit page, you will navigate to the Layout page of the Add/Edit. After designing the layout for both, click on the Save button to save the layout settings. You can drag and drop any layout under the “Layout” tab and set the layout for the contact as you want it to be displayed.
After setting the layout, you can drag and drop the required fields from the “Fields” under the “Web Forms” tab. You can also drag the inserted Fields position. The Fields that are added here will be displayed at the time of editing the Portal Users details from the Portal User Management -> Contacts.
You can edit the ‘Field label’ or ‘delete’ the fields as per your requirement. You can also see the preview of the contact’s layout by clicking on the Preview button.
By clicking on the ‘List Preview’, you will get a preview of the listing layout.


SMTP Settings
You must configure the “SMTP settings” to start the email service for the portal users.
You need to configure the following SMTP Settings:
– From Name: Insert the name you want to display in the email to the receiver.
– From Address: Insert the e-mail address you want to display in the email to the receiver. It will only work with the servers that support this functionality.
– SMTP Host: Insert the host address of your email SMTP.
– SMTP Port: Insert the port number that is used by outgoing mail servers.
– Username: Insert the username.
– Password: Insert the password.
After inserting the details click on the Save button to complete the SMTP settings.
Send Test Email: You can send the test mail to verify if all the details are correct or not.

Email Templates
You can set different email templates as per requirements for different email actions (Ex. Registration, Forgot Password, Verify Email, etc.). You can edit the existing email templates from the list. You can add a new ‘Email template’ by clicking on the + Create
By clicking on Create Email Template, you will navigate to the Email template creation page. You need to configure and insert the following details:
– Email Action: Select the events/actions for what you want to trigger an Email. i.e. For Portal Registration, Forgot Password, etc. You will get the drop-down of the list of the different actions.
– Status: Select the current status- ‘Active’ or ‘Deactivate’.
– Subject: Insert the relevant subject to identify the Email purpose.
– Body: Insert the Email description in the Body part. You can use the editing option to make email descriptions in proper format if required.
During inserting the Email description, you can use the parameters as per your Email action.
You will have the following Parameters for the Form data:
– [FULLNAME]: It will get the FULLNAME of the portal users.
– [EMAIL]: It will get the EMAIL of the portal users.
– [PORTALNAME]: It will get the PORTALNAME of the portal users.
Note: You can add more than one template for a single Object. If there are multiple templates for a single Object. Admin users will get in the list of the Email Templates selection from the Form widget configuration in the Page layout.
Once the “Email Template” is configured, click on the Save button to create an email template. A new Email Template will be listed. You can edit any template by clicking on the ‘Edit’ option.
You can also delete any template by selecting it and clicking on the ‘Delete’ button.


Theme Customization
You can customize Theme Colors, Font style & Font colors for the Admin Portal. You can also customize the below elements:
– Base Font Family: Choose a font to use for the main body text and for the menus.
– Title/Heading Font Family: Choose a font to use for all the headings and titles of the Portal.
– Theme Background Color: Choose a color to display as a background color to the body part.
– Foreground Color: Choose a color to display content background color.
– Primary Color: Choose a primary color to be displayed most frequently across all the modules. This color will appear for text/iconography.
– Success Color: Choose a color to display when the action performs and gets success. (Toast Notification)
– Danger/Fail Color:: Choose a color to display when the action performs, fails, or any error. (Toast Notification)
– Warning Color: Choose a color to display warning. (Toast Notification)
– Base Font Color: Choose a color for body text and description of Portal main content.
– Link Color: Choose a color for all text to which links have been added.
By clicking on the Save button, the theme & fonts of the Admin Portal will be updated.

Site Configuration
When the Admin users login to the Portal-Admin and authenticate the CRM, they will get the default published site.
You can create and configure multiple sites for the current portal instance, but one site can be published at a time. Being an admin user, you can create a new site for the customer portal and publish it. Later, you can edit the site as well.
By navigating to “Site Management”, you will get the list of the sites that are created. You will get the status of which site is currently active (published).
You can edit if required to change the settings or by clicking on the + Create button, you can create a new site by configuring the required details. When you create/edit any site you need to configure the site as per the following sections:
– Create/Edit Site: Site details.
– General Settings: Portal (site) Name & its logo/icon.
– reCAPTCHA Settings: Enable reCAPTCHA V2 or V3.
– Theme Customization: Fonts and color combinations.
– Customer OnBoarding Settings: Enable portal login with social media.
– Customer OnBoarding Settings User Validation: 2FA, Verify Email & User Approval details.
> Create/Edit Site
Insert the details of the site:
– Site Name: Insert the relevant name of the site that will appear in the list of the site.
After saving the details and configuration of the site, you will get the Home Page drop-down option.
– Home Page: Select the redirection page when the portal users load the initial page of the customer portal.
> General Settings
– Portal Name: Insert the Portal Name (title) that will be used for the admin interface and will reflect on the top-left corner.
– Portal Logo: Select the image to display as a logo. The selected image logo will appear there.
> reCAPTCHA Settings
The spam protection feature is provided so you can secure the customer portal pages, forms, and any widgets from the Spam. To protect the customer portal data (pages, forms & widgets), the Google reCAPTCHA feature is provided.
You can set your portal details under General Settings. You can set the general details as follow:
– Enable reCAPTCHA: Check the checkbox of the “Enable reCAPTCHA ”. You will find the two versions of the Google reCAPTCHA: V2 & V3. You can enable the required captcha version for your customer portal.
V2: You will be needing the reCAPTCHA Site Key. The “Site Key” is used to render the reCAPTCHA within a page. V2 validates the requests with the “I’m not a robot” checkbox.
When portal users access the customer portal, the captcha will be visible at the end of any Form with the “I am not a robot” checkbox as google provides. Portal users must be checked for the Form submission. After inserting & configuring all the details, click on the Save button to save the changes.
The V2 captcha can be applied to the following “Widgets”:
– Form widget – Login widget – Registration widget – Forgot Password widget
– In Subgrid Forms in the form builder
When portal users access the customer portal, the captcha (V2) will be visible at the end.
V3: You will be needing the reCAPTCHA Site Key & Secret Key. The Site Key is used to render the reCAPTCHA within a page and the Secret Key is used for performing server-side validation. V3 Verify the user’s response with a score.
When portal users access the customer portal, the captcha (V3) will be visible at the right corner of the screen that will send the token automatically based on the user actions.
The V3 captcha can be applied to the following “Widgets” and the “Page”:
– Page – Form widget -Login widget – Registration widget
– Forgot Password widget – List widget – Recent Activity widget
– Case Deflection widget – Chart widget – Counter widget
– Knowledge Base widget – Search widget – In Subgrid forms in the Form builder
> Theme Customization
You can customize Theme Colors, Font style & Font colors for the Customer Portal as well for the site. You can also customize the theme as per the Site and configure the below elements:
– Base Font Family: Choose a font to use for the main body text and for the menus.
– Title/Heading Font Family: Choose a font to use for all the headings and titles of the Portal.
– Theme Background Color: Choose a color to display as a background color to the body part.
– Foreground Color: Choose a color to display content background color.
– Primary Color: Choose a primary color to be displayed most frequently across all the modules. This color will appear for text/iconography.
– Success Color: Choose a color to display when the action performs and gets success. (Toast Notification)
– Danger/Fail Color:: Choose a color to display when the action performs, fails, or any error. (Toast Notification)
– Warning Color: Choose a color to display warning. (Toast Notification)
– Base Font Color: Choose a color for body text and description of Portal main content.
Link Color: Choose a color for all text to which links have been added
Theme File: You can customize your Portal’s UI & appearance by updating the Theme CSS file
By clicking on the Theme File button, you will get the ‘CSS Editor’ popup where you can insert the CSS and save the changes.
Reset: You can set back to the default theme and fonts by clicking on the Reset
By clicking on the Save button, the theme & fonts of the Customer Portal will be updated. If you have added the custom theme, you will get the Portals UI & appearance as per the CSS that is inserted in the CSS Editor.
> Customer Onboarding Settings
You can provide the customer portal login using the different credentials of the social media to the portal users.
You can allow the portal users or new portal users to be login or register through social media credentials:
Google ID (Gmail) > Facebook > Microsoft
You need to set up the social login credentials to allow the portal users to access the customer portal through any social media credential. You need to enable the checkbox for the respective platforms (social media) that you want to enable to the customer portal.
You will get a helpful tip to get the Client/App ID & Secret the link is provided by. By clicking on the help tip (Click Here) that will redirect you (or your other admin users) to the page that provides the instructions on how to get the ID & Secret key credentials.
Note: The portal users should have enabled the allow cookies from the browser settings for the portal site to avoid any type of contractions in the third party.
Additionally, you will get the Customer User Validation Settings for login validation.
You can enable the following settings:
– Two Factor Authentication (2FA): Enable this option if you want the two-side authentication when the portal users login to the portal. If it is enabled from here, once the portal users log in with their credentials, they will get the OTP in their registered email that needs to be verified here for successful login.
You can configure the OTP active duration under Two Factor Authentication.
Set OTP Timer: Set the timer that will display in the registered Email of the portal users with the -OTP. It will show the reverse countdown in minutes that is inserted in the Set OTP Timer.
No.of Wrong attempts: Select the number to provide the portal users’ number of attempts for entering the wrong OTP.
Disable Resend OTP: Set the periods to remain to disable the Resend OTP option for some time to the portal users.
Verify Email: If you have enabled the ‘verify Email’, the new users who registered from the Customer Portal, will get an Email verification link to their registered Email id to verify their portal account.
If the new user login with any social media platform(Google, Facebook, or Microsoft), they will be verified through Email after successfully authenticating any social media. They will get the Email verification link to their registered Email id to verify their portal account.
User Approval: If you have enabled ‘User Approval’, the admin must approve for the login to the portal users created from the portal. The users who have logged in with any social media platform must approve for the login once they successfully authenticate with any social media login.
> Site Publish
The new site will be listed under the “Site Configuration”. By clicking on the ellipsis icon (details), you can Publish the newly configured site.
Note: At a time, you can publish one site only so by publishing another site, the status of the current published site will change to Draft. You cannot delete the Published site. Once you publish the site all the changes will be reflected on the front side (Customer portal).


Site Filter and Global Filter
Once you or any Admin users logged in, you will get the published site. To change the portal site, the Global Filter selection option is provided to manage all the builders’ data and templates. The different sites can have different pages.
So, you can change the portal site from that site drop-down selection and according to that, you can make the changes in the builders.
Multiple sites management helps to display the different types of site data (Lists, Forms, Pages, Templates, and Menus) as per the site configuration.
As you change the Site, you will get the page builder data as you have configured for that site.

")
")
Site Level Data Sync
You will get the two different instances for the live and for the sandbox (testing purpose). You can manage both instances separately and the settings will be common for both as per Portal Settings. You can manage the live site and sandbox site separately from their domains, respectively.
You can Sync data from Live to Sandbox or Sandbox to live by navigating to the Settings → Portal Settings → Site Level data Sync. Here you will find the Sync Data section where you can select a module to sync data like pages, forms, lists, etc.
If you have made any changes by creating a new record or editing an existing record, you will get the option to sync the data.
When you select any module, you will get the records for that module that are changed/updated, you can select the required data to sync and all related data to those records.
If you have made any changes by creating a new record or editing an existing record, you will get the option to sync the data.
Select Data to Sync: Select any data (Module) from the drop-down selection to sync the recently added/updated data.
When you select the data (module), you will get all the records of the selected module in the Tabular format which will also get synced with the added data on live or sandbox instances.
Unsynchronized Data: You will get the records of the selected module in a tabular format that needs to be synced.
Synchronized Data: You need to simply drag and drop the data from the “Unsynchronized Data” table and add it to the “Synchronized Data” table.
Dependent Data: Once you drag and drop data to sync, you will get the dependent data for the same module that will be listed in the “Dependent Data” table.
You will see all the “Dependent Records” in full detail in the tabular format that will be synced.
When you click on the Sync button, all the selected data and dependent records will be synced to the other instance (Live or Sandbox).


Users
You can add and manage the Admin users from the Settings → User Management →Users.
Under the “Users”, check the admin users with their details like name, role, and the last login details on the User cards. By clicking on the Add User button, you can add the other admin users for the specific roles.
Note: If the super admin user has given the rights to the other admin users to add more users for the specific roles, only then other admin users will be able to add the new users.
You can add the users by assigning the relevant role and the email details. You can add the portrait photo or logo for those users to identify. The admin users will get the list of the roles if the roles are added and can manage them under the “Roles” settings.
Once a user is created, an email will be sent to that user to configure their password and access the portal as per their given rights.
 Users")

Roles (for Admin Users)
You can add and manage the Admin Roles from the Settings → User Management → Roles. Under “Roles”, you can check the added roles. Other Admin /sub-admin users can also add the user’s role as per the rights.
To create a new role for the admin users, click on Add Role button.
Insert the Role details and provide the user rights for the different roles from the Role matrix. From here, once you enable the Module’s view, you can assign the rights to Add/Edit/Delete as per requirement.
The admin users can access only those modules for which the rights are given here.
Note: if the super admin user has assigned the rights to add the roles, only the other admin user will get the right to add the user’s role.


Object Configuration
Once you successfully authenticate the CRM, you can enable the CRM Objects from the Object Configuration. You will get the list of the CRM Objects that are related to Contact and Account.
> Sync Object
If you have updated/modified the objects from the Salesforce CRM (Object Layout Management), you must sync the object configuration by clicking on the Click Here text caption.
CRM-Portal Objects
You can simply drag and drop from the CRM Objects column to Portal Objects to enable the Object for the Similarly, if you want to disable any Object, you need to drag and drop from Portal Objects to CRM Objects.
At the bottom, you will find the Save After selecting the required ‘Objects’, click on the Save button to enable the Objects for the Portal.


Roles (for Portal Users)
You can add and manage the Roles for the Portal Users from the Portal User Management → Roles.
By clicking on Create Role, you can add a role for the portal users. Insert the Role details and select the Relationship Type to select the relationship associated with the Role.
> Enable Objects
If you have selected objects for the portal objects from the “Object Configuration”, you will see in the role matrix to give the access rights for the portal role.
Enable the ‘objects’ that you want to enable for the portal users. By ticking the ‘View’ checkbox, you can enable the object. You can provide access to Add/Edit/Delete as per your need.
The Relationship selection is provided to select the relationship that is created in CRM between the contact/account and the Object.
> Enable Product
If you have selected objects for the portal objects from the “Object Configuration”, you will see those objects in the role matrix to give access to the portal role. You can enable the product for ‘Order’, ‘Opportunity’, and ‘Quote’ objects.
You need to just tick the check box to enable the product selection from the customer portal side. After configuring the “Role” details, save the details by clicking on the Save and the newly added portal user role will be listed under the Roles.
> Filter Roles
The newly created role will be listed. If there are multiple records of the roles, you can easily search the specific records by filtering the options. By clicking on the ‘filter’ icon, you will see the popup on the right side where you can filter the roles as per the Relationship Type, Is Default, and Status.
– Relationship Type: You can filter the listing of the Roles by selecting the Relationship Type either “Contact” or “Account”.
– Is Default: You can filter the listing of the Roles by selecting the Default selected Roles (Yes) or Non selected roles (No).
– Status: You can filter the Roles by selecting the Status of the Role either “Active” or “Inactive”.
After selecting the Filter options, you need to click on the Apply button to filter the Roles records. Here the listing of the Roles is filtered as per the Relationship Type ‘Account’.
> Edit & Delete Role
You can edit the existing role if you want to update/change any details or role matrix. By clicking on the ellipsis icon, you will find the ‘Edit’ option. By clicking on the “Edit” option, you will be redirected to the Edit Role page and update as per your requirement.
Note: You can’t delete the role which is set as default.
> Replace Role
From the list of the portal user roles, you can change a role to the users (contacts) that were already assigned and can replace it with another role you want to assign.
You can also delete the role if the role is not required anymore. You will find the delete option by clicking on the ellipsis icon of the role and by clicking on the “delete” option, the role will be deleted.
By clicking on the Replace Role option of the specific role that is not assigned as the default role, a pop-up will appear to select another role from the drop-down list.
Once you select another role, it will replace the current one and assign the new role to all the contacts (portal users).
Note: Here in the drop-down list, only those Roles will appear whose Relation Type is common.


Contacts
To check the portal users, navigate to the Portal User Management → Contacts. Here you will get the list of the Salesforce 365 contacts that you can add/manage from here and sync with Salesforce CRM.
Note: Here you will get the list layout only if you have created the user forms in the Portal User Settings.
Once the contacts are added, you can generate the portal credentials and approve the users for the CRM contacts in bulk. Convert these contacts to portal users just with a single click.
> Filter Contact Records
You can filter the specific records by clicking on the ‘Filter’ icon from the right side. By clicking on the ‘Filter’ icon, the sidebar will open from the right. You can filter the specific Contact records based on the following criteria:
– Search By Keyword: Search the contact records by inserting the Keyword.
– Roles: Search the Role wise contact records. You need to select the Roles from the dropdown list.
– Access: Select the record’s customer portal accessibility: “Enabled” or “Disabled” records.
After selecting the filter options, click on the Apply button to get the Contact records.


Create Contact
You can create a new contact by clicking on the Create Contact Inserting the contact details and saving them will create a new contact here as well as in CRM.
By clicking on the “Create Contact” button, you will be redirected to the Create Contact page where you need to insert the contact details and portal details.
You can select the “Customer Portal Role” for the new contact by clicking on the ‘search’ icon (magnifying glass icon). You will get the list of the existing roles.
After selecting the Role, you need to select the “Customer Portal Approval” to approve the new contact for the customer portal. Here, you will have two different scenarios as follow:
Case-1: By selecting the “Approved” option and clicking on the Save button, the new contact will be approved for the customer portal. But, credential generation will be still pending.
Case-2: When you select the “Approved” option and click on the Save & Generate Credentials button, the credentials for the customer portal will be generated and the portal users will get the email with the customer portal access link.
Once the contact details are inserted and you have saved them by selecting the Not Approved for the customer portal, you can approve for the customer portal and can generate the credentials from the contact’s listing page as well.
Note: Only those admin users can add the Contacts who have access to add Contacts.


Approve
If any new customers register from the Portal and the ‘User approval’ flow is enabled from the “Customer Onboarding Validation Setting”, the admin will approve the portal user. After that, the registered customer can access the Portal.
You can approve the portal users (Contact) who is already portal user, but the Approval Status is “Pending”. By selecting the contact(s) from the list, you need to click on the Approve from the ‘Bulk Action’ drop-down options.
After selecting the “Approve” from the Bulk Action drop-down options, you need to click on Apply button.
Note: Only those admin users can approve the users that they have the access to do so.

Enable
To generate the portal user credentials for a newly added contact, select the Enable from the “Bulk Action” drop-down.
You can also enable the contacts that are approved and generated but disabled for some reason. For that, you need to click on the Enable Portal User from the “Bulk Action” drop-down options.
You can select single contact or multiple contacts from the list to generate the credentials and/or to enable the disabled portal users. After selecting the contact record(s) and selecting the “Enable Portal User” from the drop-down options, you need to click on the Apply
Once you click on the Apply button, you will get the status report in the popup for the converted portal users. It will also enable portal access for disabled portal users. If any failure occurs, you will also get the failure details in the popup.
Note: Only those admin users can and generate the credentials that have the access.


Assign new role
From the Contacts, you can assign a new role to the portal users (Contacts). If you need to change the role for mass records, you just need to select those contacts for which you want to change the role.
Check the checkboxes of the contacts and select the Assign New Role option from the “Bulk Actions” drop-down option. After selecting the “Assign New Role”, you need to click on the Apply button.
By clicking on the “Apply” button, you will get the Assign New Role pop-up, from there you can select a new ‘Role’ from the drop-down list. After selecting the New Role, you need to click on the Change button and the new role will be assigned to the selected contacts.
After assigning roles to the single contact or bulk Contacts, the “Status” will be generated in the popup.
Note: Here only the portal user’s role will change once the new roles are assigned to the contacts (Portal users).


Disable
Similarly, you can disable the portal users as per need. For that, you need to select the single/multiple portal users (contacts) that you want to disable for a while and select the Disable from the Bulk Action drop-down options.
You will get the summary of the disabled portal users in the popup.


Send Password Link
You can send a link to the portal users in the email to set a new password. From the ”Bulk Actions” drop-down, you will see Send Password Link Select the “Send Password Link” and then click on the Apply button.
By clicking on the “Apply” button, you will get the Status of the sent password link. The password link will be sent to the selected contacts (portal users) and they can check in their email ID that is registered with the customer portal.
Note: You can send a password link to create a new password only for those Contacts (portal users) having user names and whose portal access is enabled.


Edit/Delete
You can edit any contact if any update in it and delete it if it is not required. This will be synced from the CRM side as well.

Design
You can design the portal layouts for the different Objects to display in the customer portal. You can design & configure the following layouts:
– Pages
– Templates
– Forms
– Lists
– Menus
The JS Code Editor is provided in the Page, Form, and List You will get the Code Editor option on all the builder pages. i.e., Add, Edit, Delete, Profile, Registration.

List Builder
You can design and configure the listing view for the different Objects. You can create, edit, review, and publish lists that will be used in page builders. You can design the dynamic layout of the list view using the Salesforce CRM fields.
By clicking on the “List Builder”, you will navigate to the listing page of the List. [1]
1. By selecting the listing record(s), you can duplicate or delete the record(s).
2. You can filter and search the specific list records by clicking on the ‘Filter’ icon. [2]
3. You can ‘preview’ the List view design by clicking on the ‘eye’ (preview) icon. [3]
You can filter the listing records by inserting the “Title”, “Status”, “Owner”, “Object”, and “Date”. After inserting the title and/or selecting details, click on the Apply button to filter the listing.
By clicking on the ‘preview’ (eye) icon, you can preview the designed list view record.


Publish/Draft List Records
If any listing page is already published, you will get the “Draft” option here. But if the list page is in the ‘Draft mode’, you will get the Publish option.
If you select multiple list records containing draft and published status, then all those lists will be converted to published status. If you have selected all the published list records, they will be converted to draft.
Note: You can move into the ‘Draft’ mode only if the list is not used in the Page Builder for a specific page.
By clicking on the ‘Edit’ option, you can edit the list page. You can drag & drop the ‘Fields’ from right to the body of the selected Object.
Note: If you are editing any List page, you cannot edit/change the Object and cannot use the ready list from CRM (Use Existing). You can edit the fields of the Object only.


Create a new List layout
You can create a listing page for any other object. By clicking on the + Create button, a popup will appear where you need to insert the ‘Title’ of the list page.
Click on the Next button to design the listing page layout. You will navigate the List layout design page.
From the right side, you can either Create a New List view or Use an existing ready list from CRM and it can be configured in the list builder. Select the Object for which you want to create a layout of the list view.


Selecting ‘Create New’ layout
After selecting the ‘Object’, you will get the list of the Fields that are enabled from the Salesforce CRM side. You can simply drag & drop the required fields from right to left to add the columns for the list.
The search box is also provided if you want to search the field by inserting the text caption.
By clicking on the ‘edit’ icon, you can edit the field details. You can enable the filter option to provide the filter listing records on the customer portal side to portal users.
By ticking the “Enable for Filter” checkbox, the portal users will get the searchable option for the CRM Fields.
After updating, the Field labels click on the Save button and finalize the list builder by clicking on the Publish button. You can keep it as a draft by clicking on the Save As Draft button.


Selecting ‘Use Existing’
You can also get the ready-made ‘List view’ layout that is configured from the CRM. By selecting the Use Existing option, you will get all the ready List layouts (CRM Object views).
Once you select any ‘List view’ from the View drop-down, you will get the fields of that specific list view that are configured from the Salesforce CRM.
You can add/remove the Fields as per your requirement. You can drag & drop the fields from the list on the right side and you can remove any Field by clicking on the ‘delete’ icon.
By clicking on the ‘edit’ icon, you can update and change the labels of any Field.
By editing any Field, you will see the “Data Type” of the fields. You can provide the filter options on the portal side in the list view by ticking the Enable for Filter option.


Using JS Code Editor
You can create or update the layout of the list view using JavaScript Code Editor if you have any custom JS code.
By clicking on the Code Editor, an editor will pop up where you can edit/paste your JS code. Once you edit/paste the JS code, click on the Save button and Publish the List builder record. You can Preview the List builder to check how it looks.


Form Builder
Navigate to the Design -> Form Builder to design & configure the Form layout for the add/edit and the detail page of different Objects. You can design the dynamic layout of any Object form using the Salesforce CRM fields. You can design the layout of the form page of the portal. By clicking on the “Form Builder”, you will navigate the Form Builder page list.
1. By selecting the listing record(s), you can duplicate or delete the record(s).
2. You can filter and search the specific form records by clicking on the ‘Filter’ icon.
3. You can ‘preview’ the Form view design by clicking on the ‘eye’ (preview) icon.
You can filter the form listing records by inserting the “Title”, “Status”, “Owner”, “Object”, and “Date”. After inserting the title and/or selecting details, click on the Apply button to filter the listing.
By clicking on the ‘preview’ (eye) icon, you can preview the designed list view record.
You will get the actions by clicking on the ‘ellipsis’ icon of the individual record. You will get some options to edit the Form record, Delete, Duplicate, and move to Draft (or move to Publish).


Publish/Draft Form Records
If any Form page is already published, you will get the “Draft” option here. But the list Form is in the ‘Draft mode’, you will get the Publish option.
If you select multiple form records containing draft and published status, then all those forms will be converted to published status.
If you have selected all the published form records, it will convert to the draft mode.
Note: You can move the form into the ‘Draft’ mode only if the list is not used in the Page Builder for a specific page.


Edit Form
By clicking on any form, you will navigate to its editing view. Under the “Form Grid”, you can edit the added Field’s label or delete it if not required.
Note: If you are editing the Form page, you cannot change the Object, Form Type, or cannot use the ready list from CRM (Use Existing). You can edit the fields of the Object and its Layout.
You can change the position of the inserted Fields under the Form Grid. You can move the fields to change the position in the From Grid and you can also move the inserted fields to another Form Grid.
When you move the field to change the position- in between, top, or bottom, the other fields will adjust accordingly. You can preview the ‘Form’ by clicking on the Preview button, you can check the Object layout.


Static Setting for Mandatory field
If you are editing a form that has already been assigned to the page and you removed or missed any Fields (i.e. Username, Password) from the Form, you will get the error message that will display the Form is used on another page (i.e. Registration page) and it will require to add the missing fields (i.e., Username, Password)
So if the same form needs to be used on different pages but has different Fields, this conflicting message will appear during the editing and designing of the Form.

Create a New Form
You can create a Form for any other Object. By clicking on the + Create button, a popup will appear where you need to insert the ‘Title’ of the Form. Click on the Next button to design the layout.
(+) Add Panel
You will get the (+) Add Panel option that can be used to separate the portal content (fields) into multiple sections to be displayed to the portal users in the customer portal. You can insert a relevant title to the panel to identify it. You will get the (+) Add Panel option at the bottom of the drag-drop area (Body).
By clicking on the (+) Add Panel a new panel will be added to the drag area (body) of the Form builder. You can edit the panel and update the “Panel Title”. After editing the panel title, click on the Save button.
You can drag and drop the layout to the body of the form builder. You can also use the sub-grid layout to display the form in the sub-grid view in the portal.
By clicking on the field Setting icon Sub Grid Configuration panel will open up.
Label: Insert the label for the sub grid section.
Select Relationship: Select the relationship (object) which you want to relate the object form with.
Select List: Select the list you want to display for that selected relationship type sub-grid.
Admins can manage sub grid access from the Access Settings, by checking/unchecking Creating, Editing, Deleting Records.
- Allow Creating Records:
Button Label: Insert the label you want to display for creating records on the portal.
Select Form: Select the form which will be displayed on the portal while creating records.
- Allow Editing Records:
Button Label: Insert the label you want to display for editing records on the portal.
Select Form: Select the form which will be displayed on the portal while editing the records.
- Allow Deleting Records:
Button Label: Insert the label you want to display for deleting records on the portal.
Submit Button Label: Insert the label for the submit button.
Enable Global Access: By enabling this feature you can allow portal users to access the global data, by unchecking it portal users can only access their records in the sub grid.
Note: If global access is enabled then the front side user will get a filter option to show My Records or All Records.
Enable reCAPTCHA: Enable the reCAPTCHA for the sub-grid in the portal.
Note: Sub grid option only available in edit and detail form type.
Under “Web Forms”, by selecting the ‘Object’, you can design the layout for the Add, Edit & Detail pages individually for a new page. You can simply drag & drop the required Fields into the ‘Form’ grid.
Here, there are two Copy options provided: “Copy to Edit” & “Copy to Detail”. You can copy the ‘Add’ form design for the ‘Edit’ form and ‘Detail’ form as well.
By selecting these options, you can copy the ‘Add’ form for the ‘Edit’ & ‘Details’ forms that will create the same design for the form layout and same Fields. If you are designing the ‘Edit’ form, you will get the ‘Copy to Add’ form.
When you are creating a new form and after inserting the Object Fields, you can easily change the position of those Fields just by dragging & dropping under the specific Form Grid.
You can also move any Fields to another ‘Form Grid’ easily by dragging & dropping that Field. Other Fields automatically adjust the position.


Notes & Attachment Access
If you are designing the ‘Detail’ form of any object, you can enable the notes with attachments for the detail form of any object in the customer portal. By clicking on the “Detail” form type, you will see the Notes and Attachment Access checkbox.
By ticking the Notes and Attachment Access checkbox, you are allowed the portal users to add any “Notes” for further communications with the “Attachment” of required files. After enabling the “Notes and Attachment Access”, publish the page to apply the changes to the form.

Using Existing Forms
You can also get the ready-made ‘Form’ layouts that are configured from the CRM. By selecting the Use Existing option, you will get all the ready Form layouts (CRM Object views) and you can edit the Fields as well.
Once you select any ‘Form view’ from the Existing Forms drop-down, you will get the fields of that specific form view that are configured from the Salesforce CRM. You can select Existing CRM Fields for Add, Edit, or Detail page as per the Form type.
You can add/remove the Fields as per your requirement. You can drag & drop the fields from the list on the right side and you can remove any Field by clicking on the ‘delete’ icon.
By editing any Field, you will get the Field related options to display to the portal users in the customer portal.


Using JS Code Editor
You can create or update the layout of the Form view using JavaScript Code Editor if you have any custom JS Code.
By clicking on the Code Editor, an editor will pop up where you can edit/paste your JS code. Once you edit/paste the JS code, click on the Save button and Publish the Form builder record. You can Preview the Form builder to check how it looks.


Field Configurations
You can also edit and configure any Fields that are added by drag & drop (Create New) or from the existing list of the CRM (Using Existing).
You can configure the following details for the Fields:
– Label: Insert the relevant text caption.
– Placeholder: Insert the caption into the input text field.
– Tooltip: Insert the short details as the mouse hover effect.
Once you have added the fields and designed the layouts, you can Publish the Form or keep it as a Draft.
If you have selected the Copy to Edit and Copy to Detail, the pages will automatically be created for the selected copy options.


Using JS Code Editor
You can create or update the layout of the Page view using JavaScript Code Editor if you have any custom JS code.
By clicking on the Code Editor, an editor will pop up where you can edit/paste your JS code. Once you edit/paste the JS code, click on the Save button and Publish the Page builder record.
You can ‘Preview’ the Page builder to check how it looks. Similarly, you can also edit/paste the JavaScript code to update the UI & appearance as per your desire or as per your Portal’s theme.

1. Banner Widget
A good customer portal banner should represent the business or organization accurately. Admin users can create the page banner as per their organization’s theme to display on the customer portal using the Banner
Now, drag and drop the ‘Banner’ widget to the page layout section and configure the details of the banner widget.
Now, by clicking on the ‘edit’ icon, you can configure the details of the banner widget. You need to configure the following settings as per the selection of “Template”:
– Select Template: There are three different templates provided:
1. Only Content 2. Content (left) & Image (right) 3. Image (left) & Content (right). You can choose the template to display on the customer portal. It will be displayed as the home page when the portal users access the customer portal.
By clicking on any template, the template is selected, and you will get the preview.
Only Content | Content (left) & Image (right) | Image (left) & Content (right)
> Banner’s Header:
– Text: Insert the text label to be displayed as header.
– Color: Choose the color for the header text. A custom color picker is given to choose the color.
> Banner’s Subheader:
– Text: Insert the text label to be displayed as a subheader.
– Color: Choose the color for the subheader text. A custom color picker is given to choose the color.
> Enable Button: By ticking the checkbox of the “Enable Button”, you can display the button on the banner for the CTA (Call To Action).
If you have enabled the button, you need to configure the following details for the button:
– Label: You can insert the text label for the button.
– Label Color: Choose the color for the button text. The custom color picker is given to choose the color.
– Background Color: Choose the background color for the button.
– Border Color: Choose the border color for the button.
– Border Radius: You can design the button appearance by setting the radius. You will get the slider to set the border’s radius (0-50) of the button.
> Redirect to: You need to set the redirection on the button’s click event. There are two options provided: Select Page or URL.
– Select Page: You can select the specific portal page to redirect the portal users when they click on the button.
– URL: You can insert the URL to navigate the portal users to that URL when they click on the button.
> Background of Banner: You can set the background of the banner that will be displayed on the customer portal. There are three options given: Color, Image, or Video.
> Color for Background: If you select the “Color” to set as a background, you will get two more options to set the background color of the banner. You can either select Solid or Gradient for the banner background.
– Solid: You need to choose the “Color” to display in the background of the banner. A custom color picker is provided to choose the color. (left image)
– Gradient: You need to choose “Primary Color” and “Secondary Color” to display in the background of the banner. A custom color picker is provided to choose the color for both. (right image)
– Degree: You can set the degree (0 to 360) of the gradient color for the banner’s background.
> Image for Background: If you select the “Image” to set as a background, you need to upload the image.
> Video for Background: If you select the “Video” to set as a background, you will get two more options to set the background of the banner. You can either Upload a File or insert an External Link.
– Upload (local video): You can select and upload the local video file from your system to set the banner’s background. (left image)
Note: You can upload the local video maximum of 2MB size. The video’s size must not be more than 2 MB. The supported video files are MP4, M4V, MPG, WMV, MOV.
– External Link: You need to insert the video’s URL in the “Video URL” box to set the banner’s background.
Banner Height (px): Insert the height of the banner that will be displayed on the customer portal.
After configuring the “Banner” widget, click on the Save button to save the configuration and publish the page to apply the changes.


2. Button
You can configure the Button widget to perform such actions:
– Label: Insert the text label for the button.
– Tooltip: Insert the text label that helps portal users to understand the button action.
– URL Type: Select the URL for the button actions. There are 2 types of URLs given: Internal & External.
– Internal Type: You can select the page that is created in the Page builder of the portal.
– External Type: You need to insert any specific URL manually to navigate the portal users to any external URL.
– Open in a new tab: Check the checkbox to open the redirection page in the new tab. If this option is unchecked, it will open on the same page.
Select Alignment: You can select the position of the button: Left, Center & Right.
Preview: You can preview the configured button widget on the page.


3. Charts
If you want to display the analytics in Charts by selecting the Object & its specific field, you need to configure the following details:
– Title: Insert the relevant Chart Title. i.e., Total Cases, In Progress Cases.
– Select Object: Select the Object from the list. i.e., Account, Case, Attachment, Contract, Call, Order.
– Select Field: As per the Object selection, the Fields will be fetched.
– Option: As per the ‘Field’ selection, the Field values will be fetched, and select that field value for which you want to display the count. i.e., In Progress, Cancelled.
Design Layouts: By scrolling down, you will get the 4-predefined Design Layouts to select the appearance of the chart in the customer portal. By clicking on the design, you will get a preview of the design.
Enable reCAPTCHA: If you have enabled the reCAPTCHA, you will get the “Enable reCAPTCHA” option in the widget. By enabling the reCAPTCHA, the page will be protected from spam when the portal users navigate to the page.
Note: If the V3 reCAPTCHA is configured, only then you will get the Enable reCAPTCHA option in the Chart widget configuration. If you have enabled it, the V3 reCAPTCHA will appear in the customer portal.


4. Counter
To display the record counter of a specific Object, you need to insert the following details:
– Title: Insert the relevant Counter Title. i.e., Total Cases, In Progress Cases.
– Select Object: Select the module from the list. i.e., Account, Case, Attachment, Contract, Call, Order.
– Select Field: As per the Object selection, the Fields will be fetched.
– Option: As per the ‘Field’ selection, the Field values will be fetched, and select that field value for which you want to display the count. i.e., In Progress, Cancelled.
– Icon Class: By clicking on the Pick an Icon button, you will get the icon picker list. Pick a relevant icon.
– Design Layout: You will get the 3- predefined Design Layouts (Style). Select any design layout to display in the customer portal.
By clicking on the design, you will get a preview of it.


5. Data Card
Display any object records in grid view in the Data Card. It will display the object records details in the Data Card instead of the list view to the portal users in the customer portal.
Drag and drop the ‘Data Card’ widget to the page builder section and configure the following details:
Widget Settings
Data Card Title: Insert a relevant title to display in the customer portal.
Select Card View: Select the object from the dropdown list to display in the customer portal.
Header Text: Select the object’s CRM Field from the dropdown list to display as header text on the record’s card in the customer portal.
Sub Header Text: Select the object’s CRM Field from the dropdown list to display as Sub header text on the record’s card in the customer portal.
Supporting Text: Select the object’s CRM Field from the dropdown list to display the supporting text on the record’s card in the customer portal.
Tags: Select the object’s CRM Field from the dropdown list to display as Tag of the record’s card in the customer portal. e., Tags could be Priority, Status, Reason fields of the object.
Create Action Settings
Create Button Text: Insert a text to display for the button label for the create page.
Redirect To: Select the page to navigate to create a new object record.
Edit Action Settings
Redirect To: Select the page to navigate to edit an existing data card record.
Detail Action Settings
Redirect To: Select the page to navigate to the details of the selected data card record.
Records per page: Insert the number of object records (data cards) you want to display per page. You can decide how many data cards to be displayed at a time.
After configuring the Data Card widget, you need to Publish the page to apply the changes to the selected page. As you have configured the Widget Settings, the portal users will get the object records as Data Cards in grid view from the customer portal.
Static Widgets in Card Design
You can also display the widgets – Image, Text, and Video as Data Card design in the customer portal.
Once you drag and drop to the page layout while creating a specific page, it will automatically set as card style.


6. Forgot Password
It provides the functionality to reset passwords for registered users. You will find the following options for Forgot Password widget:
– Title: Insert the label of the forgotten password title.
– Description: Insert an instructive message for the Forgot Password field.
– Forgot Password Button text: Insert the label of the button.
– Enable reCAPTCHA: Enable the reCAPTCHA option to protect from spam. The portal users will get the reCAPTCHA V2 or V3 as you have configured in the “Portal General Settings” from the Settings → Portal Settings.

7. Form
Using the ‘From’ widget, you can select the created Forms under the Form builder to display the add/edit or detail page for a specific Object.
Form Configuration:
– Form Title: From the drop-down select the Form that you need to display.
– Select Form: Select the ‘Form’ from the searchable drop-down list to navigate the portal users to that page. Here you can select the 3-Types of the Form pages: Add, Edit & Detail.
– Edit Button Text: Insert text caption for the Edit button. i.e., Update Record, Edit Details
– Delete Button Text: Insert text caption for the Delete button. i.e., Remove Record
> ‘Add ’ Form type
– On Success: Select the URL for redirecting to the page after successful form submission.
– Submit Button Text: Insert the ‘Text captions’ for the Submit button (after inserting the details to be clicked).
– Design Layout: You will get the 3- predefined Design Layouts (Style) for the ‘From’. Select any design layout to display in the customer portal. You can preview the layout by clicking on it.
– Enable reCAPTCHA: If you have enabled the reCAPTCHA, you will get the “Enable reCAPTCHA” option in the Form widget.
By enabling the reCAPTCHA, the Form page will be protected from spam when submitted by the portal users. The portal users will get the reCAPTCHA V2 or V3 as you have configured in the “Portal General Settings” from the Settings → Portal Settings.
You can enable the reCAPTCHA for any other forms that will be accessible to the customer portal. You can manage the Edit/Detail page by configuring the Redirection and Text Label settings. Navigate to the Edit/Detail page and edit the form.
You can manage the Edit/Detail page by configuring the Redirection and Text Label settings. Navigate to the Edit/Detail page and edit the form.
> ‘Edit ’ Form type (Edit Form Configuration)
– Form Title: Insert the text label for the title of the form.
– Select Form View: Select the Page URL from the searchable drop-down to redirect the portal users to the editing page.
Success Settings
– On Success: Select the Page URL from the searchable drop-down to redirect the portal users once the form is edited successfully.
– Delete Button Text: Insert the text label for the Delete button.
– Redirect To: Select the Page URL from the searchable drop-down to redirect the portal users after deleting the record from the edit page.
> Exit Settings
– Cancel: Insert the text label for the Cancel button.
Design Layout: You will get the 3- predefined Design Layouts (Style) for the ‘From’. Select any design layout to display in the customer portal. You can preview the layout by clicking on it.
After configuring the Edit page details, click on the Save button and publish the page to apply the changes to the customer portal.
> ‘Detail ’ Form type
Edit Detail Form Configuration
– Form Title: Insert the text label for the title of the form.
– Select Form View: Select the Page URL from the searchable drop-down to redirect the portal users to the detail page.
– Edit Button Text: Insert the text label for the edit action from the detail page.
– Redirect to: Select the Page URL from the searchable drop-down to redirect the portal users to the form editing page.
– Delete Button Text: Insert the text label for the Delete button.
– Redirect To: Select the Page URL from the searchable drop-down to redirect the portal users after deleting the form from the edit page.
– Design Layout: You will get the 3- predefined Design Layouts (Style) for the ‘From’. Select any design layout to display in the customer portal. You can preview the layout by clicking on it.
After configuring the Edit page details, click on the Save button and publish the page to apply the changes to the customer portal.


Send Email to Form Respondent
Send Email to Form Respondent for Form Widget
Admin users will get the Email Respondent option from the Form widget Configuration. There will be an option as “Send Email to Form Respondent”, by enabling this option you will get the following option to select:
– Select Page: Select a page from the drop-down list to redirect to that page.
You need to select record links from the “Select Page“ that will convert into the page link which is sent in an email, and it will redirect the form submitter to the selected page.
– Select Email Template: Select an Email Template from the drop-down to send an Email with that template details.
The Email template is according to the selected form’s Object, in the case of the parent-child relationship form the templates will be according to both the Objects.
Note: If the page is “Add” type (to create a new record), only then an “Email respondent setting” will be shown in the From widget configuration.
If the page is also selected for the Before Login, the Email field must be in the form details that will be used to send the Email.
For the After login, the portal users will get the Form respondent mail with the form details in the Email that is used for the logged in.

8. Image Widget
Drag-drop any image to display on the customer portal or you can browse the image from the Image Configuration. Under Image Configuration:
– Height: Insert the height as per your requirement.
– Width: Insert the width as per your requirement.
– Choose File: Select an image from the local drive.
– Alt-Text: Insert the ‘Alt text’ that will appear in place of an image on a webpage if the image fails to load on a user’s screen.

9. List widget
You can configure a list widget to display the object data in the list:
List Title: Insert the relevant ‘Title’ caption for the selected Object list.
Select List View: Select the Object for the List view from the searchable drop-down list. If there are many list records, you can easily search the record and select it.
By clicking on the + add icon beside the Page URL (Create, Edit & Detail), you will navigate to the Page Builder to create a new page. You can directly add a new page by hereby clicking on the Refresh icon, it will refresh the list of the pages and get the latest pages.
Here, you will get the three different sections: “Create Action Settings”, “Edit Action Settings” & “Detail Action Settings.”
> Create Action Settings
– Create Button Text: Insert the text caption for the create button.
– Redirect To: Select the Page URL from the searchable drop-down to redirect to the Create Page
> Edit Action Settings
– Redirect To: Select the Page URL from the searchable drop-down to redirect to the Edit Page.
> Detail Action Settings
– Redirect To: Select the Page URL from the searchable drop-down to redirect to the Detail page.
> Records per page: Set the no. of the records to be displayed on the page.
Enable reCAPTCHA: If you have enabled the reCAPTCHA, you will get the “Enable reCAPTCHA” option in the List widget.
By enabling the reCAPTCHA, the List page will be protected from spam when the portal users navigate to the list page. If you have enabled & configured reCAPTCHA V3 in the “Portal General Settings” from the Settings → Portal Settings, the list view will be protected with the reCAPTCHA V3.
You can enable the reCAPTCHA for any other Lists that will be accessible to the customer portal.
Design Layout: By scrolling down, you will get the 3- predefined Design Layout (Style) for the List view. By clicking on any design, you will get a preview of it. Select any design layout to display in the customer portal.


10. Login
‘Login widget’ is used to access the portal. Insert and select the following details:
– Title: Insert the title label for the log-in.
– Email or Username: Insert the label by inserting what credential the user can log in with.
– Login button text: Insert the button label for login.
You can enable and configure the “Additional Configurations” for the Login:
– Remember Me: It will be visible on the Login page. The portal users can enable to save their credentials.
– Forgot Password: If you have selected to display on the login page, you need to select the Forgot Password “Redirection URL”.
– Select Forgot Password Redirection Page: Select the URL from the searchable drop-down to navigate the portal users to the Forgot password page. Here you will get the searchable drop-down list. You can search & select the relevant page.
– Allow Registration: If you have selected this option to display on the login page, you need to select the “Redirection URL” for the Registration. Select the registration page in the URL.
– Select Registration Redirection Page: Select the URL from the searchable drop-down to navigate the portal users to the Registration page.
– Login Redirection Page: Select the URL from the searchable drop-down to navigate the portal users to the next page once their login credentials are corrected.
Enable reCAPTCHA: Enable the reCAPTCHA option to the login page to protect from spam. The portal users will get the reCAPTCHA V2 or V3 as you have configured in the “Portal General Settings” from the Settings → Portal Settings


11. Profile
This widget is used to see the user profile details from the user portal. Insert the label names of the profile:
– Profile Form: Select the Form page for the Profile.
– Edit Profile Label: Insert the label for the edit profile.
– Change Password Label: Insert the text label for the change password.
– Edit Profile: Button Label: Insert the button label for updating the profile.
– Change Password: Button Label: Insert the button label for Change Password.
Design Layout: You will get the 3-predefined Design Layout (Style) for the Profile page. Select any design layout to display in the customer portal.


12. Recent Activity
By selecting the ‘Recent Activity’ widget, you will find the following options:
Title: Insert the relevant Title. i.e., RecentCases, Recent Orders.
Select Object: Select the object from the list. i.e., Account, Case, Attachment, Order, etc.
Select Redirection URL: Select the page to navigate to the specific page when the portal users click on the Redirection URL or View more.
Select Detail Page: Select the page where you want to navigate to the specific page when the portal users click on the specific record.
HTML Class & HTML ID: You can customize the page sections and widgets by adding a custom HTML ID and Class.
Design Layout: You will get the 3- predefined Design Layout (Style). Select any design layout to display in the customer portal.
By clicking on the design, you will get a preview of it.


13. Registration Widget
Create a ‘Registration Form’ for the new customers. You need to configure the following details:
– Registration Form: Select the ‘form’ for the registration from the list of forms.
– Title: Insert the label to display the title of the Registration form.
– Description: Insert the message for registration.
– Register Button Text: Insert the button label for submission of the registration form.
– Verify Email: If you have enabled it from the widget, the new users who are created from the portal needs to be verified through the mail once they registered.
– User Approval: If you have enabled User Approval from the widget, the admin has to approve the users created from the portal.
– Design Layout: You will get the 3- predefined Design Layout (Style) for the Registration page. By clicking on any design, you can preview the layout. Select any design layout to display in the customer portal.
– Enable reCAPTCHA: Enable the reCAPTCHA option to the customer portal Registration page to protect from spam. The portal users will get the reCAPTCHA V2 or V3 as you have configured in the “Portal General Settings” from the Settings → Portal Settings.


14. Slider Widget
You can add the Slider widget to display the details in the slides to the customers in the customer portal. Drag and drop the Slider widget and click on the ‘edit’ icon to configure the settings.
(+) Add Slide
First, you need to add the slides by clicking on the (+) Add Slide. You need to configure the following options for the slider.
You need to configure the following settings as per the selection of “Template”:
o Select Template: There are three different templates provided:
- Only Content 2. Content (left) & Image (right) 3. Image (left) & Content (right). You can choose the template to display on the customer portal. It will be displayed on the page when the portal users access the customer portal.
o By clicking on any template, the template is selected, and you will get the preview.
- Only Content
- Content (left) & Image (right)
- mage (left) & Content (right)
Slider’s Header:
o Text: Insert the text label to be displayed as the header of the slider.
o Color: Choose the color for the header text. A custom color picker is given to choose the color.
Slider’s Sub header:
Upload Image: You will get this option if you have chosen the template that contains the “Image” (Template-2 & 3). Choose the image file to be displayed on the slider that will display on the customer portal. The image size should not be more than 1MB and allowed file types are JPG, JPEG, GIF, BMP, PNG, SVG.
o Alt-Text: You can insert the “alternative text” for an image.
Note:
o You will get the “Upload Image” option if you have chosen a slider with an image.
o If you have uploaded the image and inserted the details for the “Alt Text” attribute, it will be placed as the Alt and Title attribute. But, if you have not uploaded the image, then the file name will be added to only the Alt attribute. This is only for the images inside the slider.
Redirect to: You need to set the redirection on the button’s click event. There are two options provided: Select Page or URL.
– Select Page: You can select the specific portal page to redirect the portal users when they click on the button.
– URL: You can insert the URL to navigate the portal users to that URL when they click on the button.
Background of slider: You can set the background of the slider that will be displayed on the customer portal. There are three options given: Color, Image, or Video.
Color for Background: If you select the “Color” to set as a background, you will get two more options to set the background color of the slider. You can either select Solid or Gradient for the slider background.
Solid: You need to choose the “Color” to display in the background of the slider. A custom color picker is provided to choose the color. (left image)
Gradient: You need to choose “Primary Color” and “Secondary Color” to display in the background of the slider. A custom color picker is provided to choose the color for both.
– Degree: You can set the degree (0 to 360) of the gradient color for the slider’s background.
Image for Background: If you select the “Image” to set as a background, you need to upload the image.
Video for Background: If you select the “Video” to set as a background, you will get two more options to set the background of the slider. You can either Upload a File or insert an External Link.
Upload (local video): You can select and upload the local video file from your system to set the slider’s background.
Note: You can upload the local video maximum of 2MB size. The video’s size must not be more than 2 MB. The supported video files are MP4, M4V, MPG, WMV, MOV.
o External Link: You need to insert the video’s URL in the “Video URL” box to set the slider’s background.
- Now, by clicking on the Save button, the slide will be added. Similarly, you can add more slides that you want to display in the customer portal.
- You can see the newly added slides under the Slides You will see three options for the added slider: Settings, Clone, and Delete.
-
- Settings: You can edit the slide to update/change any configuration and the details.
- Clone: You can duplicate the slide with the same configuration and details.
- Delete: You can delete the unwanted slide from the slider. By clicking on it, you will get the warning message and after confirming the message, the slide will be deleted.
Slider Settings
- You need to configure the common settings for the sliders (slider content) to display in the customer portal.
- Enable Auto Slide: This option will help to play the added slides automatically as per the timer. By ticking the checkbox, you need to set the timer to play the slides.
-
- Transition: Apply the slider effects. You will have two effects: Slide or Fade.
Navigation
- You can display the navigation settings of the slider.
-
- Enable Arrow: Check the box if you want to display the arrow on the slide.
-
- Enable Pagination: Check the box to enable the pagination in the slides. You will have three designs (pagination type) to display the pagination below the slider.
Slider Height (px): Insert the height of the slider that will be displayed on the customer portal.
Note: If you have not set any height or set it to 0, the slider height will be set to auto.
- By scrolling down, you will find the Save button to save the slider settings and publish the page to apply the changes.


15. Testimonials Slider Widget
You can add the Testimonial Slider widget to display the customers’ testimonials by customizing the content. Drag & drop the widget and click on the ‘edit’ icon to configure the testimonials slider.
(+) Add Testimonial
First, you need to add the testimonial slides by clicking on the (+) Add Testimonial. You need to configure the following options for the testimonial slider:
Author Name:
– Text: Insert the Author’s name.
– Color: Choose the text color for the author’s name.
Author’s Designation:
– Text: Insert the Author’s designation/position.
– Color: Choose the text color for the author’s designation.
Description:
– Text: Insert the message.
– Color: Choose the text color for the description.
Profile Picture: Upload an image that indicates the author’s profile picture.
Alt-Text: You can insert the “alternative text” for an image.
Note:
If you have uploaded the image and inserted the details for the “Alt Text” attribute, it will be placed as the Alt and Title attribute. But, if you have not uploaded the image, then the file name will be added to only the Alt attribute.
The maximum image size must be 1 MB. Allowed file types are JPG, JPEG, GIF, BMP, PNG, or SVG.
Rating: You can select the ratings with 5-stars. You need to click on the star(s) to apply the default rating. You are allowed to select a half-star rating as well. To clear the rating, you will find the ‘clear’ icon beside the stars.
After configuring the “Testimonial Slider Configuration”, click on the Save button to save the configuration. Publish the page to apply the changes.
Now, by clicking on the Save button, the testimonial slider will be added. Similarly, you can add more testimonial slides that you want to display in the customer portal.
You can see the newly added testimonial slides under the Testimonials You will see three options for the added testimonial slides: Settings, Clone, and Delete.
Settings: You can edit the slide to update/change any configuration and the details.
Clone: You can duplicate the slide with the same configuration and details.
Delete: You can delete the unwanted slide from the slider. By clicking on it, you will get the warning message and after confirming the message, the slide will be deleted.
Testimonial Slider Settings
You need to configure the common settings for the testimonial slider to display in the customer portal.
Slider Title: Insert the title of the testimonial slider to be displayed on the frontend.
Enable Auto Slide: This option will help to play the added slides automatically as per the timer. By ticking the checkbox, you need to set the timer to play the slides.
Navigation
you need to display the navigation settings of the slider.
Enable Arrow: Check the box if you want to display the arrow on the slide.
Enable Pagination: Check the box to enable the pagination in the slides. You will have three designs (pagination type) to display the pagination below the slider.
Rating Color: Select the color of rating to be displayed on the portal.
Slider Height (PX): Insert the height of the slider that will be displayed on the customer portal.
Note: If you have not set any height or set it to 0, the slider height will be set to auto.
By scrolling down, you will find the Save button to save the slider settings and publish the page to apply the changes.


16. Video Widget
Video widget is used to display the upcoming product launch, any offers, or any tutorials on any page in the customer portal.
Drag & drop the ‘Video’ widget to the page layout and configure the following details:
Title: Insert the relevant video title name.
Select Video Types:
– YouTube URL: Paste/insert the ‘URL’ of the YouTube video. If you have selected the YouTube URL, you will get the “Auto-play” video option.
– Auto-play: Enable the Autoplay option for auto-playing the video when portal users navigate there.
– Embedded Code: You can insert your embedded code that should contain an iframe. You can add the 3rd party embedded code for the video that must be in proper format.
After configuring the video widget Save and Publish to display the video on the portal.


17. Menu Configuration
You can configure the Menu widget to provide navigation to the customers to another page (menu):
Select Menu: Select the ‘Menu’ that are added in the “Designer -> Menu Builder” option. Here you will get the searchable drop-down option to search & select the Menu.
Enable Logo: Enable logo to display the portal logo in the menu of the customer portal.
Enable Profile Navigation: Enable the profile navigation to display the profile navigation in the menu.
Menu Location: You can set the Menu Location (Menu view) either Vertical or Horizontal.
Note: You will get the vertical option enabled only when the page layout ration is less than 50%. (i.e., 25% + 75%)


18. Text Widget
Add the Text widget for any page layout content. Design the text with different settings.

HTML Class & ID for widgets
Customize the widgets by adding a custom HTML ID and Class.
HTML Class: Add the multiple classes with a comma (,) separated values. The class can be applied to multiple elements so it could be multiple times on a single page.
HTML ID: Add the ID for the section. The id will be prefixed with “custom-” text. ID is unique on a page and can only apply to at most one element.
Note:
For the widget, the classes and id are not directly applied to the widget. It will apply to the div.
Add classes and id without space and if required add valid special characters i.e. [ -, _ ].
Admin users can apply the custom class & ID in the JavaScript code to customize the widgets.


Templates (Template Builder)
Navigate to the Templates (Design → Templates) to design and create a generic template for the different pages.
If the design and layout of the different Object pages are the same, you can create a template for the reusability of your layout design and widget.
You can design the layout and add the required widget that will be common for the pages. So, you will not require to design the same page layout for the different Objects. The created templates can be used at the time of the creation of the pages.
By clicking on the “Templates”, you will get the list of the templates to create, edit and detail pages. You can see for which page the template is used at the time of creating a Page (Page builder).
1. Duplicate and delete the templates by multiple selecting the template records.
2. You can filter the template records.
3. By clicking on the ‘ellipsis’ icon of the specific template, you can Edit, Delete, and Duplicate the template.
> Create Template
By clicking on the + Create button, you can create a new template by designing a layout and adding a widget.
Insert a relevant Title to identify the template during page creation and by clicking on the Next button, you will navigate to the page layout to design the template.
Here you can drag and drop the design layout under the ‘Layout’ tab and insert the required widgets from the ‘Widgets’ tab.
After designing the template, click on the Save button to create and save the template. Admin users can also edit the existing template as per requirement or design change.
When Admin users create the Page, on the “Create Page” popup, they can create a new page either by selecting the Page Layout or selecting the relevant Template from the drop-down list. They will get the Select Template dropdown of the created template.
By selecting the required template, you will navigate to the page layout with the designed layout. After designing the layout, you can save it as a template by clicking on the Save As Template button.


Menu Builder
You can create and customize the Customer Portal Menu to display when the user’s login into the customer portal. You can change the following settings for the Menu.
To create a menu, navigate to the Design -> Menus.
By clicking on the Menu Builder, you will navigate to the Menus page where you can see the existing created menus list.
From the list of the ‘Menu Builder’, you can perform actions like Filter the specific Page, duplicate, or delete, preview, and edit the Menu. You can also Replace the Menu by selecting the specific pages from the list of all the pages.


Create Menu
Now, by clicking on the + Create button, you can create a Menu. By clicking on the Next button, you will navigate to the “Create Menu” page. You need to select the pages for menu items.
Here you will get 3-tabs under the Pages where you can find the Pages:
– Most Recent: You will get the most recently created pages list.
– View All: You will get all the pages list.
– Search: You can search the specific page by inserting the page name.
You can also add the Custom Link as a Menu Item.
– Menu Title: Insert the Menu Text caption that you want to display.
– URL: Insert the ‘URL’ where you want to navigate the users.
By clicking on the “Add to Menu” button, the custom link menu item will be added on the left side.
You can simply drag & drop the Menu Items and set them as a sub-menu item under any main menu item. You will have 3 level menu navigation.
You can also edit the Menu Items by clicking on the down arrow.
– Menu Item Label: Insert the Menu label caption.
– URL: You will get the URL of the menu item. If you have added the custom link, a custom URL will be shown.
– Is Active: Enable/Disable the Menu item for the customer portal.
Select Role: You can enable the Menus for the Roles. Not all users can be accessible for all the menus.
Check the checkbox of the role to enable the menu. Here, the searchable drop-down is given to search for a specific role.
Note: The portal users will get the Menu access as per the role selection here once they log in to the portal (after login). So, the portal users will log in to the portal, they will get their accessible menu as per the role selection under the Menu detail.


Replace Menu
When you have used menus in lots of pages and it is required to change the menu for some pages, the Menu Replacement feature is provided. You can choose the menu that you want to replace. By clicking on the ‘options’ icon of the menu, you will get an option of Replace Menu.
By clicking on the ‘Replace Menu’, you will get the Menu Replacement popup from where you can select the menu that you want to Replace with it. So, you will not be required to navigate to the individual pages and update the menu.
You will get all the pages in which the selected menu is used. Select the required pages that you want to replace the menu for. By clicking on the “Replace” button, the pages will be replaced by the selected menu.


Customer Portal with Banners
You can show the banner to the portal users by choosing the specific template on the customer portal main page (home page). When the portal users access the customer portal, they can see the customer portal banner as configured using the “Banner” widget from the portal admin side.
> Banner with Content only
You can choose the template that you want to show as the portal’s home page to the portal users. If you have chosen the content-specific template only, you just need to set the Banner’s Header Text and Sub Header Text only.
> Banner with Image
You can choose the template with the image as well.
In the screenshot, the content is on the left and the image is on the right side as per the selected template. You can also choose the template in that the image will be on the left side and the content will be on the right side.
> Button for CTA
If you have enabled the button from the portal admin side in the “Banner” widget, the portal users will get the button and navigate to the button events as configured. (Specific page of the portal or external URL)
> Banner with the specific background
You can set the banner’s background by setting the background color (solid/gradient), Image (uploading an image), or Video (uploading a video/external video URL) as per your requirement of the portal.
> Banner with Gradient color background:
The banner is set as a gradient color background choosing the Primary, Secondary Color and setting the gradient degree.
> Banner with Background Image:
The banner is set as the background image. You can also configure the text color for the content that is displayed on the banner. (Header & Sub Header Text).
In this way, you can also show the banner with the background video.


Portal Login & Registration
The portal users who are authenticated from the admin side can directly log in to the portal using the credentials.
Here the portal users will get the login page widget as configured from the Design -> Page Builder admin side.
If reCAPTCHA is enabled, the portal user will get the reCAPTCHA option at the time of login.
Note: You can allow the portal users to access some of the menu/pages before login. On the login page, you will get the option from the header menu, as you have configured it as before the login page in the Page Builder.

Two Factor Verification
If you have enabled the two-step verification from the ‘Login’ widget, the portal users will get the OTP in their registered Email ID that needs to be added here for successful login.
Here, the portal users will get the options to disable the two-factor authentication for their browser & Resend OTP to get the OTP in the registered Email id once again.
By clicking on the Verify button, the portal users will log in to the portal.

Forgot Password
Portal users can retrieve their login password using the ‘Forgot Password’
The portal users need to enter the email address and by clicking on the Send Reset Password link, they will receive a link in the registered mail to reset the password.

Signup (Registration)
Any new customer can sign-up for the Portal by clicking on the ‘Sign Up’ link on the Login Page. Clicking on this link will redirect customers to the registration page.
The new customers will get the “Registration page” as designed and configured in the Forms Builder and its Page Builder from the admin side.
Note: If you have enabled the options of “Verify Email” & “User Approval” from the Page Builder, the new customers must verify their email and will require the user approval at the time of login.

Login with social media platforms
Login through the social media platforms
The portal users can log in with any of three social media platforms if you have enabled the Customer Onboarding Setting from the Settings → Portal Settings and configured their keys individually. The portal users will get the social media buttons that are enabled.
By clicking on any social media button the portal users will be authenticated by the social media login if the portal user is not registered, they will be required to register first. So, the portal users can log in with user validation if you have enabled it from the Customer Onboarding User Validation settings.
Note: If any of the social logins do not have the Email field then the additional Email field section appears and the portal user needs to enter the Email.

reCAPTCHA
The portal users will get the reCAPTCHA V2 or V3 as you have configured in the reCAPTCHA settings from “Portal General Settings”.
If you have enabled and configured the reCAPTCHA V2, the portal users will get the “I am not a robot” checkbox on the Login page as Google provides. The portal users need to be checked for the form submission.
If you have enabled and configured the reCAPTCHA V3, the portal users can see a captcha at the right corner of the screen. It will send the token automatically based on the portal user’s actions.


Public Access
Without Login (before login)
You can display any page (i.e., About Us,) to the portal users even before the login is public.
For that, you need to select the options “Public” and the “At Top” in Page Nesting at the time of creating the Page Builder of any Object/page.
If you have enabled any page by selecting the Form that needs to appear without Login (Before Login page), it will appear before the log-in page. So the users who are not registered yet can also connect with the organization by sharing details as per the Form.
")
")
CRMJetty Portal Customer Portal Dashboard
Once the portal user logs into the portal, they will be redirected to that page which is set in the ‘Login Redirection URL’ of the Login Widget of Login page builder.
The details on the dashboard will appear as per the configuration and the Dashboard design layout in the “Page Builder” from the admin portal side. The counter will appear as per the “Counter” widget configuration.
The portal users can see the recent activity details in the tabular format and the details in the column will be displayed as sequences are managed from the “Recent Activity” widget.
If you have selected the redirection page (View All), the portal users will be redirected to the selected page in the “Recent Activity” widget configuration.
By clicking on the specific record, the portal users will be redirected to the detail page as per the selection of the detail page from the widget configuration (Portal Backend).
Portal users will get the analytics in the charts. The charts will appear as per the Charts widget configuration. They will get the widgets as per the configuration under the Page layout of the Page Builder.


Menu Items
Menu & its Sub-menus
If you have managed the menu in 3-level navigation from the Menu builder, the menu with the child menu & its sub-menu will appear in the customer portal.
Custom Link
If you have added the custom link as menu items, the portal users can access it.


Vertical View & Recent Activity
Vertical View
If you have set the Menu location as “Vertical” from the Page builder, the portal users get the Customer portal as Vertical view.
Recent Activity
If you have added the Image Field for the “Recent Activity” widget, the portal users will see the images along with the records.


Slider
If you have configured the “Slider” widget to any page, the portal users will see the information in the form of slides.
If you have enabled the “Auto Slides” option, the slides will be changed automatically as the timer was set. You can set the color background of the slides individually.
You can also enable the Navigation & Pagination settings for the “Slides”.


Content Slider
You can display the information as a slider to the portal users in the customer portal. The portal users will get the slides according to sequences of the content slider set.
You can set the Auto Slides, Navigation, and Pagination options as per your requirement. You can customize the individual slide’s content and make it more attractive slider.
Note: The template structure will be changed as per the width of the section. Suppose if you have set the 3-column template but the width is not enough to render, it could be reduced to 2 or 1 column structure.


Testimonial Slider
You can display the customer’s review or feedback in your customer portal by configuring the “Testimonial” widget. If you have enabled navigation settings like enable arrow to navigate previous-next slides and pagination, the portal users can see in the customer portal.
Note: The template structure will be changed as per the width of the section. Suppose if you have set the 3-column template but the width is not enough to render, it could be reduced to 2 or 1 column structure.

Videos
If you have configured the “Video” widget to any page, the portal users can view the video. Video will be played automatically if you have enabled the Auto-Play option while creating the widget.

List view
By navigating to any Object, the portal users will be able to see the list of the records of that Object.
Here the users will get the Listing page appearance (Fonts & Background) as per the Theme configuration from the Admin portal settings.
The users will get the Listing details as per the configuration from the Object’s Page Builder and as per the configuration of the ‘List widget’.
You can search and filter the records from the list. If you have added the fields for the filter search, the portal users can filter the records by clicking the filter icon. By clicking on the filter icon, the portal users can search the records based on the selected values.
The portal users can access the Object details and edit/delete the records as per the given rights.
> Delete
The portal users can also delete multiple records as you have given the delete rights. Portal users can select the Object records in bulk and by clicking on the Delete icon, the records will be removed.
> CSV Export
The portal users can export the Object records in the CSV. Select all or select required records to export in CSV and click on the CSV icon, it will export the CSV file of the selected records.
> Filter & reCAPTCHA
If you have enabled the option for the Filter search (Advanced Filter) from the Field details of any list, the portal users will get the Filter search option in the list records in the customer portal.
By clicking on the ‘Filter’ icon, the portal users can filter the records by selecting the field’s value.
If you have enabled the reCAPTCHA V3, the portal users will get the reCAPTCHA icon at the bottom-right corner.


Data Card View
If you have added a Data Card widget for any object, the portal users will get the records of the selected object in the data card (grid view).
Here the order object’s records are shown in the Data Card view.
Delete Records
The portal users can also delete multiple records as you have given the delete rights. Portal users can select the Object records in bulk and by clicking on the Delete Records button beside the Create button or Delete icon on the card.
CSV Export
The portal users can export the Object records in the CSV. Select all or select required records to export in CSV and click on the Export CSV, it will export the CSV file of the selected records.
Advance Filter
Portal users can also filter the records, if you have enabled the advance filter from the list view of the Data Card widget.
Edit Record
Portal users can also edit the records by clicking on the Edit icon, if you have given edit rights to them.


Add/Edit/View Records
Record Details
By clicking on any records from the list, the portal users can view the record details as per the user rights. The fields will appear as configured from the admin side.
The portal users can edit/delete the selected records as per the user rights.
Add/Edit Record
The portal users can ‘edit’ any existing records if the editing rights are given. Click on the Submit button once the records are edited.
The portal users can add new records if the adding rights are given. As configured from the Page Builder, the fields will appear to insert the details.
You can select “Account” or “Contact” as per the Lookup records. You can select the records from the Lookup Records.
> Product Selection
The portal users can add the product if the product selection rights are given for the ‘Order’ object. By clicking on the Add Product button, the product list popup will appear.
The portal users can check the selected products from the detail view page. Similarly, you can give the product selection rights for the “Opportunity” and “Quote” objects as well.


Edit/Detail Page Redirection
When the portal users are on the edit page or the detail page of any Object, they can ‘edit’ the Object record or ‘delete’ it as per requirement. Once they click on the Submit/Delete button, they will be redirected to the page as configured from the “Form Widget”(Redirection Settings)
From the Object listing page, the portal users can navigate to the edit page. When they delete the Object record, after success, they will be redirected to the page as selected for the “Delete Redirection” page.
But, if the portal users edit the form details and click on the Submit button, they will redirect to the page as selected for the “Submit Redirection” page.
Similarly, from the Object record’s detail page, the portal users are redirected to the page that has been set in the form widget for the Detail page.


Progress Bar & Multi-Step
Progress Bar
If you have enabled the Progress Bar for the picklist type Field, the portal users will get the progress bar.
The portal users can change the value of the progress bar by clicking the stage displayed on the bar. The value of the field will be reflected according to the stage of the progress bar.
Multi-Step Form
If you have enabled the multi-step Form for the Add/Edit form (records), the portal users will get stepwise form filling. The steps are the section-wise details that are added in the form layout.
Once you fill in the details click on the “Next” button to navigate to the next details.
You cannot navigate to the next step until you fill in the current step details. If you are editing the record (form), you will get the multi-step.


Panel Separation (Section-wise details)
If you have added multiple panels and added the layouts panel-wise in the form builder of any Object, the portal users can get that page panel-wise in the customer portal.
As you have added fields in the panels by inserting the ‘Title’ of the panel, the portal users will access the details.

Sub Grid Support
The Portal users will get the Sub grids with related records as per configuration in the Form builder Object.
The portal users can perform actions such as Add (Create), Edit, and Delete as per the accessibility from the Form builder Sub Grid configuration.


Show/Hide Fields
You can Show/Hide the fields to portal users based on condition match that is set and configured in the “Advance Field Management” in the “Form builder”.
When the portal users select a ‘Field’, which is set as Conditional Field Options, the fields which are selected in “Visibility Field” will appear in add/edit of any Object form.


Parent-Child Identification
If the identification is set for the Parent-Child form and the user enters the field value that is already existing in the CRM, it will not create a new record for the Parent Object. It will relate the child Object record with an already existing parent record.

Notes And Attachments
If you have enabled the “Notes and Attachment Access” option in the detail page layout of any object form, the portal users can access the Notes and Attachments. From the detail page of the record, the portal users will see the “Notes” & “Attachments” sections. [1]
By clicking on the Create Note button, the portal users will get a popup where they can add a Subject and the Description to provide some issues, queries, details, or any instructions regarding the records (i.e., case details/technical issues). [2]
After inserting the note-related details (Subject & Description), click on the Create button to add a note.
By clicking on the accordion icon of the “Notes”, you can show/hide the notes section. The “Notes” section contains the Title, Description, and Created On. [3] The portal users also can delete any note that is no longer required by clicking on the ‘delete’ icon.
Similarly, by clicking on the Create Attachment button, the portal users will get a popup where they can “Attach a File” by browsing from the local system. Along with the file, the portal users can add a “Description” as well. [4]
After attaching the file and adding the description, click on the Create button to add an attachment.
Note: The portal users can attach a file maximum of 5MB in size. All the file extensions of Salesforce CRM will be supported here. [5]
By clicking on the accordion icon of the “Attachments”, the portal users can show/hide the attachment section. The “Notes” section contains the Title, Description, and Created On. The portal users can also delete any note that is no longer required by clicking on the ‘delete’ icon.
If the description is too long in Notes & Attachments, the portal users will see the Read More text. [6] By clicking on the “Read More” caption, the portal users will see the whole description in the popup. [7]


Site Under Maintenance
If you have enabled the portal site under the maintenance option from the “Portal General Settings”, the portal users will see the page that you have selected for the Site Under Maintenance.

Profile
The portal users will get the profile details as per the configuration of the ‘Profile widget’ in the Page Builder of the profile from the admin side. You will get the Profile layout as per the selection of the Design Layout (Style) of the Profile.
The portal users can update their data and change passwords as per their requirements.

Contact Us
We simplify your business, offer unique business solutions in digital web and IT landscapes.
Live Chat
-> Get instant support with our Live Chat.
-> Visit our product page at https://www.crmjetty.com/dynamicscrm-customer-portal.htm and click on the Live Chat button for instant support.
Tickets
-> Raise tickets for your specific question!
-> Send an email to support@crmjetty.com or you can log in to your account @ crmjetty.com and click on My Support Tickets on your account dashboard, to get answers to your specific questions.
Customization
If you would like to customize or discuss additional features for your Customer Portal, please write to us at sales@crmjetty.com
