SugarCRM Plug-in Installation
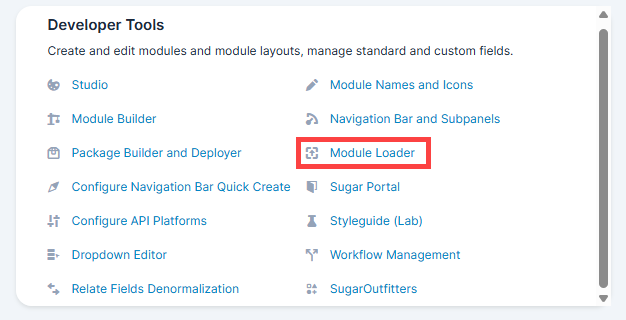
To start with the installation, Log-in as Administrator into SugarCRM. Navigate to the Administration page and click on ‘Module Loader’ to install the package.
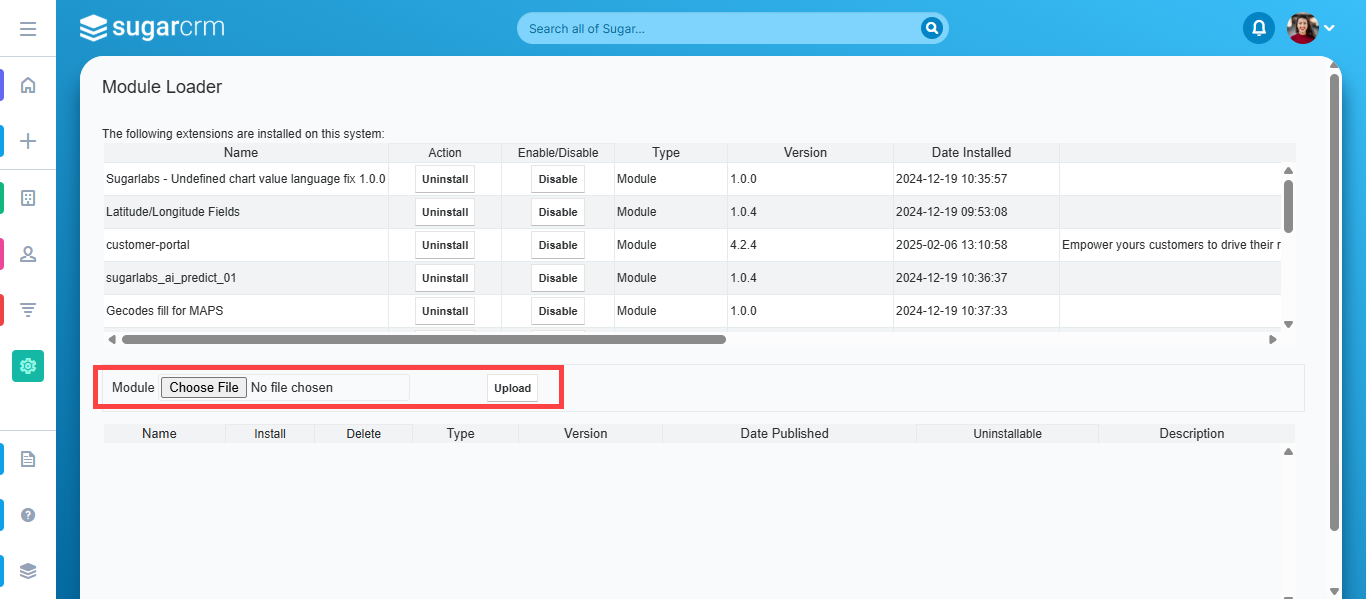
Browse the SugarCRM Package zip file and click on ‘Upload’ button.
After uploading the package, click on ‘Install’ button to install the package.
Click on ‘Commit’ button to finish the installation. After successful installation you can see ‘sugarcrm – customer-portal’ Plug-in in Installed plug-in list on Module Loader page.
Now, need to repair your SugarCRM Instance. For that, navigate to Administration page and click on ‘Repair’ link, then click on ‘Quick Repair and Rebuild’ link.
 Installed")
WordPress Manual Plug-in installation
Login to your WordPress Portal from wp-admin and navigate to Plugins module. Here you can see the Add New Button. Click on ‘Add New’ button which will redirect you to Add Plugins Page.
Click on ‘Upload Plugin’ button. Browse the WP-Plugin-Package zip and Install the Plugin.
Go to Installed Plugins screen. Here, you can see SugarCRM Customer Portal plugin was successfully installed. But still it’s Inactive.
Click on ‘Activate’ to activate this newly installed plugin.


SugarCRM Configuration Settings
Get activation key
Get the activation key from the Order Confirmation Mail. OR
Login to your account then go to Downloadable options and copy the activation key for the Customer Portal plug-in.
Note: Applicable only if purchased from CRMJetty.
Activate your plug-in
After successful package installation, you need to validate your license and configure your Portal.
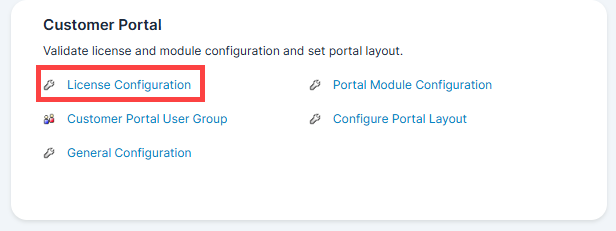
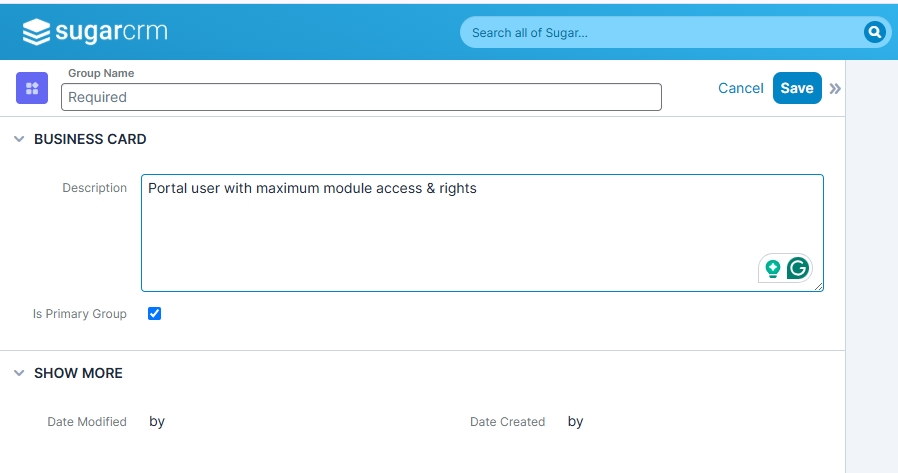
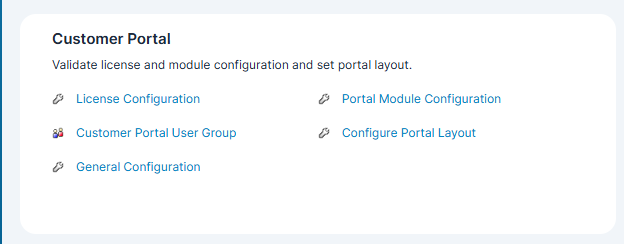
Log-in to your SugarCRM as admin and go to Administrator Page. You can see the ‘Customer Portal’ section on this page.
Now click on “License Configuration” link, this will re-direct you to Portal Configuration page.
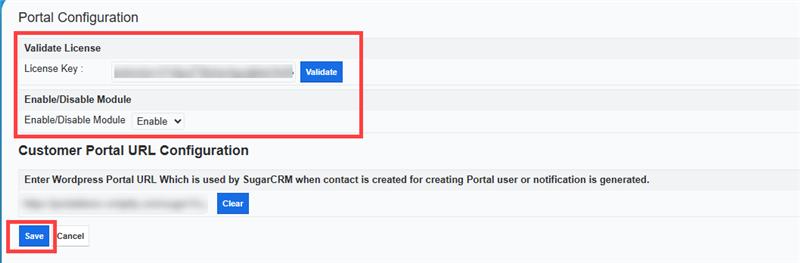
Enter your license activation key provided by CRMJetty. Validate your license by clicking the ‘Validate’ button.
WordPress Portal URL Configuration
Customer Portal plug-in provides a functionality to create WordPress users from the SugarCRM based on Contact creation. When any contact is created in SugarCRM, you can also provide that contact an access to the portal.
For this, WordPress URL must be configured. To configure the URL, go to administrator page and click on ‘License Configuration’. Select WordPress from the dropdown, enter your WordPress Portal URL and click on ‘Save’ button.
Note: WordPress portal URL configuration is mandatory for Portal user creation or for receiving notification from SugarCRM.

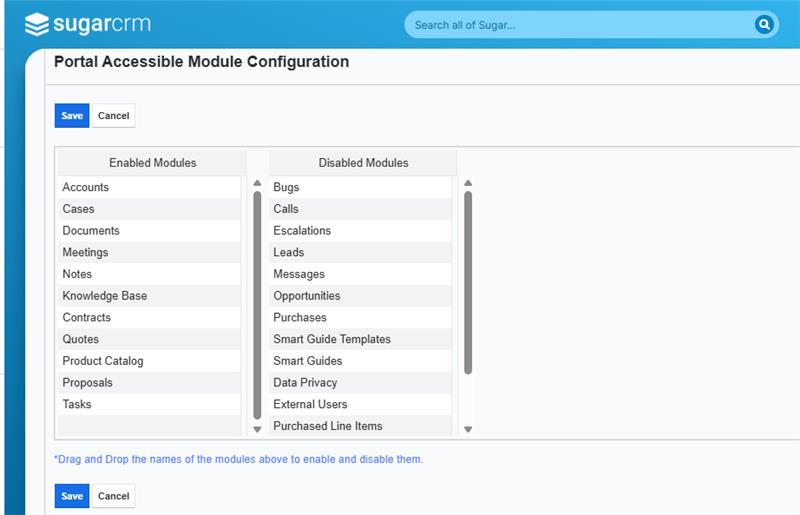
Configure Portal Accessible Modules
Customer portal provides feature to manage SugarCRM Module’s configuration for their portal users. You can decide and configure default SugarCRM modules as well as custom modules accessibility.
Navigate to “Admin -> Customer Portal”. Click on “Portal Module Configuration”.
You will get the list of default and custom module. Just need to drag and drop to make them enabled for portal users.
Note: Only those default and custom modules will get listed who is having relationship with contact module.
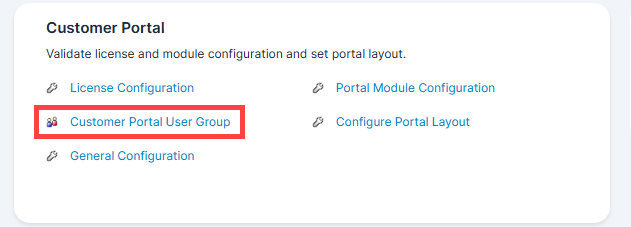
Set Module Accessibility for Portal Users
Customer Portal provides feature to manage SugarCRM Module’s accessibility for their WordPress portal users. You can decide access of which module should be provided to which customer by WordPress User Group module.
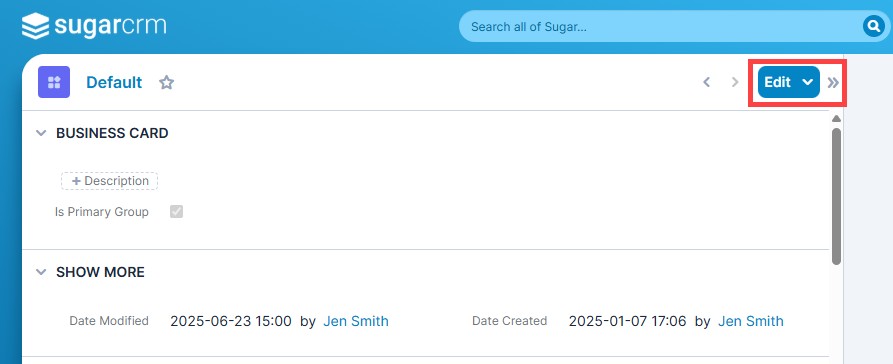
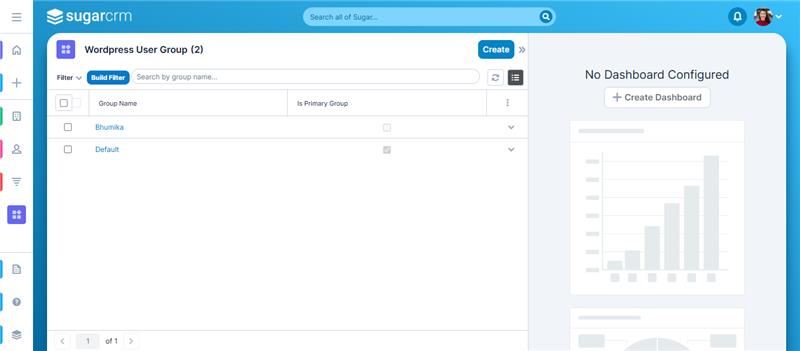
Click on ‘Customer Portal User Group’ link and you will be redirected to the WordPress User Group Module’s List View. Here, you can see ‘Default’ WordPress User Group already exist in the list. User cannot delete this ‘Default’ group record.
You can check and edit the Default Group details.
Note: By default, ‘Default’ group will be assigned to a newly created contact record.
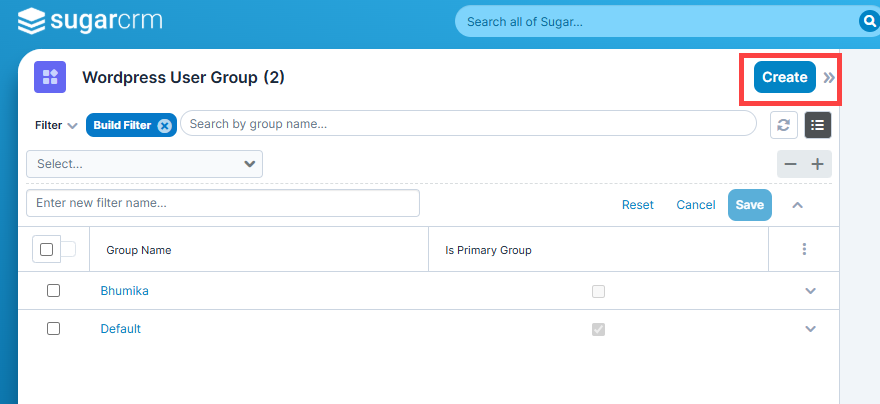
Admin can create different ‘User Group’ and define accessible modules for that group.
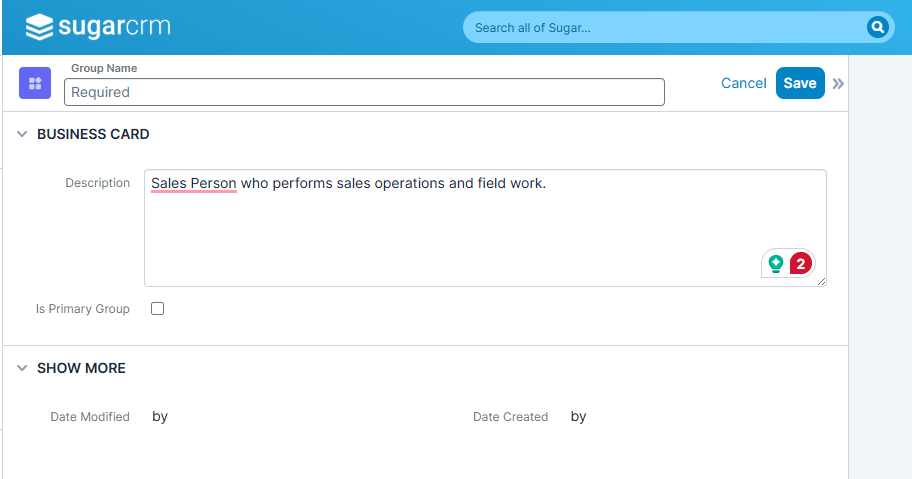
Once the Primary details (Business card details) are added, you can configure the Portal Access Module rights for the Portal users.
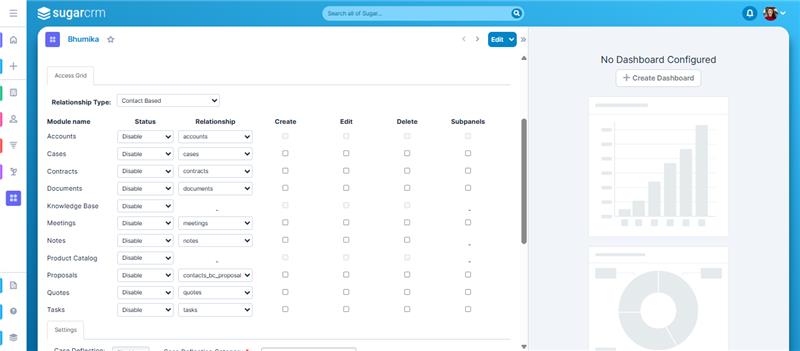
Under the “Portal Access Module List”, you will get the Relationship Type to define the relationship of the selected user group. You can select either Contact based, or Account based.
If you select Contacts, the portal user will get the data that is directly related to the Contact. But if you select Account, the portal user will get the data that is related to Contact’s Account.
Relationship selection is provided to select the relationship for the module with contacts or accounts. The relationship of the modules will be changed as per the selection of the Relationship Type.
Enable the Modules from here and give the rights for Create/Edit/Delete/Subpanels by ticking the options to your customers, it means the user will get the access to the module as per your settings.
Sub-Panel Accessibility for Portal Users
Customer portal provides feature to manage SugarCRM sub-panel’s accessibility for their WordPress portal users. You can decide access of sub-panel should be provided to which customer by WordPress User Group module.
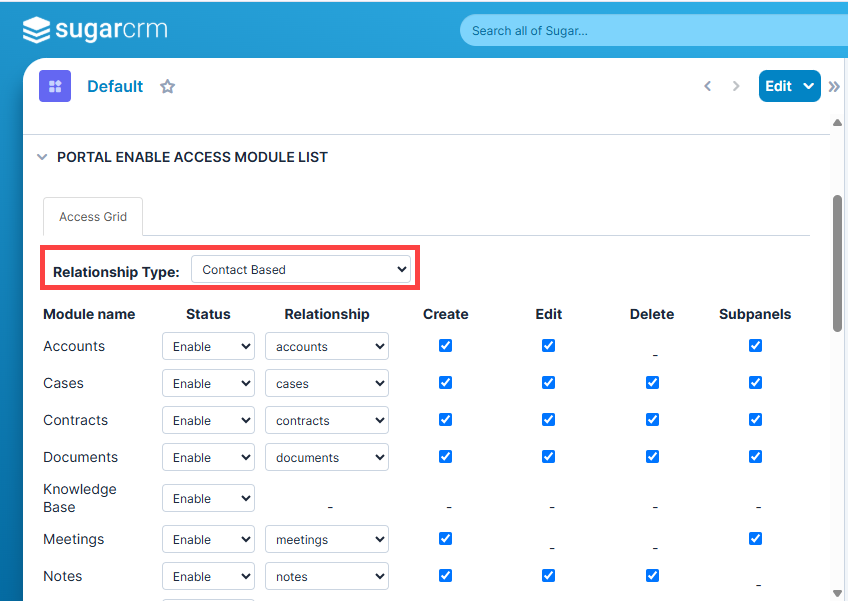
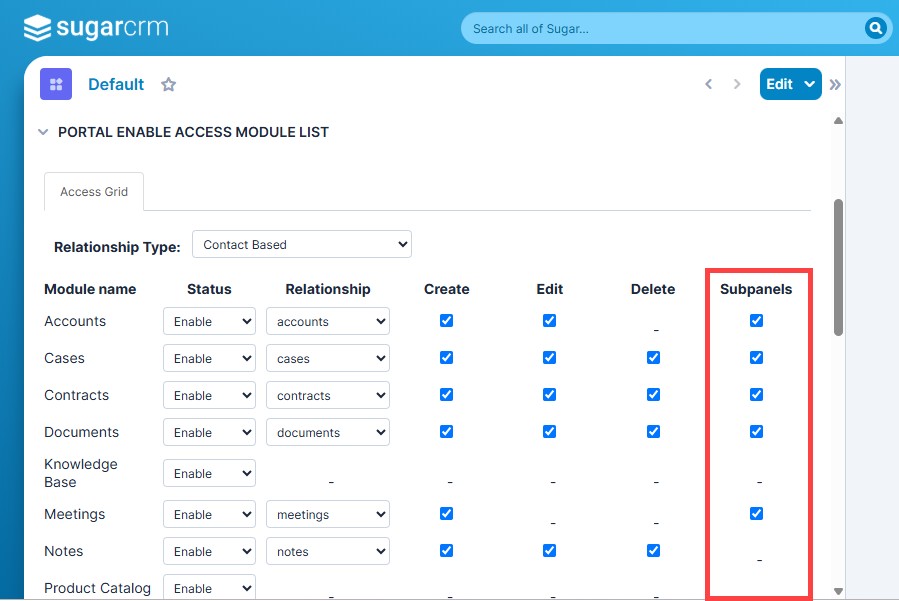
To provide sub-panel access rights to portal users, create a WordPress User Group and save it.
You will get a list of Portal enabled modules. Check the last box provided for sub-panel’s visibility in portal.
The data in the subpanels will be loaded based on the relationship with the selected Relation Type, either “Contact based” or “Account-based”.
Note: For Calls and Meetings module, if you want to get data listed in sub-panel then you need to make then “Portal Visible”. Follow below steps to make call or meeting portal visible.
Navigate to detail view of call or meetings which you want to make “portal visible”.
Click on Edit option from detail view to edit call or meeting.
From Portal visibility tab check the box to make call or meeting portal visible and view them in sub-panel.

Case Deflection
You can also define advance configurations to different user groups like Case deflection, Knowledge Base Category and Calendar accessibility.
While creating cases from portal, Case deflection feature helps your customers to find the probable solutions before adding any Case. If no relevant solutions are found, then customer can proceed ahead by adding a new case.
It will search a solution for the enabled Case Deflection Categories (which belongs to Knowledgebase Categories of CRM). So, on enabling “Case deflection” you will be settings categories to be search while finding a solution.
Note: Case Deflection will only work if Knowledge Base module is enabled and Category is selected.
You can also enable calendar only for specific user groups.
Note: Calendar will only be enabled if Calls or Meeting module is enabled.

Dynamic access rights
Customer portal provides feature to manage SugarCRM Module’s accessibility for their WordPress portal users. You can decide access of which module should be provided to which customer by WordPress User Group module.
Click on ‘Customer Portal User Group’ link and you will be redirected to the WordPress User Group Module’s List View. Here, you can see “Default” WordPress User Group in the list. User cannot delete this ‘Default’ group record.
Admin can create different “Customer Portal User Group” to provide access to certain defined modules. Admin can also set dynamic access rights for each accessible module.
To provide dynamic access rights to portal users, create a WordPress User Group and save it. You will get a list of Portal enabled modules.
You can also select any custom added relationship for any specific modules. Portal will work on the relationship selected for the module.
To disable a module, select ‘Disable’ option from the status dropdown. To provide dynamic access rights of ‘Create’, ‘Edit’ and ‘Delete’ check the boxes against each enabled module.
Set Portal Layout
To avail SugarCRM modules into your WordPress portal, it is mandatory to set Portal Layouts for each accessible module. Customer Portal plug-in provides facility to set Portal Layouts for Accounts, Contacts, Calls, Meetings, Notes, Cases, Documents, and Quotes module from SugarCRM.
To create or view the Portal user group, navigate to Admin -> Admin -> Customer Portal Layout. [1]
You will see the Configure Portal Layout option to set and configure the layout for the customer portal. By clicking on the “Configure Portal Layout”, you will be redirected to the Portal layout Settings. Select the desired user Group and respective Module to set the layout accordingly.
Set layouts for Edit view, Detail view, and List view. Drag and drop fields from the left column to the right. [2]
> Portal Field Properties Settings
By clicking on the Portal Field Properties Settings (setting icon), you can set the Field Properties and Conditional Settings for the different Modules. [3]
Portal Field Properties
Now, click on the Portal Field Properties option to set the “Portal Label” and “Help Tip” for the different fields of the selected module. [4]
It provides you to manage various field settings, which are listed below:
– Portal Label: Insert the desired ‘label’ of the field so portal users can easily recognize the fields.
– Help tip: This attribute will be shown as a tooltip regarding the respective field in the portal.
– Required: This attribute will allow users to make fields mandatory.
– Read-only: This attribute will restrict users to edit the respective field’s value.
– Searchable: Portal users can filter the records as per the search option. If you want to add the field in the search option in the portal, check the checkbox of that field as ‘Searchable’.
Note: You can only make fields mandatory if they are not default required fields from CRM.
Conditional Statement
The conditional statement is the point where workflow divides into two branches. With the help of conditional statements, you can set the conditions to view the specific data in the customer portal. [5]
You can configure the Field Visibility and Conditional Field by defining the hide/show for other fields. If Field B depends upon Field A and you want to display the “Field B” based on the selection of the ”Field A”, you can define this conditional visibility for the fields under Advance Field Management.
Now, by clicking on the “Conditional Settings”, you will see the ADD STATEMENT button if you are configuring the Conditional Settings for the first time. [6]
From the Conditional Settings, you can set the condition to make the visibility of the field on the customer portal side.
By clicking on the ADD STATEMENT, you can configure the Field Visibility conditional for the field’s value as follows:
– Field for visibility: Select the field for which you want to apply the condition.
– Portal Required: Switch ON to make the field required in the portal.
– Default field visibility: Switch ON to hide the selected field in “Field for Visibility” in the portal by default.
Note: You can only make fields mandatory if they are not default required fields from CRM.
Show above field when following criteria matches:
– Conditional Field: Select the field of visibility. [7]
– Matching Category: Select any one Matching Category from “Any” and “All”. [8]
If you select the “Any” Matching category then the customized condition will be applied if any value is selected in the “Options” field.
But, if you select the “All” Matching category then the customized condition will only apply if all the values are selected as configured in the “Options” field.
– Options: Select the options to match the criteria for which you want to set the condition. After configuring the conditions, click on the Save button to save the conditions.
Similarly, you can also add another new condition by clicking on the “Add Statement” button.
Note: After configuring the portal layouts in the SugarCRM or WordPress, you must log in again to the portal to check the updates.


Knowledge Base articles accessibility
To set knowledge base articles accessibility, navigate to Customer Portal User Group settings.
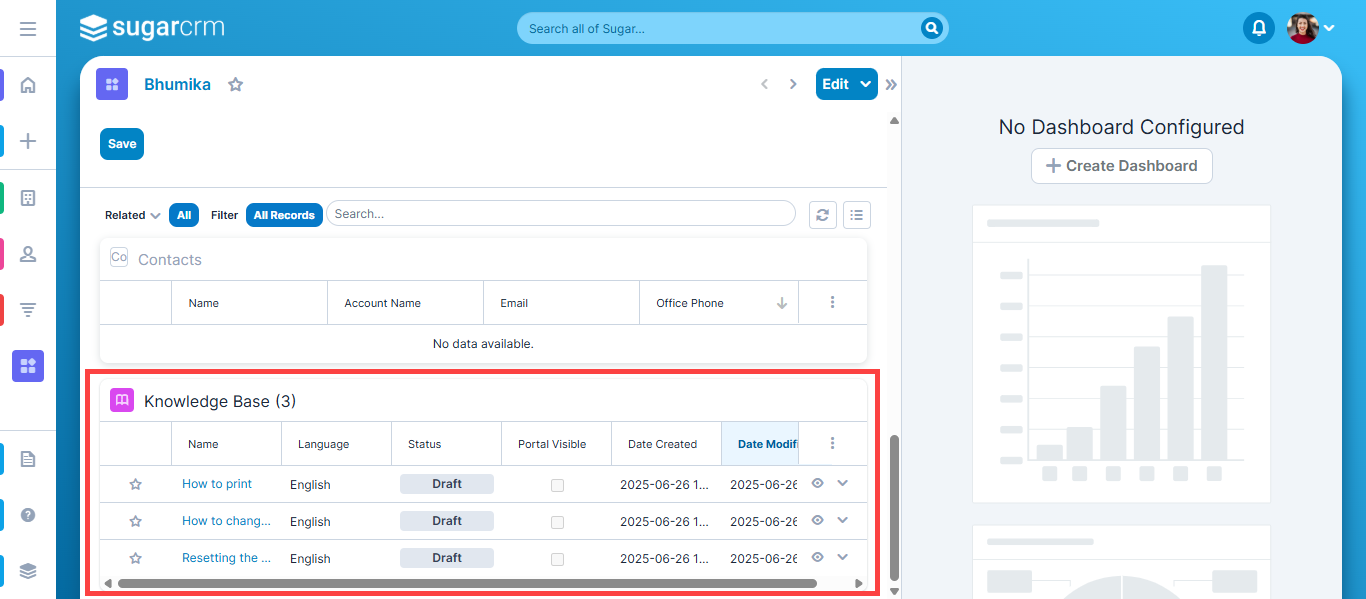
Click on ‘Customer Portal User Group’ link and you will be redirected to the User Group Module’s List View. Here, you can see ‘Knowledge Base’ sub-panel.
Select the articles or create the new one which you want to display on portal end. These articles will get accessible for this particular user group customers. You can also enable/disable portal visible option from the detail view of article.
‘Check’ the Portal Visible option and select the Status as ‘Public’ to enable it for the Portal Users.
Knowledge Base article can be instantly useful for portal users to resolve any query.
You can also create a Knowledge Base article and give the access as per Portal User Groups.
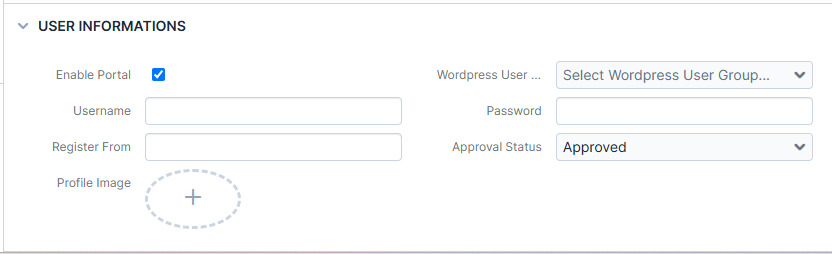
Set Username and Password Fields in Contacts Layout
When you install this package, username and password both fields are created in contacts module. Confirm that Username and Password fields are added to record view. If you cannot see Username and Password fields in record view or create view, you may have to set these fields in Record layouts.
For that, Go to Administrator -> Studio -> Contacts -> Layouts -> Record and Drag and drop those fields in Record View and click on ‘Save and Deploy’ button.
Sugar Admin can set the Portal credentials for a contact and allow access of portal to that contact. By default, the ‘Enable Portal’ checkbox will be enabled for a newly created contact.
Uncheck the ‘Enable Portal’ checkbox to disable the portal accessibility to any user.
Single Site Settings
Go to WordPress admin side and click on ‘Customer Portal’ and configure SugarCRM portal setting options.
Authentication
Select appropriate name for your portal.
Enter your CRM instance URL and CRM Admin credentials (Username and Password).
You can enable/disable registration for portal. If this box is unchecked, new user cannot sign-up from portal.
General Settings
In General Settings, you can set the number of records you want to display per page, set Portal Logo and Mobile Portal Menu Tile.
You can allow users to have a single sign-in for WordPress Account and Portal. To enable single sign-in feature, check the ‘Single Sign-In’ check box.
Layout Settings
You can also choose a template from the dropdown menu.
Note: Choose ‘Full Width Page’ template for existing theme header and footer.
You can select the Theme Color and select color for Calendar activities like Calls, Meetings, Task.
You can also add the Custom CSS.
Page Settings
Select the relevant page for different activities.
reCaptcha Settings
You can also add re-captcha option for login, signup and forgot password page to protect your website from spam and abuse.
Add re-Captcha Site Key and re-Captcha Secret Key, then configure for pages and save it.
Note: To get details for generating re-Captcha Site Key and re-Captcha Secret Key, navigate here. We support re-Captcha v2.0


Multi-site Settings
If you have multiple sites in WordPress, you can provide access of portal to all sites. All websites will be listed under ‘My Sites’ tab in your WordPress Admin Account.
To configure Portal for multiple sites, navigate to ‘Network Admin’ and click on ‘Customer Portal’. You can manage all the general configurations for Portal from Network Admin.
Check the ‘Multi-site Sign-in’ check box to allow user to login from any other sub-site.
Check the ‘Multiple Domain Site’ check box to enable portal for websites with multiple domains.
You can configure portal for all sub-sites separately. To configure portal for a sub-site, navigate to that particular site from ‘My Sites’ tab.
Now, click on ‘Customer Portal’ tab on the left side panel. This will take you to the portal configuration page of that particular sub-site.
In addition to general portal settings, you can allow users to have a single sign-in for WordPress Account and Portal. To enable single sign-in feature, check the ‘Single Sign-In’ check box.
To disable portal for this particular sub-site, check the ‘Disable Portal’ check box.
Note: If you have not configured portal for each sub-site separately, then all configurations set in the Network Admin will be considered as default.


User Redirection Configuration
Network admin or Sub-site Admin can redirect any user to other website’s portal.
To redirect a user to any other website, navigate to Network Admin > Dashboard > Users.
This will take you to the Users list page. Click on ‘Edit’ link under the user you wish to redirect to other websites portal.
This will redirect you to the user edit page. Navigate to ‘Account Management’ section and choose a website from the dropdown.
Upon next login User will be redirected to the selected sites’ portal.
Note: User Redirection is only for Multisite WordPress Account


Custom Menus
Custom Menu feature gives you the power to add the customized menus to the portal as per the business needs. Here is how you can enable it in your portal.
Navigate to the Appearance → Menus, you will land on the “Edit Menu” page. Select the menu items like Pages, Posts, Custom Links, and Categories to add to your menu. [1]
For example, if you want to add a custom link to the menu then enter the “URL” and “Link Text” which will be displayed on the portal. Once you are done adding the items, click on the “Add to Menu” button. Let’s configure the “Menu Structure”. [2]
1. Enter the “Menu Name”
2. Checkmark ☑ “Portal Menu” under the “Menu Settings”
3. Click on the “Save” button [3]


Module Ordering
To set the order of module click “Customer Portal -> Module Ordering” it will navigate to Module ordering page.
Now Drag and Drop modules for reordering and save updated order.
It will reflect the same order in portal dashboard and drawer.

Approval and Verification for Portal Users
If you want to provide access for portal only to them who is approved by admin, then navigate to WordPress Admin Panel -> Customer Portal Settings Page.
Tick the checkbox to enable user approval flow.
Now whenever a portal user registers from portal. They will be added to Contacts module in CRM with pending status.
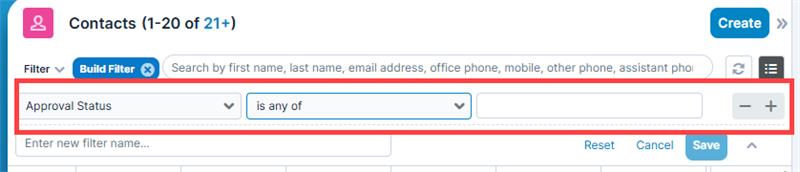
Now you can apply advance filter on contact’s approval status and get the list of pending contacts for approval.
Now you can apply advance filter on contacts and get the list of pending contacts for approval.
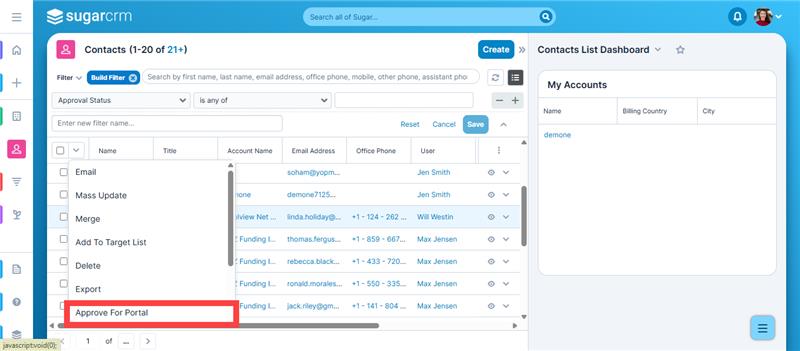
To approve contacts, select such contacts from the filtered contacts’ list view and click on the actions dropdown.
Now select ‘Approve For Portal’ option from the dropdown.
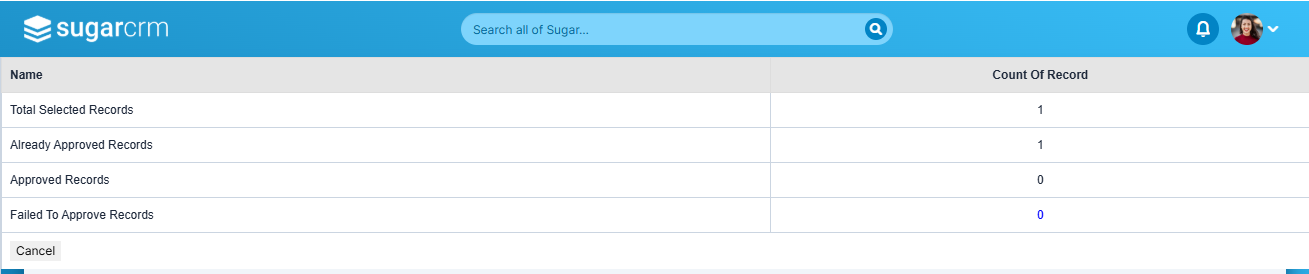
This will convert pending CRM Contacts to portal users and a list of imported contacts will be displayed.
While approval it will also send an email to portal users notifying that they are approved and can access the portal.
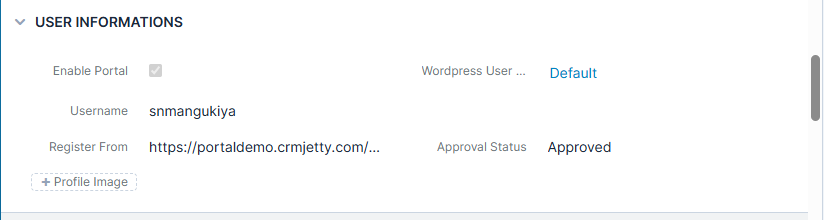
Instead of mass contacts approval you can also navigate to the detail view of any contacts and approve them by changing the approval status from portal user information tab.
Note: Once the contact is approved, you cannot change the approval status of that contacts.
If verification flow is enabled. They need to verify their account then only they can proceed further for login.

Multi Language Support for Portal Users
Customer portal provides multi language support to collaboratively work online across organizational, geographical and overcome language barriers.
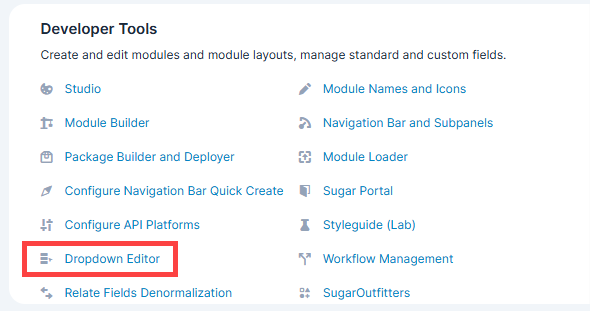
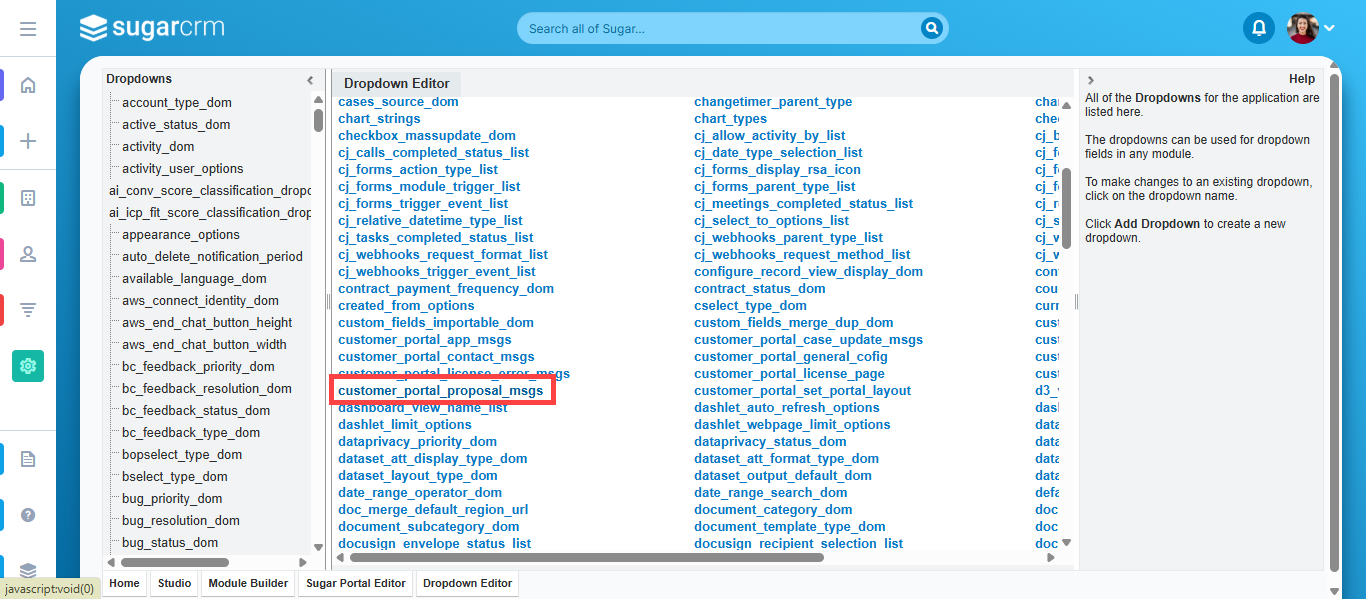
You need to set message for portal to work with different languages. For setting messages, navigate to Admin -> Developer Tools -> Drop Down Editor.
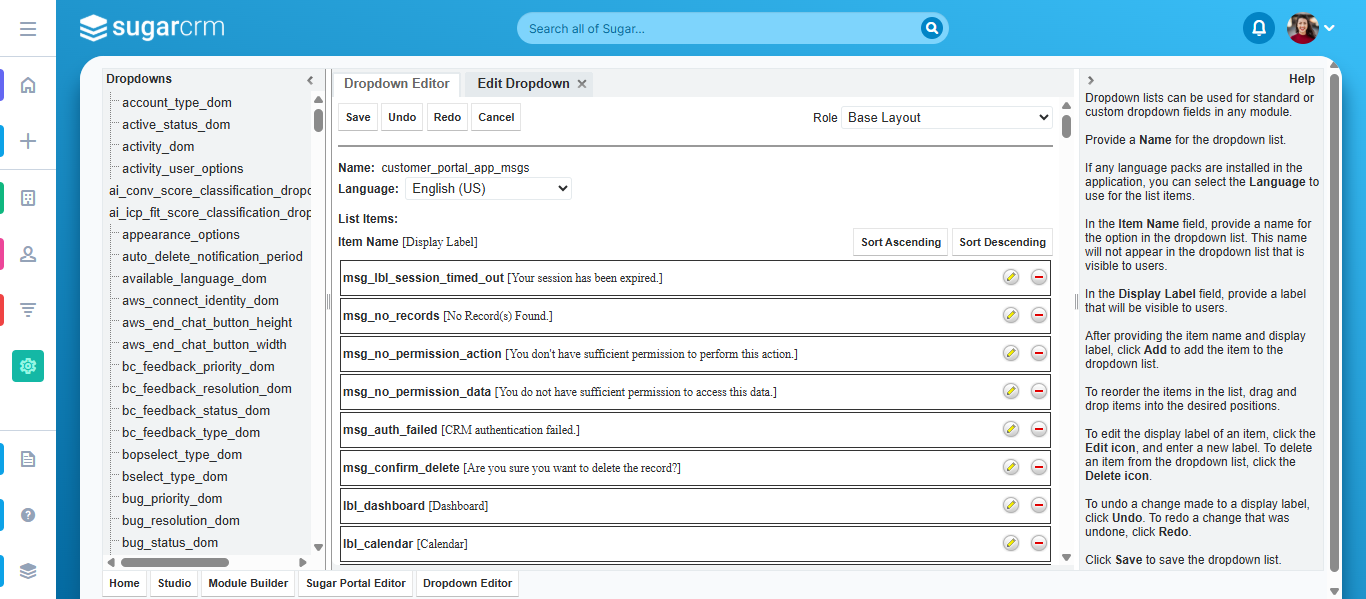
From drop down editor you will find “customer_portal_app_msgs” tab. From there you can set message for individual languages.
Select language and add messages. It will be reflected in portal when that language is selected on portal end.
Note: Default language can be set from CRM view “General Portal Configuration” and if no language is selected it will take from CRM enabled languages.
Convert CRM contacts to Portal Users
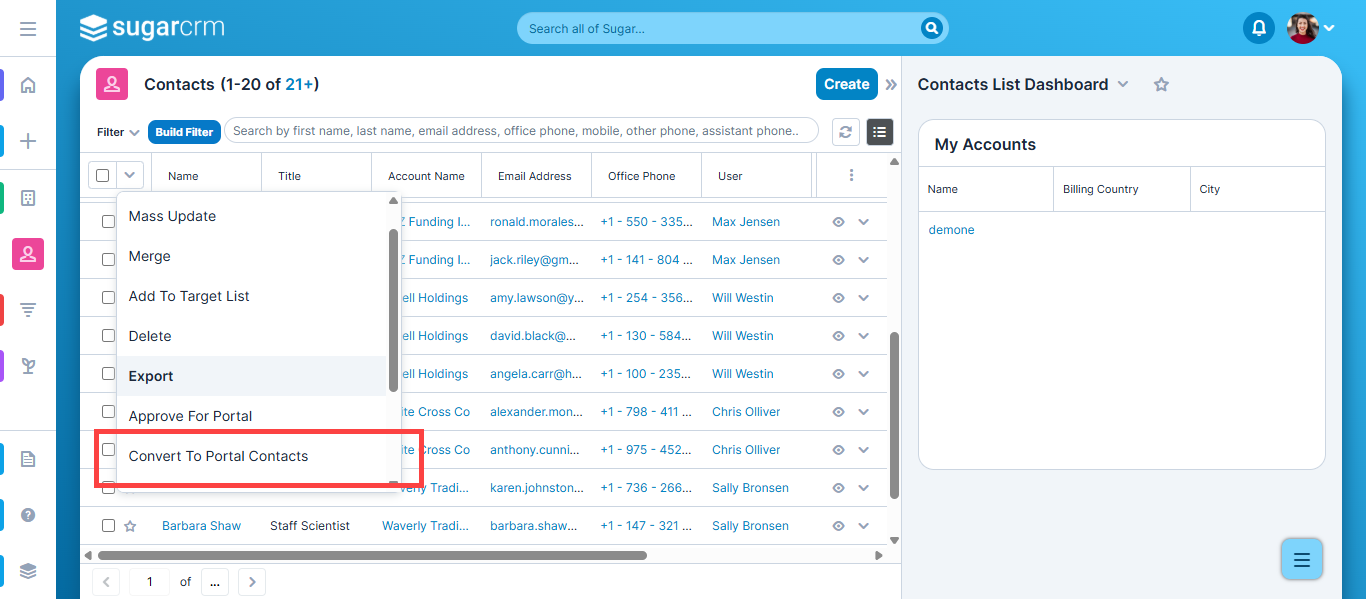
To provide access to Portal for already existing CRM contacts, select such contacts from the contacts’ list view and click on the action’s dropdown.
Now select ‘Convert to Portal Contacts’ option from the dropdown.
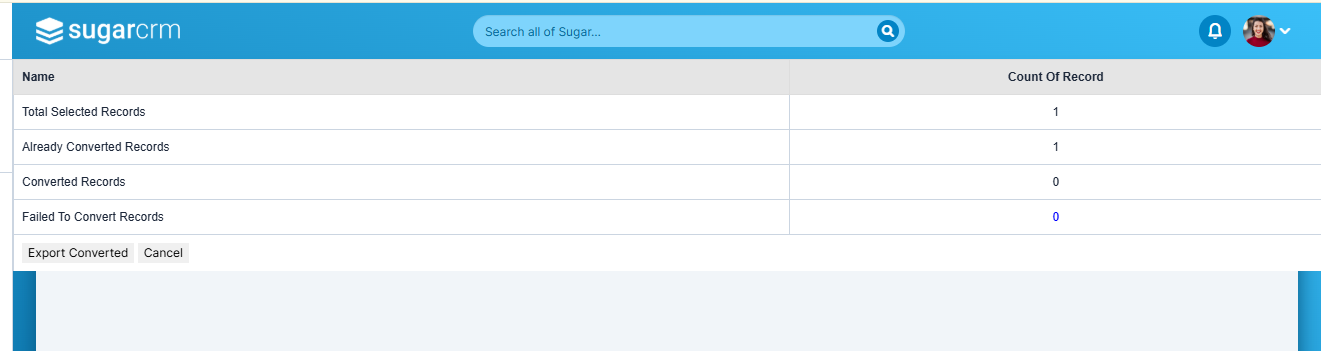
This will convert CRM Contacts to portal users and a list of imported contacts will be displayed.
Click on ‘Export Converted’ button to export the list of converted users. This will export the list of converted users to a .csv file.
Now, to create WordPress Users, import the csv file in WordPress Portal. To import the file in WordPress, navigate to Customer Portal >> Import Users
Click on ‘Choose File’ button and upload the csv file. Now, click on ‘Import’ button to import the contacts.
On importing the file, new WordPress users will be created and if ‘Send User Mail?’ checkbox is checked then users will receive a mail notification along with their credentials.

Proposals
You can create proposal with the required products and services.
Once the proposal is created, user can edit or delete that proposal only if it is in “Pending” state.
Admin can convert the proposal to quote by “Convert to Quotes” option.
Note: Proposal cannot be changed once the proposal is converted or declined by admin.
Once the quotes are converted, they will also be listed in detail view of corresponding proposal.


Login, Sign up & Forgot Password
Directly login to the portal using your portal credentials.
If two-step authentication is enabled, then portal users will receive an OTP in email. Enter valid OTP and it will allow portal users to access interface.
Note: OTP is valid for 30 minutes. If not used, then portal user needs to resend OTP and get new OTP.


Sign Up
If you are a new user, you can directly sign-up from the Portal. Click on the ‘Sign Up Now’ link on the Login Page to register as a new user. On clicking this link, you will be redirected to sign up page.
The credentials will be verified to check if you are already registered with same username and email address. If no such information exists in the system, a user will be created in WordPress and SugarCRM Contacts module.
Once signed-up from the Portal, you can directly login to the Portal and can also access your WordPress Account without having to login again.
Note: Already existing customers on both sides (WordPress and Sugar) won’t get the access for Customer Portal automatically on installation.
When any user registers in the portal, an account will be automatically created with the entered username.

Forgot Password
You can retrieve your login password using the ‘Forgot Password’ Option. Click on ‘Forgot Password’ option and enter your username and email address. Click on ‘Submit’ button and you will receive your password on your email.
Navigate to reset password link from your email and set new password for portal.

Portal Dashboard
Dashboard includes recent activities and today’s schedule for viewing your whole day schedule.
WordPress admin can set the accessibility to recently added records for portal users. Accordingly, those modules with their recent records will be displayed on the dashboard.
Quickly access top modules by clicking “View More”. It will also display charts for cases and quotes module to view their status.
As the admin has selected the “Relation Type” from the SugarCRM side in the Portal user group configuration, you will get either “Contact” based, or “Account” based modules’ data.
Suppose the admin has selected Account as “Relation Type”, the details will be loaded on the dashboard and will be loaded based on the relationship with the account.
You can also search the data globally from the portal or you can select module from drop down to search from any specific module.
You will get the global search result of data or the selected module will be loaded as per the module’s relationship with the selected “Relation Type”, either Contact based, or Account-based.
Note: For the Note, Meeting, and Call modules, the data will be loaded based on the relationship with the account and accounts related to all contacts data of the contact portal logged-in Contact.
Suppose the admin has selected Contact based as “Relation Type”, the details will be loaded on the dashboard and will be loaded based on the relationship with the contact.


Module List
The modules list will be visible on the customer portal as per the configurations from the WordPress side.
Once the portal user clicks on the custom link, they will be redirected to the page configured by you while configuring the menus.

List View
Navigate to any module and you will be able to see the list of records of that module. You can search a record from the list view, delete it, export CSV or update it.
You will get data of any module in the listing page as per the selection of the “Relationship Type”, either based on Contact or Account.
You can also add a new record to that module. To add a new record, click on the ‘ + Add’


Add Record
Add a new record in a module from the portal and it will get reflected in the SugarCRM.
User will be able to view tooltips in add, edit and detail view if they are added from backend.

Detail Page
Click on any record from the List View to view the details of a record. You can edit that record or delete it from the detail view.
Portal user can also print details from details view for specific modules like documents, Attachments, Notes, Quotes, Invoices and KB articles.

Show/Hide Fields
You can Show/Hide the fields to portal users based on condition match that is set and configured in the “Conditional Settings” for the fields. When the portal user selects a Field, which is set as Conditional Field, the Field which is selected in “Visibility Field” will appear in add/edit of any modules. [1]
Priority: Select the priority of the subject from “High”,” Medium”, and “Low”.
If the customer has selected the “Low” priority, then the Type field will appear while adding the case as per the conditional statements from the Conditional Settings. [2]
QA Radio Option: The portal users can select the required option. When the portal users select the options that is set for the conditional field, based on that any other field will visible, the portal users will get another field.
I.e. By selecting the “option 1” from the QA Radio Option, the portal users will get the QA Multiselect field.
QA Multiselect: If the portal users select the “Option 1” and “Option 2”, so based on the “And” condition, the Status field will appear after the “Description” field. [3]
Now, the portal users can select the Status as per requirement. After adding the details, the portal users can save the case details.


Advance Filter
The portal users can search and filter the module records from the list. By clicking on the ‘filter’ icon, you will see the “Search” & “Filter” options. [1]
They need to enter the criteria and click on the “Search“ button for which they want to find the results. [2]


Case Deflection
When you have enabled the ‘Case Deflection’ option with the selection of Category, your customers can search for solution by inserting the keyword or a sentence related to their queries/issues by logging in the portal.
Your customers will be able to see the list of cases by clicking on Case They can click on + Add Case button to add a new case.
After clicking on the + Add button, your customer can find the probable solution by searching the query/issue. The search result will appear as per inserting the search key word.
The customer can also print the solutions by clicking on ‘print’ icon.
If your customers could not find any probable solution or if they found a solution but it is not relevant to what they were looking for then they can add a new Case.
Note: If You have disabled the ‘Case Deflection’ option in SugarCRM, the customers will get directly redirected to the above page to add a case. They will not get the ‘Search Solution’ option.


Attachment Preview
If any attachments in portal, customer can check and directly access that records by clicking on “Preview” button from the ‘Action’ … icon.
You can download the attachment and by clicking on the ‘View’, you will navigate to the list view of that module.

Sub-Panel
Navigate to Case By clicking on ‘Case’ (‘View’ icon), the details page will be redirected. By scrolling down, the customer will find the sub-panel.
Here the portal users will get the data in the sub-panel based on the selection of the “Relation Type” Contact or Account.
By clicking on any subpanel, the customer can see the record which is created by the Admin.
Click on the ‘View’ icon from the List View by clicking on the ‘Action’ … icon and navigate to details of a record. You will find sub-panel related to that record in detail view.
You can also add record from sub-panel view or navigate to detail view of that listed record.
Note: Only those ‘Calls’ and ‘Meetings’ will be visible in sub panel which are made portal visible from SugarCRM.

Dashboard Preferences
Portal Users get an option to set their required dashboard preference from the Customer Portal.
To set preferences, they can click on “preferences” option from the profile drop-down menu.
They can enable/disable preferences for dashboard as per requirement.
Note: When the customer will log in, they can see the preference as admin has set.


Notification Preferences
By scrolling down in Dashboard Preferences, your customers can set the preferences for the Notification.
Our login portal provides you the functionality to view notification which helps you to identify latest updates.
Create: If you perform any actions, the customers will get the notification if they are in that User Group. g. if new meeting is created by you, the customer will get notification related to the meeting.
Status Change: If Status is changed by you, they will get notification.
Notification
By clicking on the Notification ‘icon’, the customers will get the notification with the highlighted details as shown above image.
By clicking on the View All option, the customers can see all the notification in detail.
The ‘Delete’ option is also given if the portal user want to delete any notification.
You can also delete the unwanted notification from the list. Select notifications and click on “Delete” button or click on “Delete All” button if you want to clear the notification list.
You can also apply filtering on notifications for various parameters as mentioned below:
Type: Notifications are generated on basically three type i.e. on create, on status change and on case updates. So, you can apply filter and view specific type of notification list.
Module: Choose module to view module specific notifications.
Start Date and End Date: Choose dates to view in between notifications for that particular day, week, month or year.


Feedback
By using feedback section, a portal user can add feedback.
Add subject and description for feedback and save. It will get related to this particular contact in CRM. So, in contacts you will get sub-panel of feedback where there will be a list of feedbacks added by that portal user.
Portal user can also add multiple feedback from portal as an when require.

Calendar Page
If you have enabled the Calendar option from the SugarCRM Configuration, the Calendar will be displayed to your portal users.
By clicking on it, the calls and meetings records can be seen on the calendar as per the records date with time by your customers.
Click on any date and schedule activity as per your requirement.


Product Page
View the list of products from product page.
You can also navigate to detail view and find out the details of that specific product.
Note: Only those products will be visible in portal which are set as “portal visible” by admin from the detail view of portal.


View Quotes, Invoices and Contracts
Your customers can View or Download Quotes, Invoices and Contracts added by admin from SugarCRM side in Portal.
To download the PDF version of Quotes, Invoices or Contracts click on the download icon under ‘Actions’ column.

Accept or Decline Quote from Portal
By clicking on Quotes, the user can verify the details of Quote. A button to accept or decline the quote will appear in the detail view of a quote when it reaches the “confirmed” stage. [1]
If the user ‘Accepts’ the Quote, the status will be updated to “Closed Accepted”. [2]
After accepting the Quote, the ‘Proposal Status’ will also change to Converted. [3]
Similarly, you can also see the Status in your SugarCRM portal as Closed Accepted and Converted. But if the customer declines the ‘Quote’, they must add a Reason for Decline. [4] The status in ‘Quote’ will be updated as Closed Lost.
Similarly, you can also see the Status in your ‘SugarCRM portal’ as Closed Lost. [5]
Note: The customer can see the ‘Rejection History’ field because the admin has selected it during the Portal Layout setup.
Later, you can edit the “Quotation” on the basis of rejection reason and resend the same to the User. Admin can edit the quotation on the basis of rejection reason and resend the same to the user.
Note: This cannot be changed again from the portal.


Custom Modules
If you have added any Custom Module and enabled as well from the CRM side for the customer portal, your customer will get the custom module and add/edit/check the records as per the accessibility rights.
As per your portal layout settings for list view / detail view, you will get the layout with the details. You will also get the Dynamic Dropdown option if you added that fields.

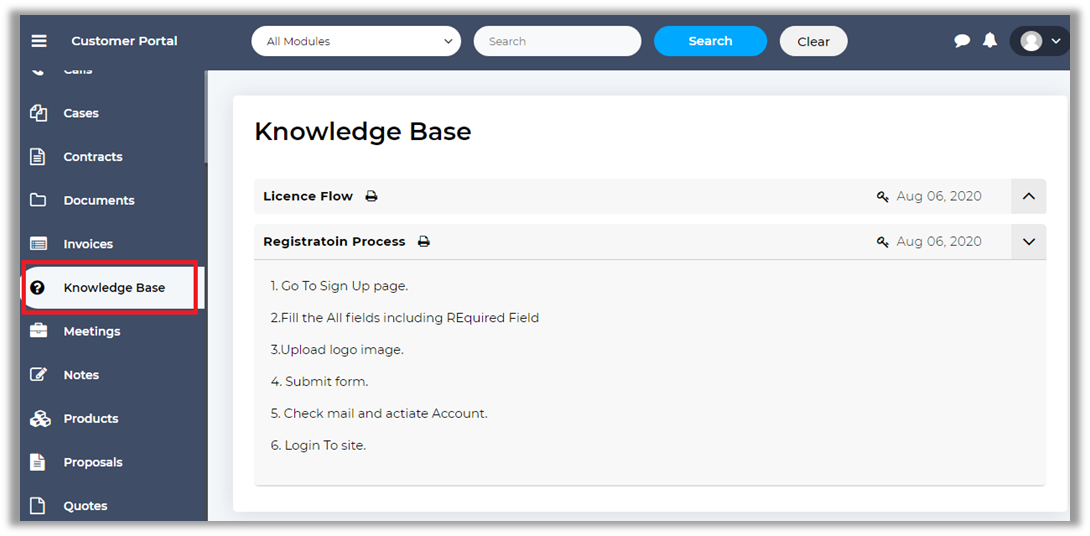
Knowledge Base
Access the Knowledge Base module of SugarCRM from portal to view question and answers based on category.
Note:
Quote and Knowledge Base module support is only for SugarCRM Pro and Enterprise version.
Knowledge Base can be accessed without login by using this “[bcp-knowledge-base] “shortcode, and make sure document status should be public.
Profile
Customers can see their profiles and update the details. Customer can change the profile picture by clicking on the Change Image caption and change the password as well.

Chatting
Once twak.to plugin is successfully configured, you can start chatting with your portal users using the chat widget.
The chats can be monitored from the twak.to dashboard. Once the chat is completed, a transcript of that chat will be generated and sent to the configured email address.
Also, a case will be generated in the CRM with the chat transcript which can be related to a concerned user.

