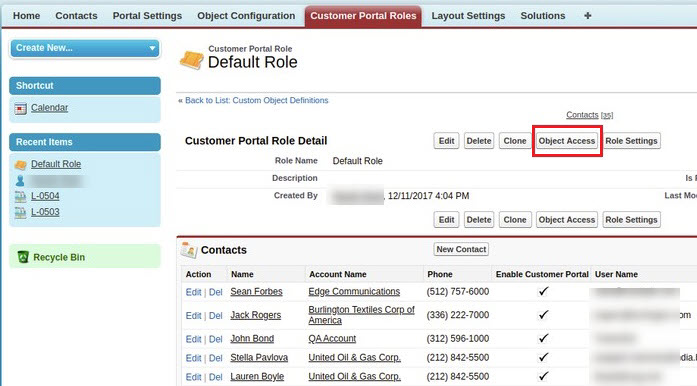
If you navigate to the Role Setting page, you can see the Object Access option. In the Object Access setting, you can see the option to enable/disable the product sub-grid. So, you can enable/disable the product sub-grid for entities from the Role Setting page.
Object Access Setting
By clicking on the ‘Object ’ button, Object Setting will popup.

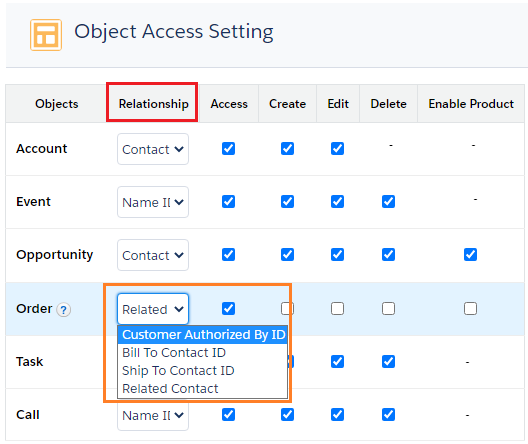
The standard (default) and custom modules that are enabled in the Object Configuration will directly reflect in the Object Access Setting.

From here, enable the modules by checking the Access option and assign the rights to Create/Edit/Delete as per requirement.
Relationship selection is provided to select the relationship between modules and contact or other relation.
Product Sub-Grid Selection
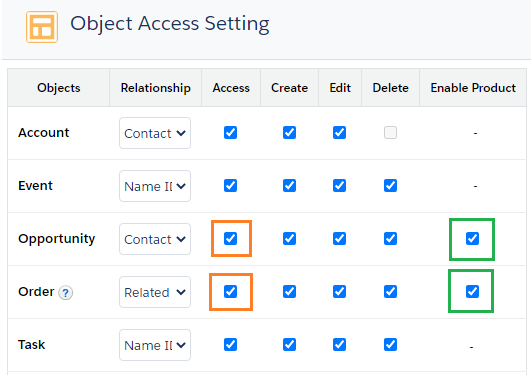
To enable the Product selection, you must have enabled that module. Once you enable the access, you can enable the ‘Product’ for that module.

You can also enable the ‘Product’ if you want to provide product selection while adding records in the customer portal.
You can also edit the access rights for the custom module.
After configuring the Object click on the ‘Save’ button.
If you have enabled the new module and enabled the access rights, by saving the setting, you will be notified to set the Layout for a newly added module.
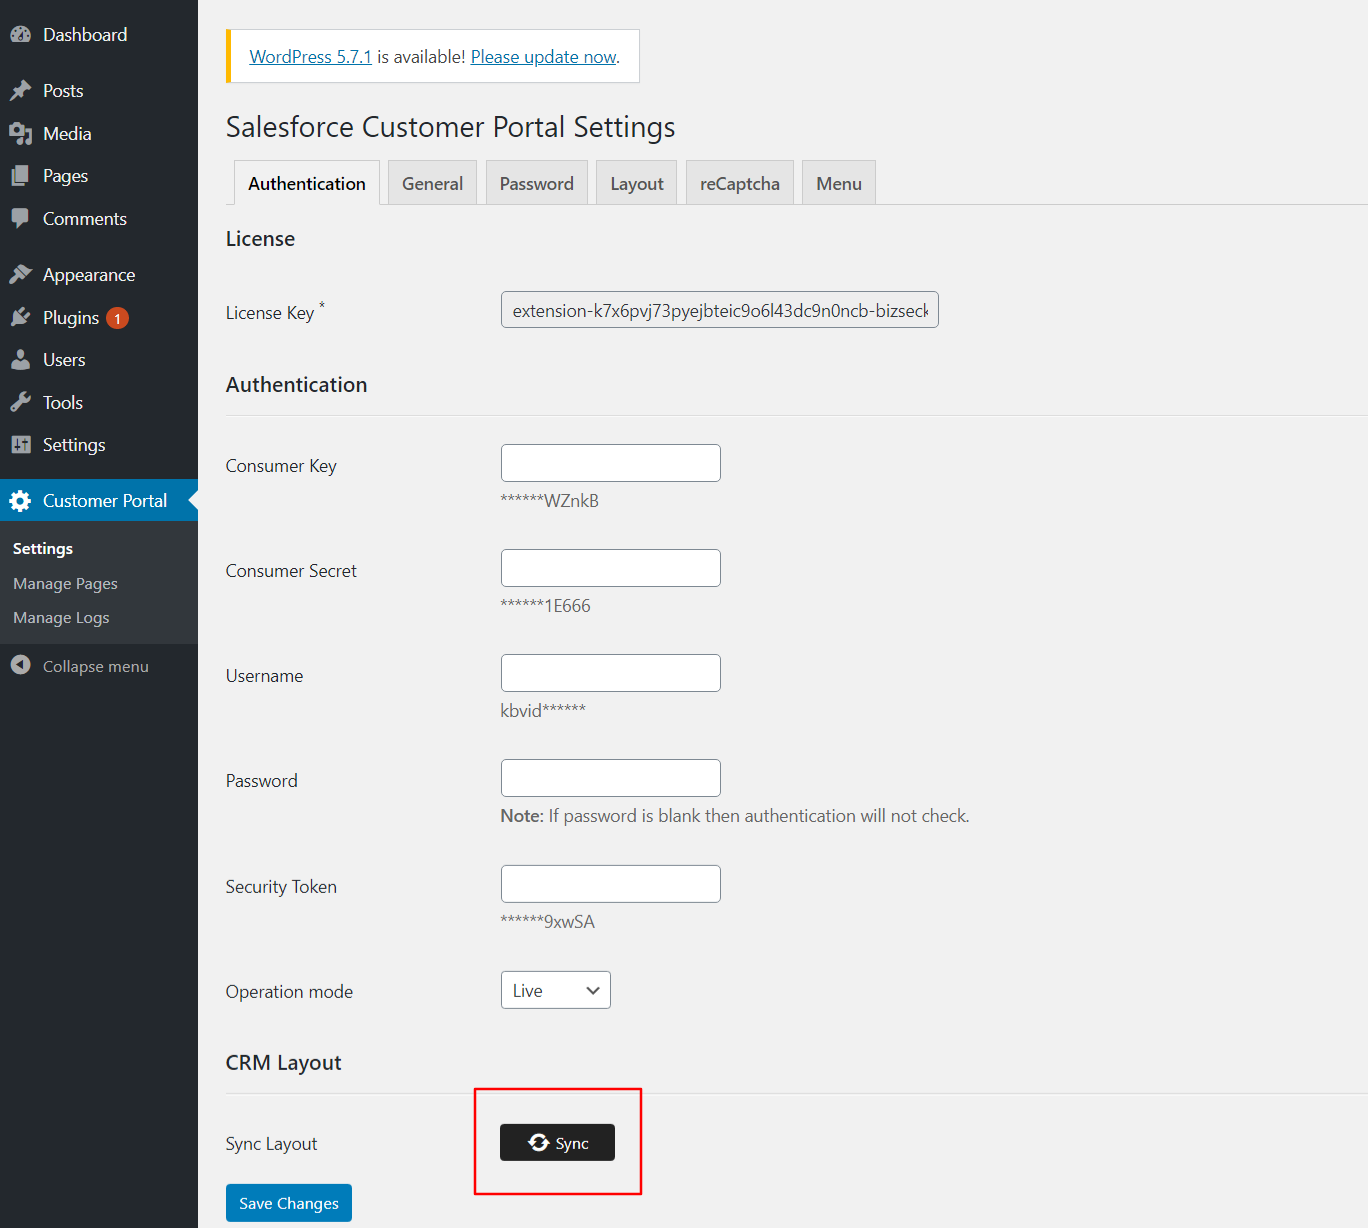
Note: After saving the configuration in the salesforce, you need to sync it in your WordPress website. Here is how you can do it.
WordPress Backend
Navigate to the Customer Portal ➤ Authentication, you will land on the ‘Salesforce Customer Portal Settings’ page. Now scroll down and press the ‘Sync’ button to successfully sync the updates.


