


Yes, we do provide support for WPML to manage multi-language in WordPress. We provide the multi-language translation to the portal users to translate the portal’s content and provide users their regional language in the customer portal. WordPress admin can configure the multi-language settings and translate the portal content to the desired language.
To know more language settings and tools for Multi-Language management read the following;
Language Settings for the Site
Navigate to WordPress Settings ➤ General to install the language(s). From the General page, scroll down to Site Language from where you can select the language.

From Site Language, you will find a list of languages with Installed and Available.
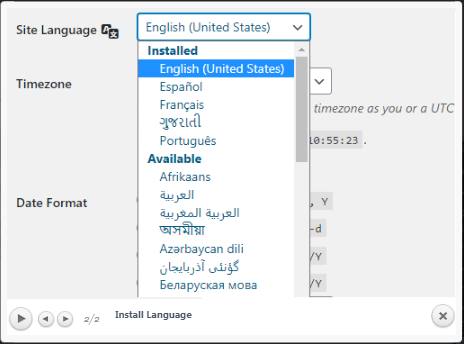
You can select the required language and save the language settings once. The language will be installed.
Language Settings for the Customer Portal
After installing the language, navigate to the Customer Portal ➤ General, you will land on the ‘General Settings’ page.
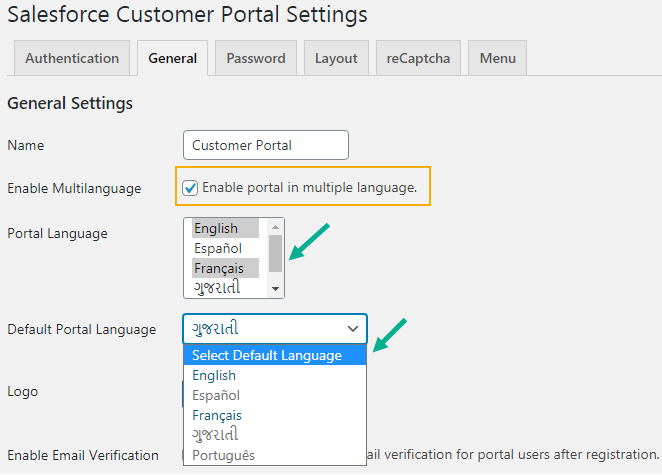
Enable Multiple: Tick makes the box to enable the multiple languages in your store.
Portal Language: Select the languages to enable the portal which will be displayed on the portal.
Default Portal Language: Select the language to display as default for the customer portal.
Translating Methods:
There are two ways to add the language translation for the portal:
- Using WordPress or
- Third-party plugins: Loco Translate
Using default WordPress
You must install the WP-CLI Software if you want to translate the portal content using WordPress. After installing the WP-CLI software, follow the below steps:
We have already generated a template POT file including all the static content (strings) used in the plugin.
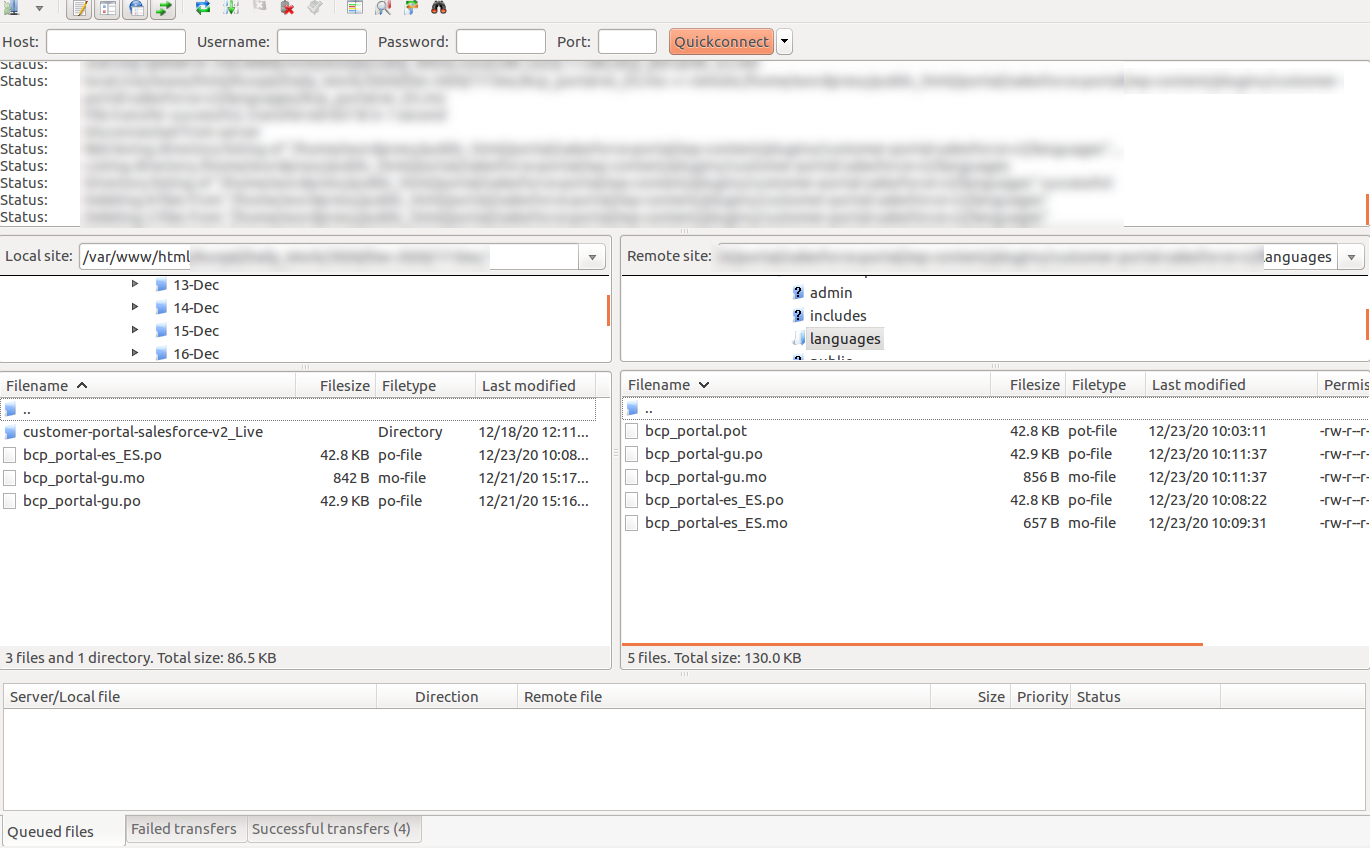
You just need to copy template files in the desired language.
Ex.: Suppose, if you want to translate the plugin in the ‘Spanish’ language, you need to copy bcp_portal.POT file and after pasting the file, rename the file as “bcp_portal-es_ES.po” file where bcp_portal represents our portal’s slug and es_ES represents the language slug.
Add translation for all the content (strings) manually from the PO file and generate the MO file.
Note: You can generate an MO file by using any free website and put that file in the language folder of the plugin. You need to name the PO file (i.e., bcp_portal-es_ES.mo).
You need to translate ‘JavaScript’ files by using the below command which will create a JSON file that includes JavaScript strings.
wp i18n make-json bcp_portal-gu.po –no-purge
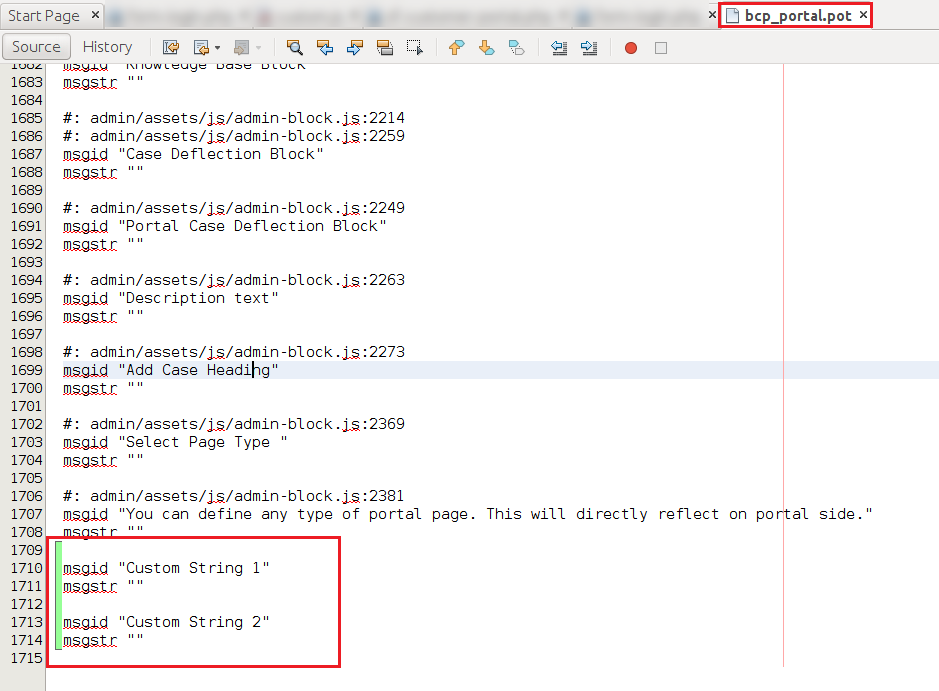
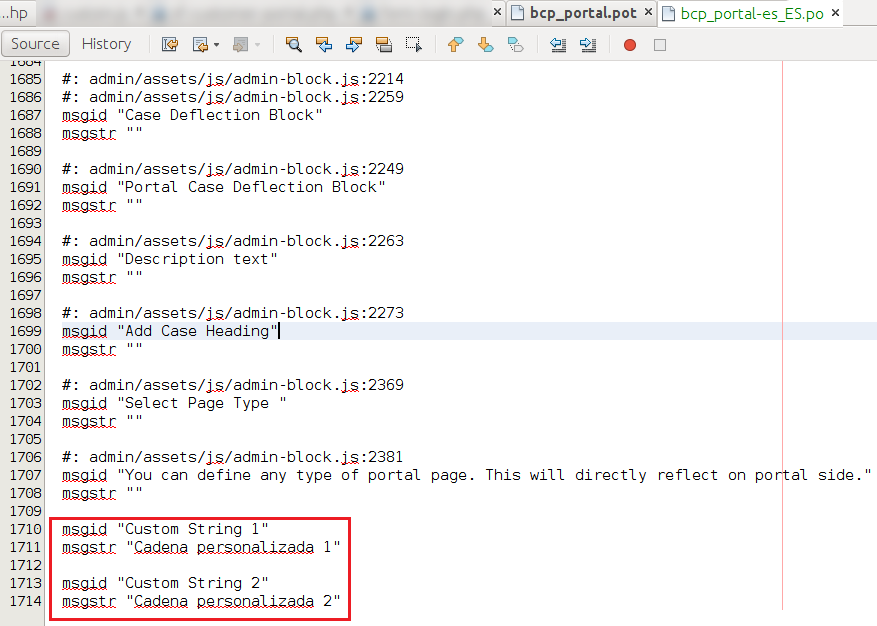
First, you need to add any custom string into the POT file. “msgid” represents the original string name, and ”msgstr” represents the translated string but in the POT file, you need to keep blank the “msgstr”.
Once you added the string in the POT file, you need to copy those custom strings into the PO file and once you copied the strings in the PO file, you need to add the translated string in the “msgstr” text.
When all the custom strings are added, you need to generate the MO file again and replace it with a respected MO file.
Using Third Party Plugin- Loco Translate
You can also translate the content by installing Loco Translate, the third-party plugin into WordPress. To install “Loco Translate” and translate the content with it, follow the below steps:
![]()
Install the ‘Loco Translate’ plugin into your WordPress admin.
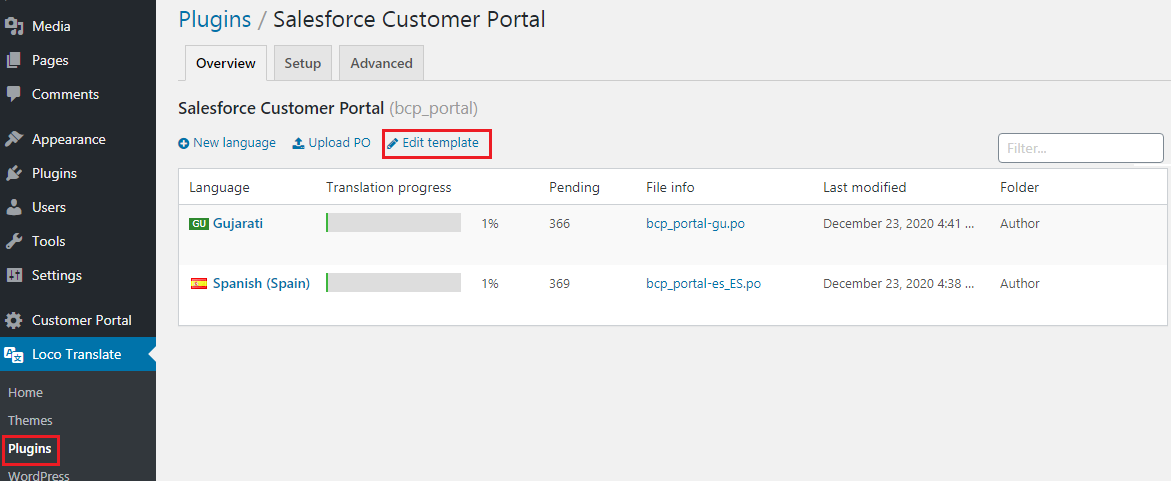
You can check the translation progress, by clicking on the ‘Salesforce Customer Portal’. You will navigate to the Language Translation details from where you can edit the existing language.
![]()
Click on any language to translate the source texts.
![]()
Now, on that specific language page, select any source text from the list of the Source Text that appears for the portal users.
![]()
Under the selected language translation, add the translated content and click on the ‘Sync’ button.
Now, if you want to add the custom strings, navigate to the ‘Plugin’ of ‘Salesforce Customer Portal’ and click on the Edit Template caption.
By clicking on the ‘Edit Template’ button, you will navigate to the template page where you will find the list of all the Source Text of the customer portal. By clicking on the + (Add) button, you can add the new string (content) for the portal.
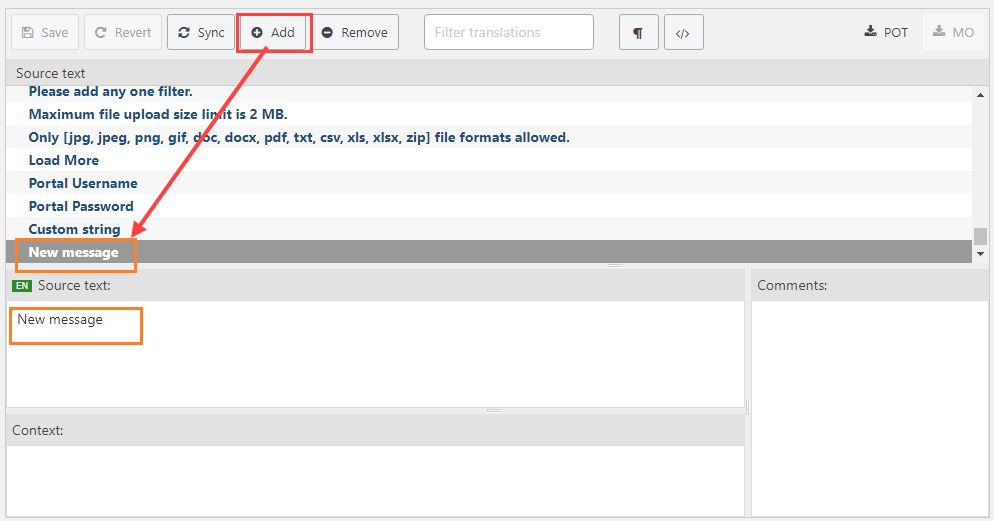
Note: Once you add the new string, edit the Source Text, but you must keep the Content blank.
By clicking on the Sync button, the added string will be updated in the Source Text and from there you can translate in the specific language.