


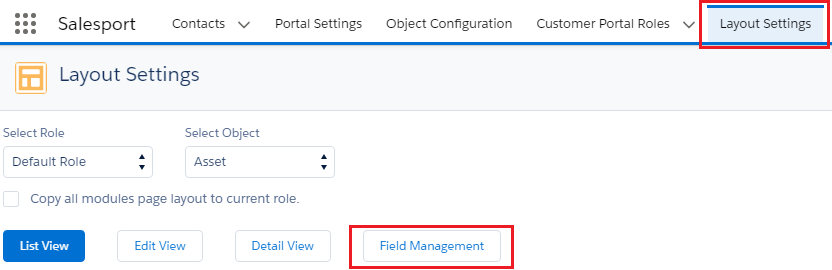
By clicking on Field Management, you can manage the fields of the selected object. And there you will get two submenus under ‘Field Management Settings’. They are General management & Advance Management. So let’s look at some settings of General Management.
For Salesforce Classic
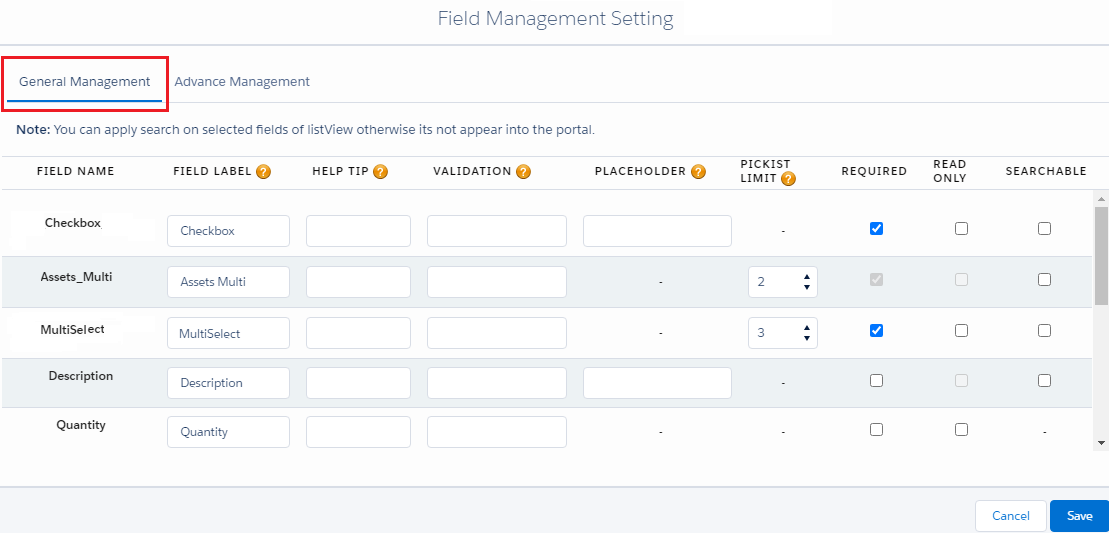
General Management- You can manage fields related to all the general details and text captions that will be displayed in the customer portal. Following are the options available in General settings.

- Field Name: You will get the list of the fields as per the selection of the object under the Portal Layout Settings.
- Field Label: Insert the desired ‘label’ of the field so portal users can easily recognize the fields.
- Help Tip: Insert a short/instructive message regarding the field.
- Validation message: Insert custom validation messages for the field to give the mandatory instruction.
- Placeholder: You can insert a custom placeholder for any field to display what to insert in the specific field. This placeholder will be applicable only for text fields.
- Picklist selection: By using Picklist selection, you can define the limits from the Picklist selection for the customer portal.
If there are 5 options in the picklist of any field but you want to allow a maximum 3 options selection out of 5 options, the portal user can select up to 3 options in the portal, but the customers cannot select more than 3.
- Required: If any field is mandatory from the portal side, tick the ‘Required’ option. The portal users will get it as a mandatory field.
- Read Only: If you want to provide a field that should not be editable for the portal user but just want to display there, tick the ‘Read Only’ option.
- Searchable: Portal users can filter the records as per the search option. If you want to add the field in the search option in the portal, select that field as ‘Searchable’.
For Salesforce Lightning

General Management- You can manage fields related to all the general details and text captions that will be displayed in the customer portal. Following are the options available in General settings
- Field Name: You will get the list of the fields as per the selection of the object under the Portal Layout Settings.
- Field Label: Insert the desired ‘label’ of the field so portal users can easily recognize the fields.
- Help Tip: Insert a short/instructive message regarding the field.
- Validation message: Insert custom validation messages for the field to give the mandatory instruction.
- Placeholder: You can insert a custom placeholder for any field to display what to insert in the specific field. This placeholder will be applicable only for text fields.
- Picklist selection: By using Picklist selection, you can define the limits from the Picklist selection for the customer portal.
If there are 5 options in the picklist of any field but you want to allow a maximum 3 options selection out of 5 options, the portal user can select up to 3 options in the portal, but the customers cannot select more than 3.
- Required: If any Field is mandatory from the portal side, tick the ‘Required’ option. The portal users will get it as a mandatory field.
- Read Only: If you want to provide a field that should not be editable for the portal user but just want to display there, tick the ‘Read Only’ option.
- Searchable: Portal users can filter the records as per the search option. If you want to add the field in the search option in the portal, select that field as ‘Searchable’.