


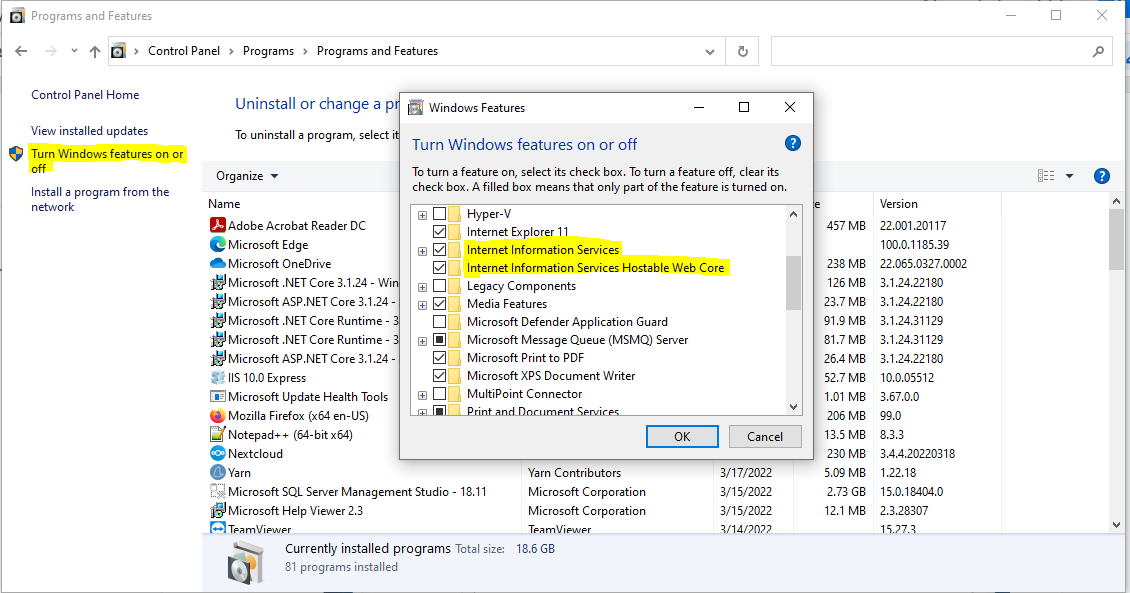
- First of all, check if server has IIS. if not then install latest version of IIS here. Go to Control Panel > Programs and Features > Roles and Features.
- Check if the IIS feature and all the related features inside are installed. If not then select IIS, IIS Hostable web core and all related features.
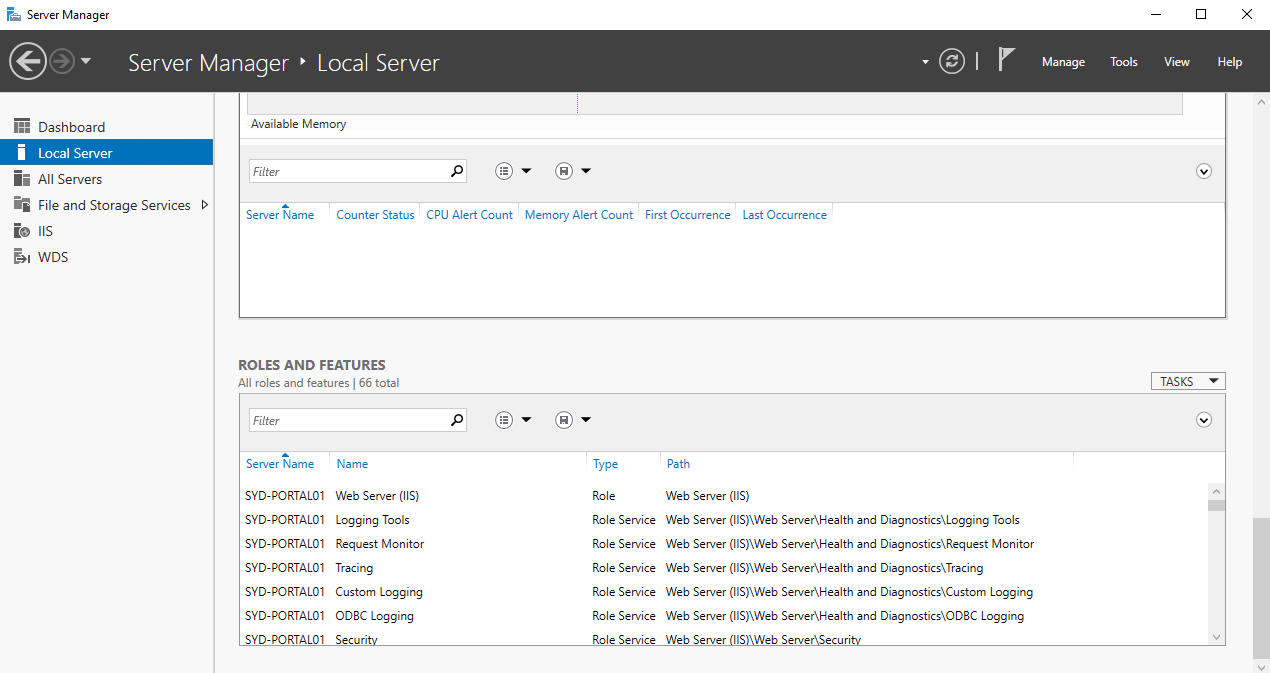
- If the server has Server manager than open server manager go to local server scroll down and check if all the roles and features are their. If not then click on add roles and feature and add following features.
- IIS, Windows deployment service and all related features.
- Then install the version of hosting bundle for which your site is created. (ex. Portal is create in Net core 3.1 then install net core hosting bundle for 3.1 latest version)
IIS configurations for .net
– Need to enable windows features for :
– IIS
– IIS Hostable Web Core
– .Net Framwork 4.3 Advanced Service
– .Net Hosting Bundle (3.1.24 if .Net 3.1)
– DB with SQL Authentication
– Give permission of project to IIS User
We will provide you two published (compiled) code folders. One is for the API and another is for Portal Web.
To host Portal Web, follow below steps:
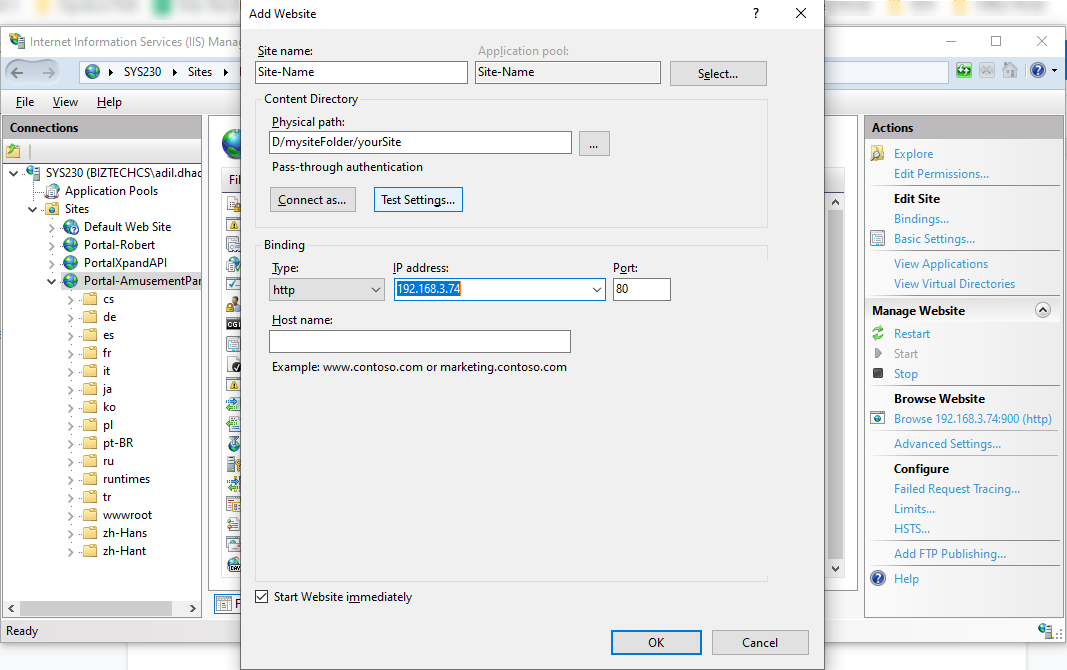
Go to IIS Manager and Create a site if not exist already. Enter site name then browse the path where you published the site on folder and keep type http and select ip address and give some different port. Then click on ok and site will be pubshed.
Now right click on site and select edit permissions and click on security give all control to group or user names. Add IUser and IISUser if not added already and give them all control.
To publish an API, follow the same steps as above. Portal API’s url needs to be configured in Portal Web.
You will need to install SQL server and we will provide you the database script to update it with the default database structure.