Register app in Azure AD:
Login with Dynamics 365 and in a new tab browse the below URL:
Open the Azure portal home page. Use the search input to find Azure Active Directory and click on it.
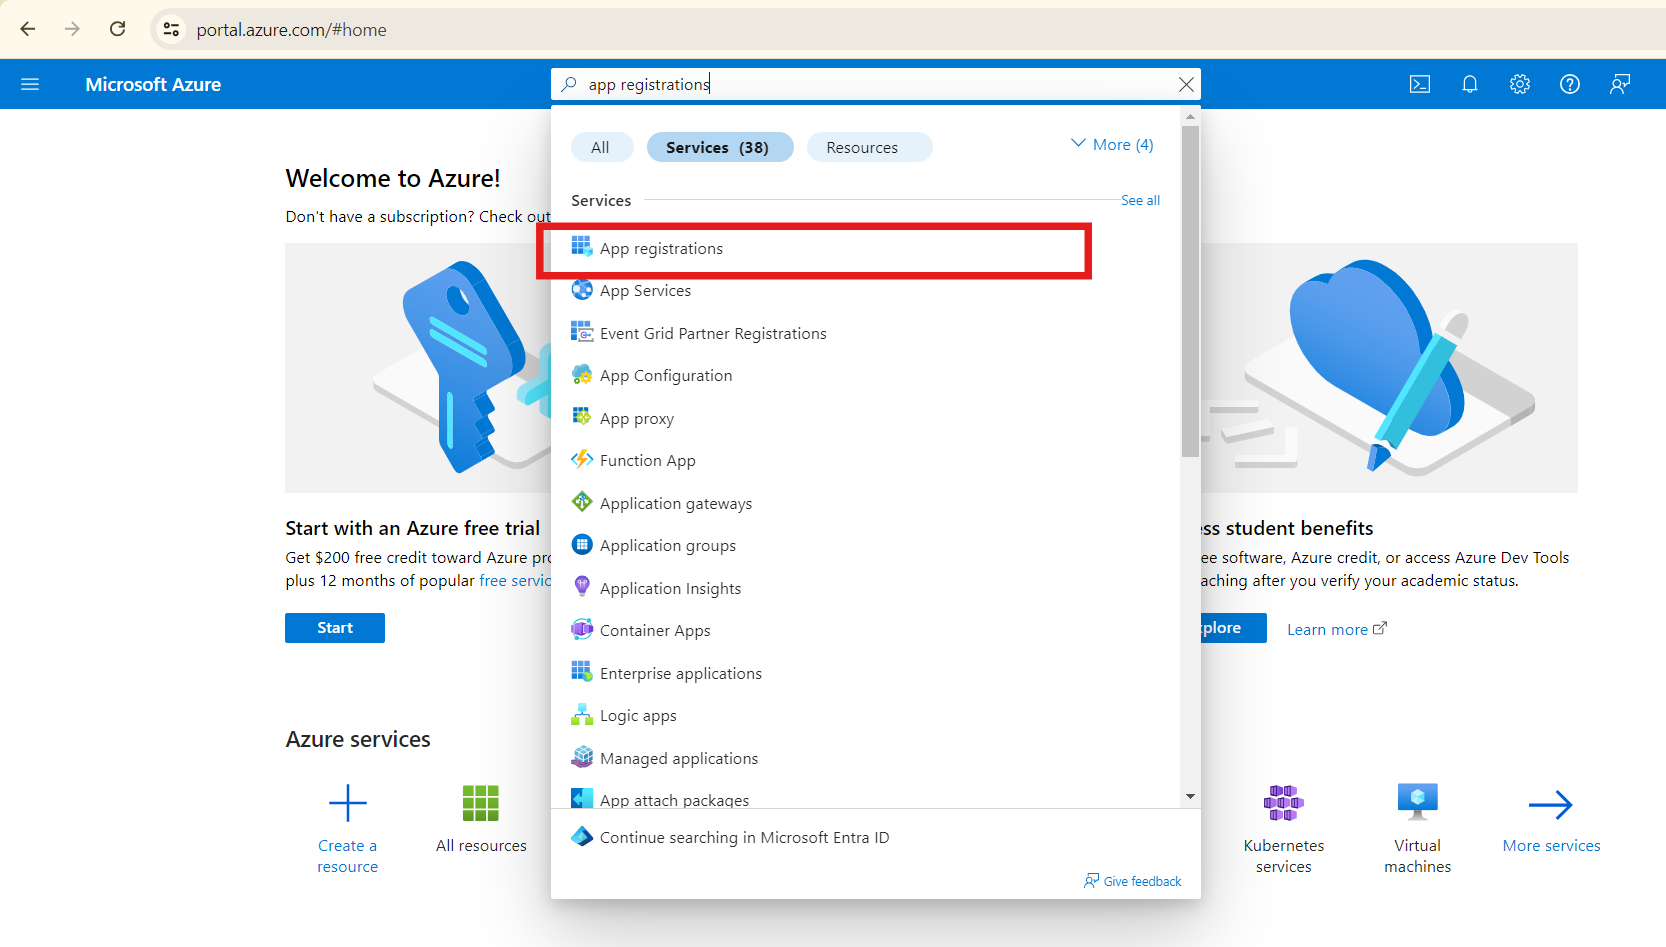
To create an app, click App Register from the left menu, then select New registration.

Fill in the app name in the registration form and click Register.

Once the app is created, a new app details page will open. Copy the Application (client) ID for OAuth.
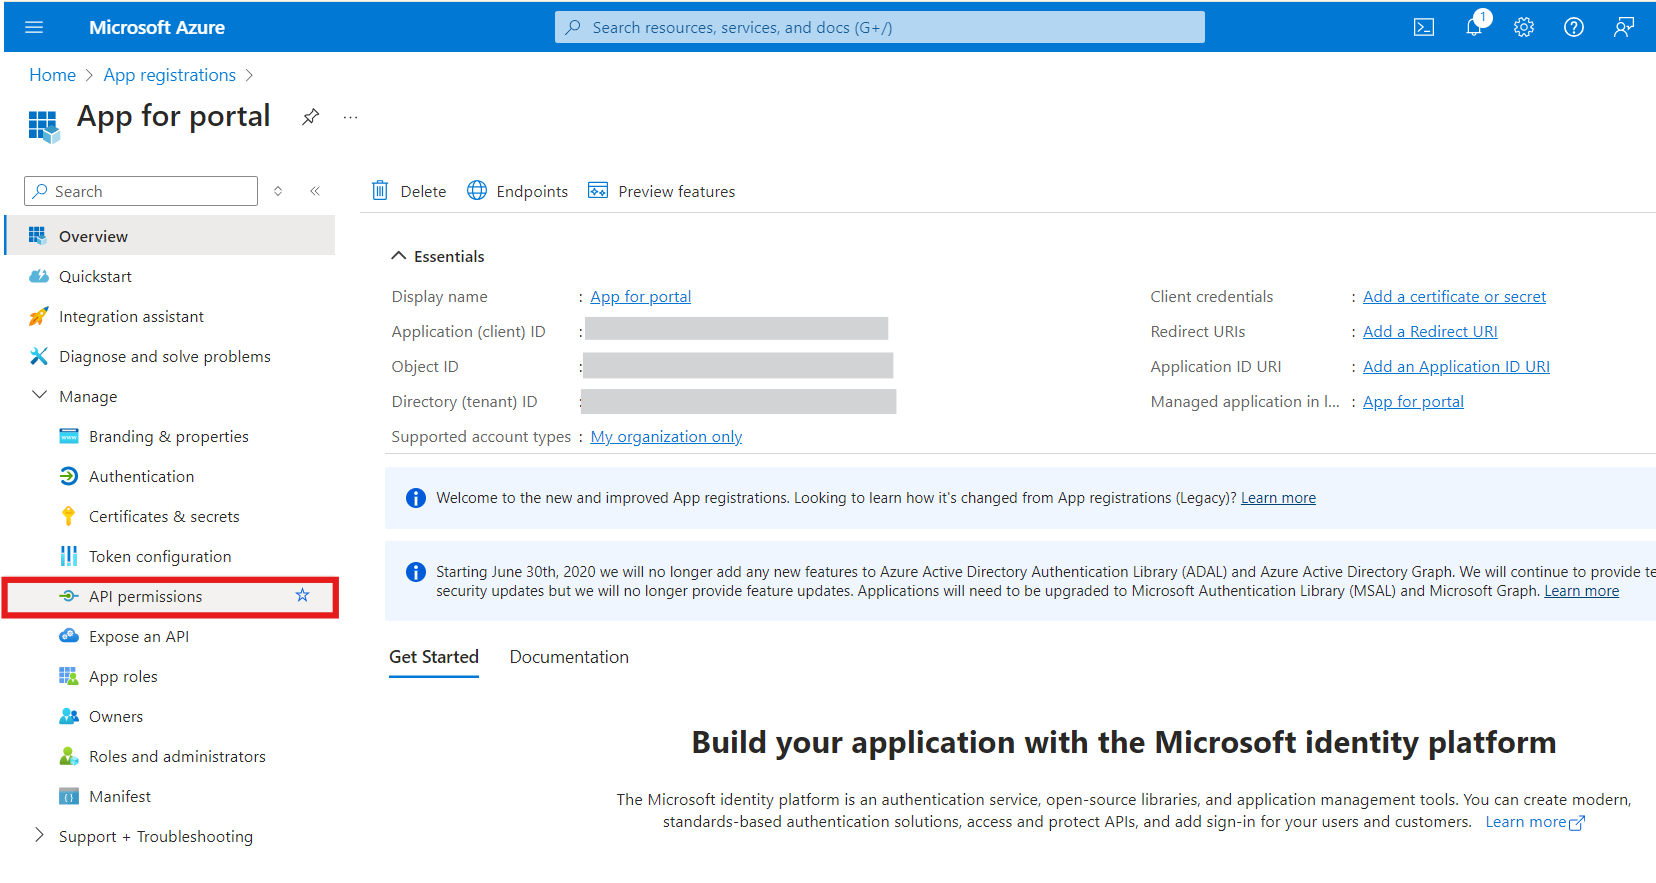
To provide Dynamics 365 API permissions, click on API permissions from the left menu, then select Add a Permission.

In the side panel, click on Dynamics CRM to view permissions.
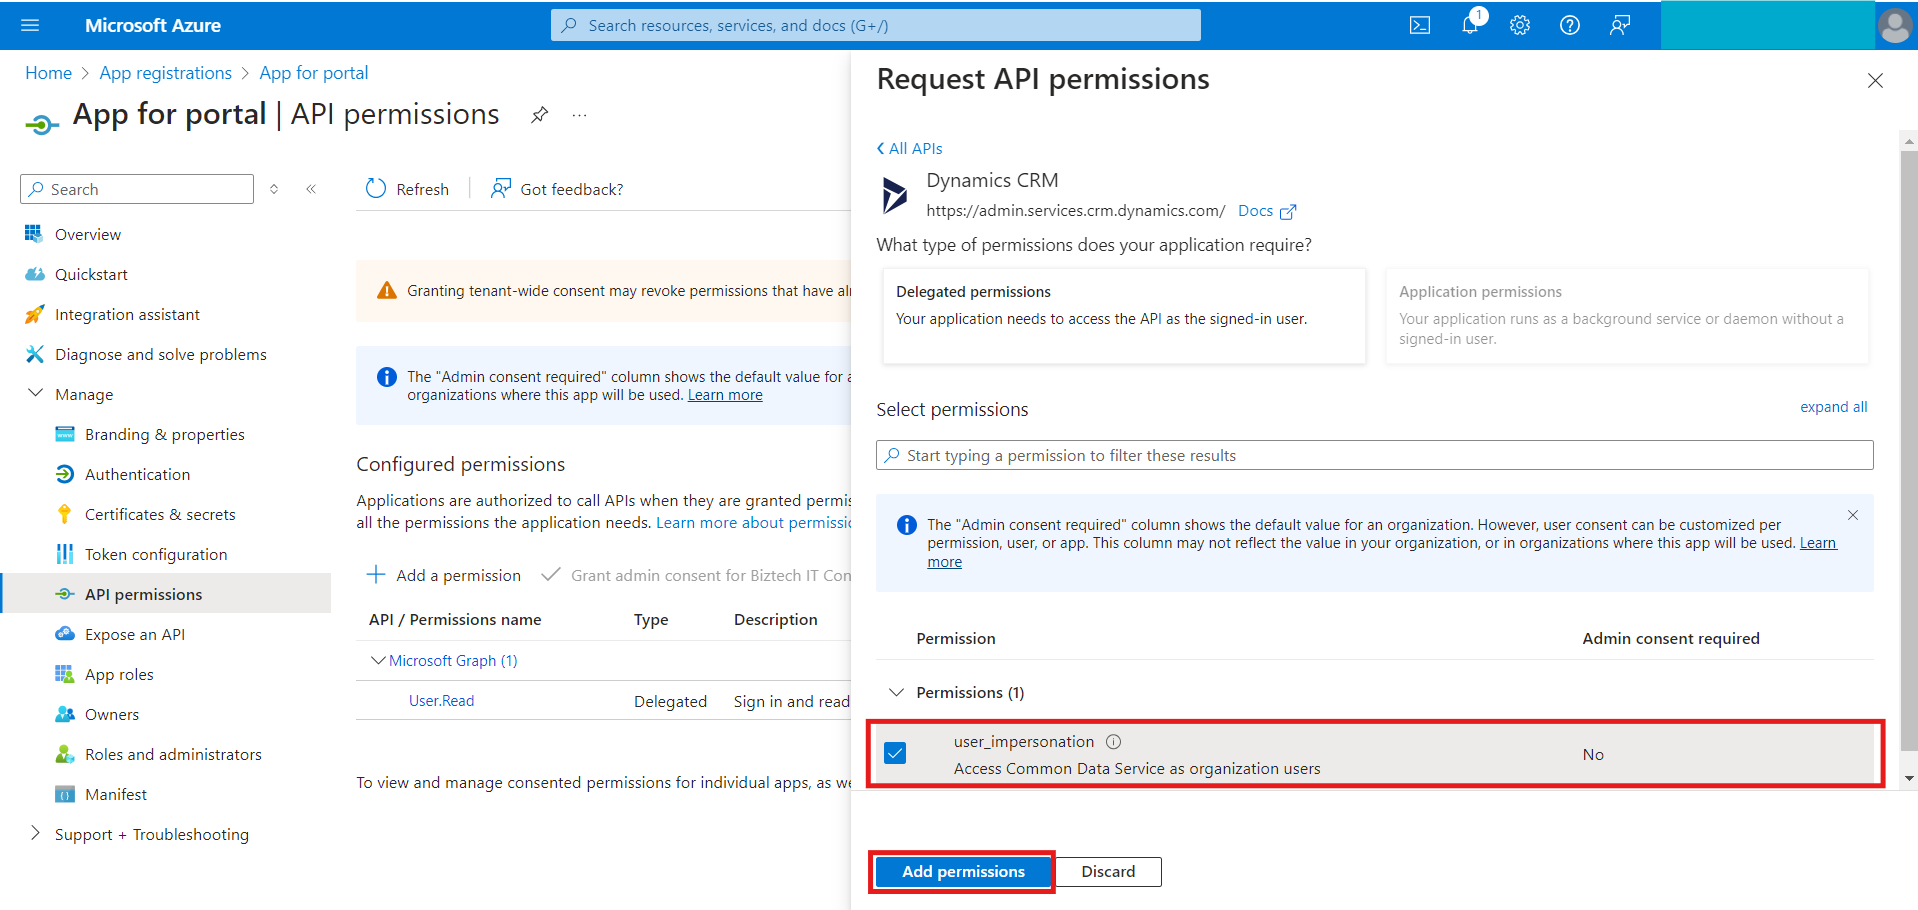
Check the user_impersonation checkbox and click Add permission to add CRM common data service permissions.
To add SharePoint permissions, click Add New Permission again, then select Delegated permissions on the next screen.
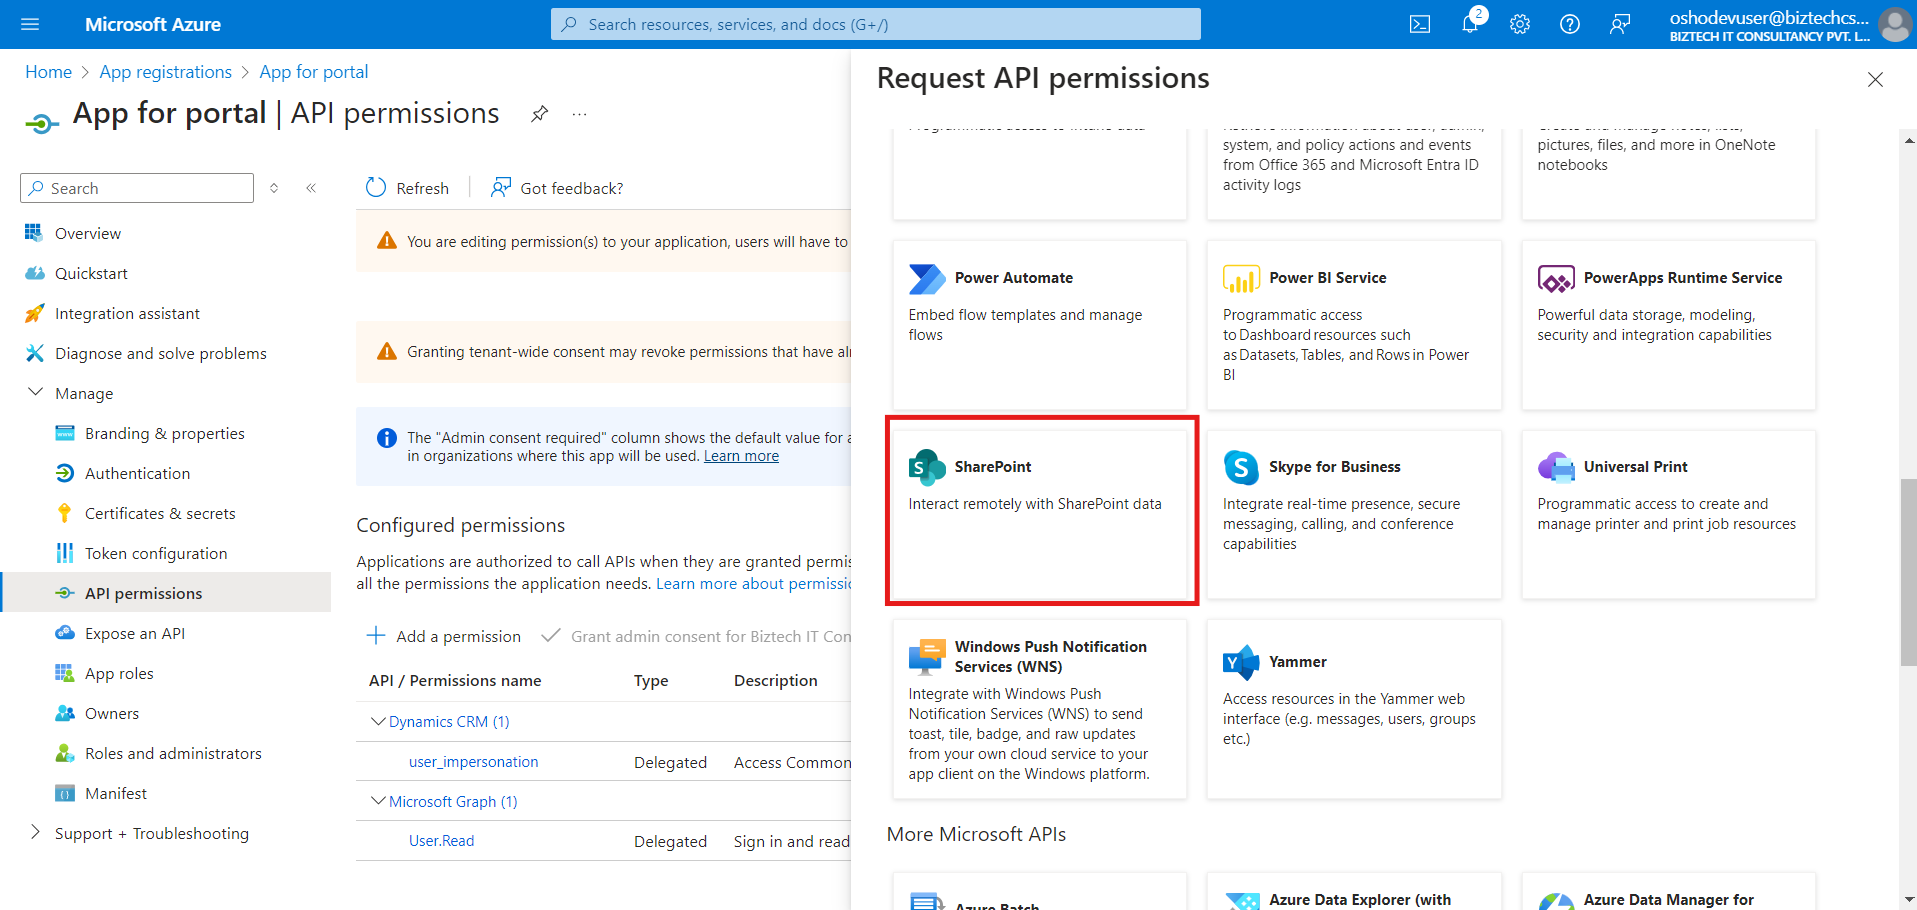
Now select Delegated permissions on the next screen.
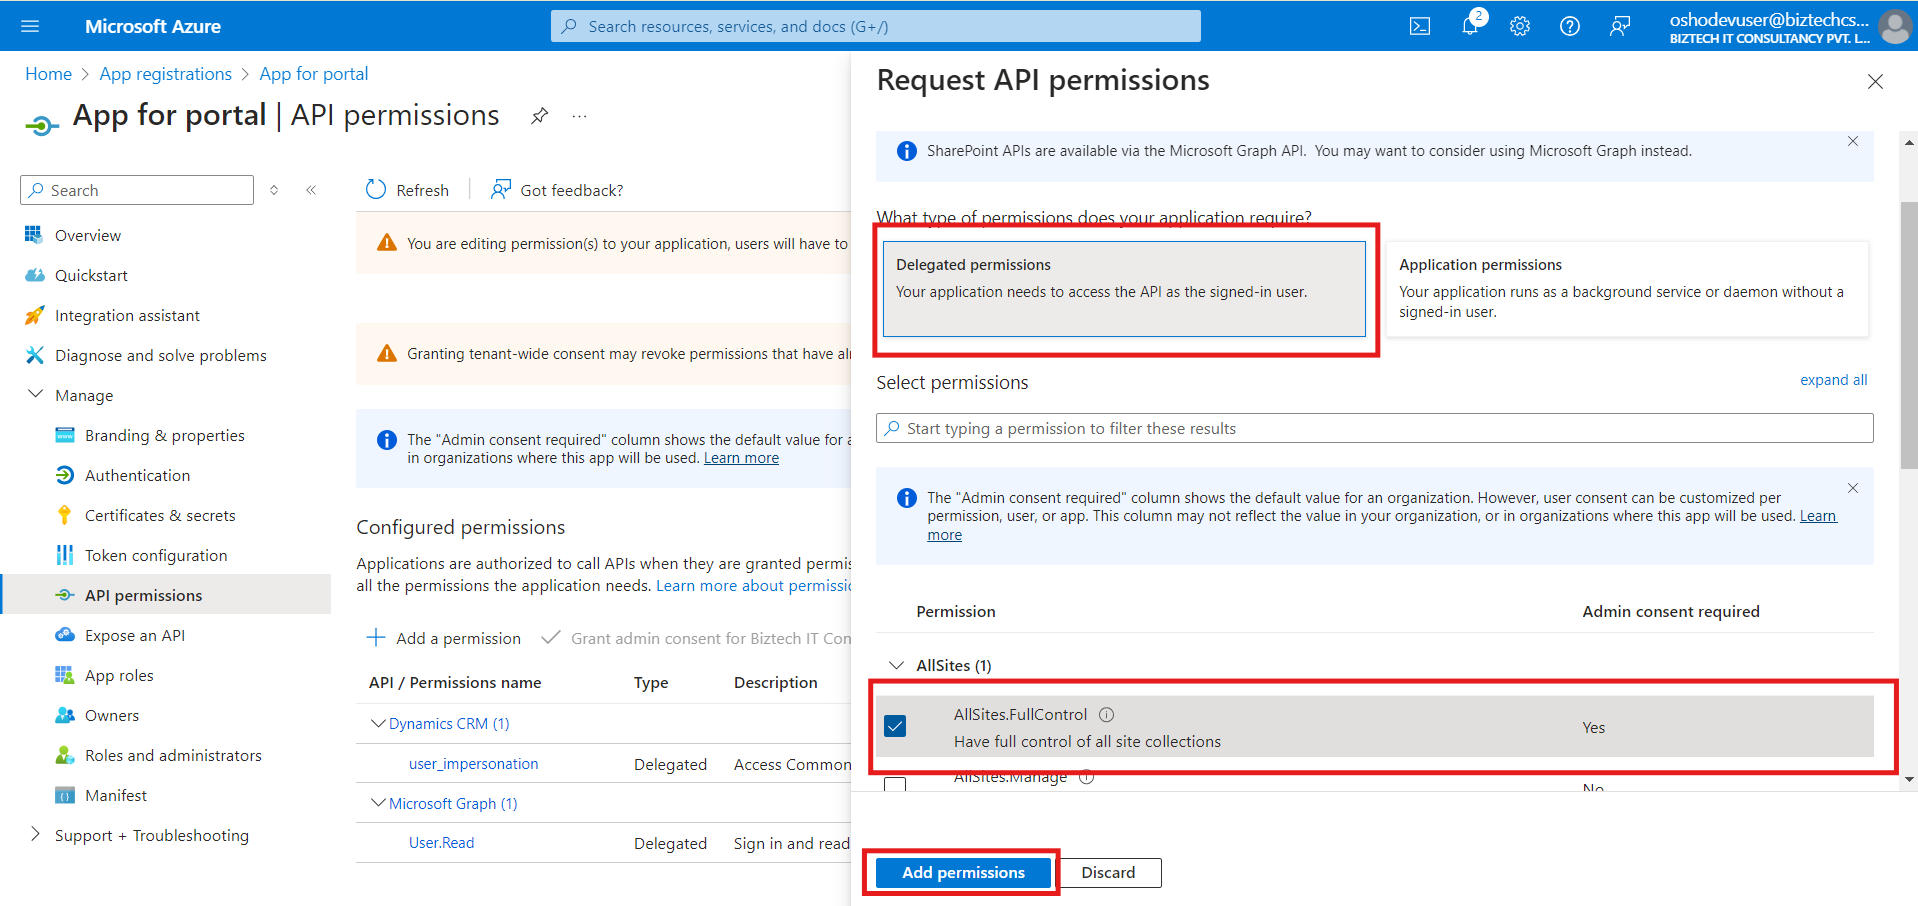
In the permission section, Expand AllSites and check the AllSites.FullControl checkbox. Click Add permission to add SharePoint permissions.
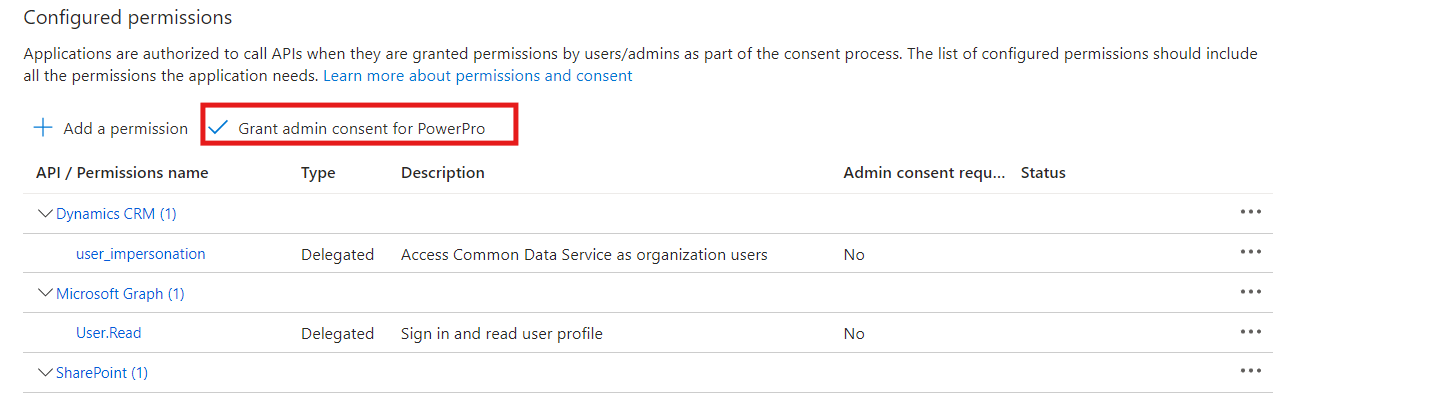
Click Grant admin consent for [user] to grant permissions.
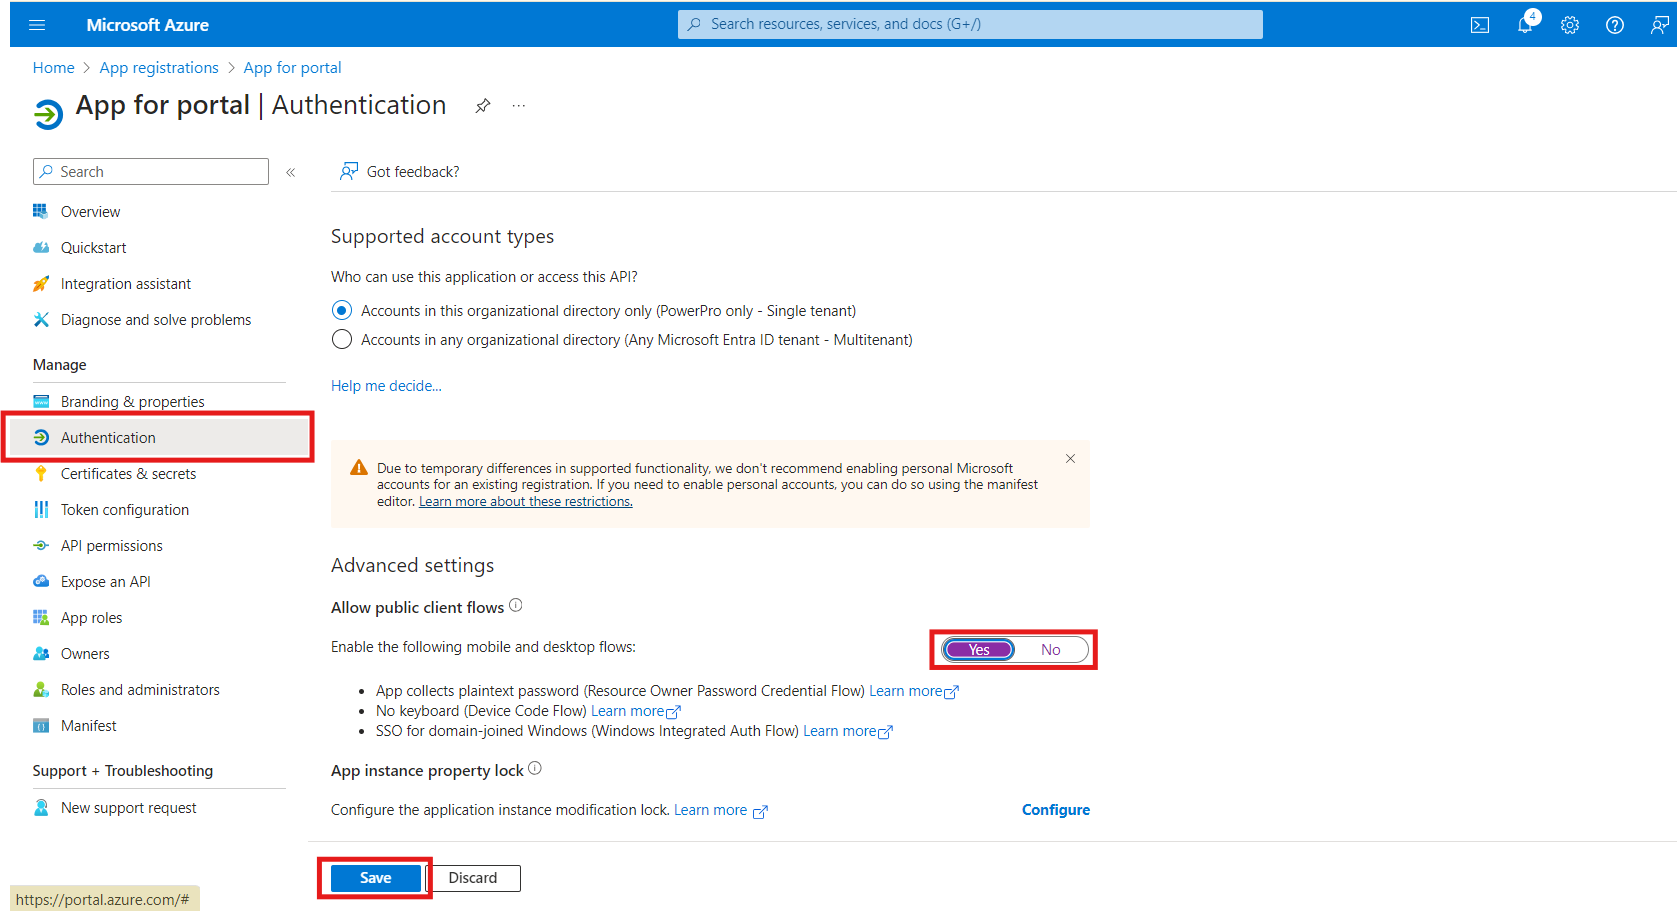
Click Authentication from the left menu.
On the left side, Advanced settings is enable Allow public client flows by switching it to Yes, then click Save.
To create a client secret for the app, click Certificates & secrets from the left menu and select New client secret.
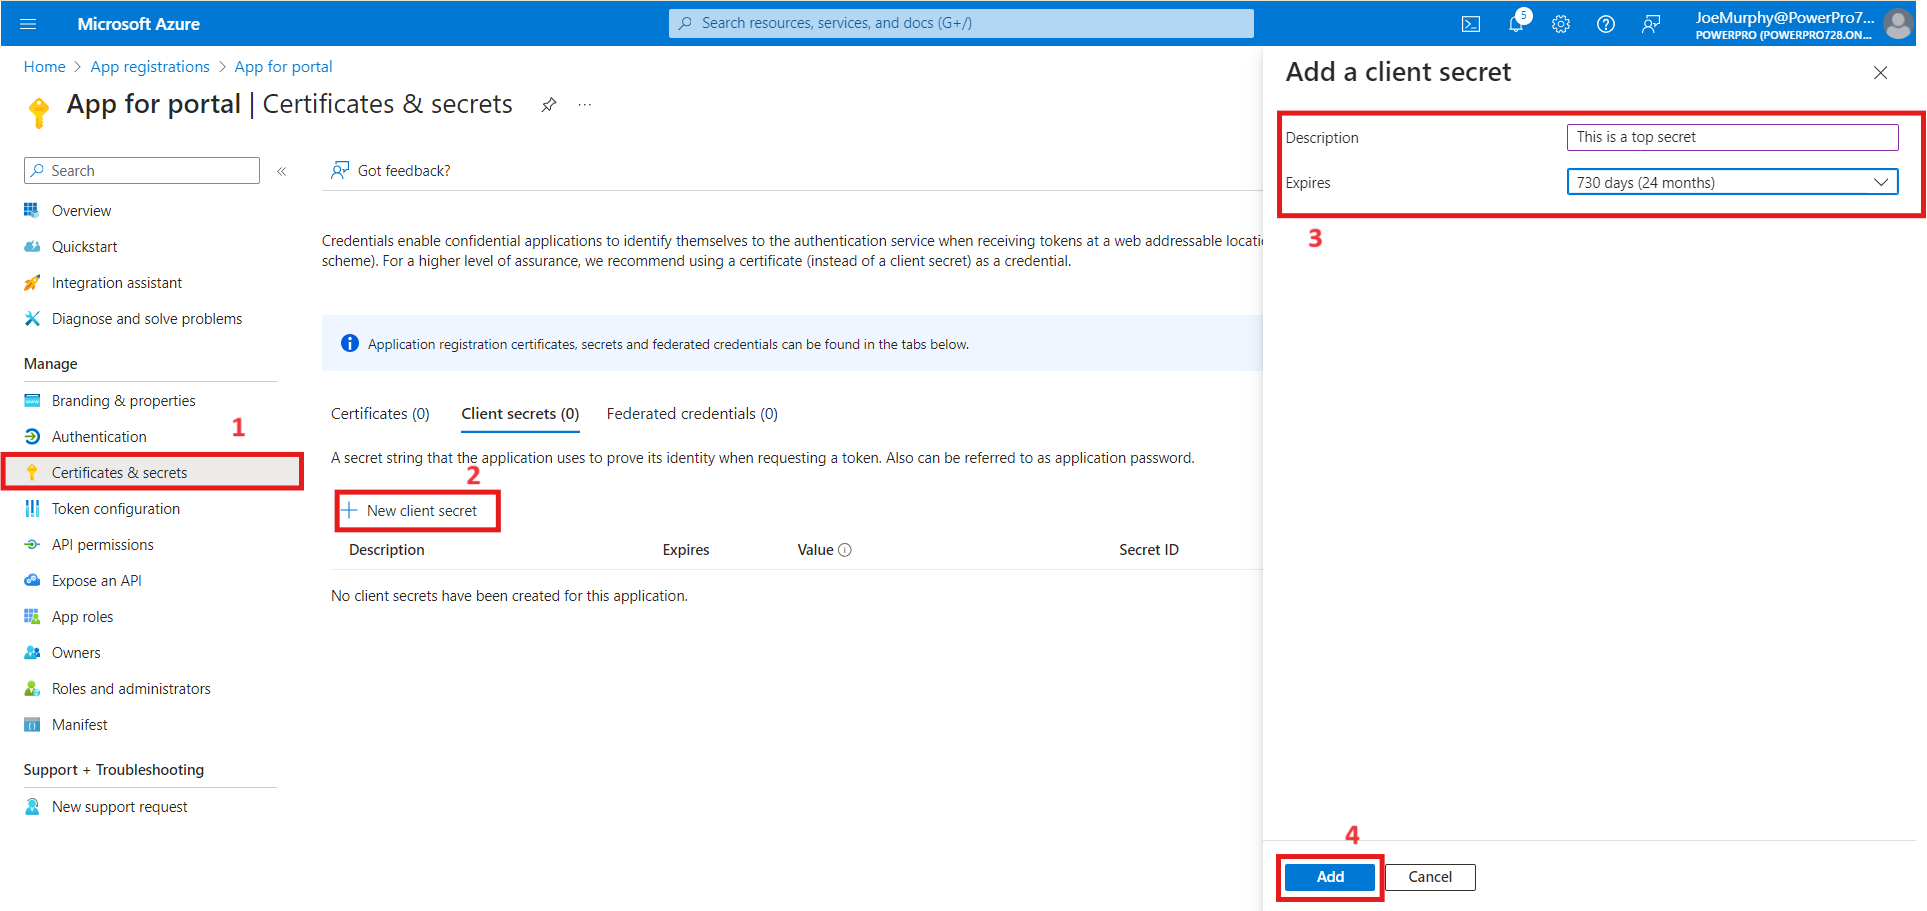
Add a description, select the expiry time for the client secret, and click Add.
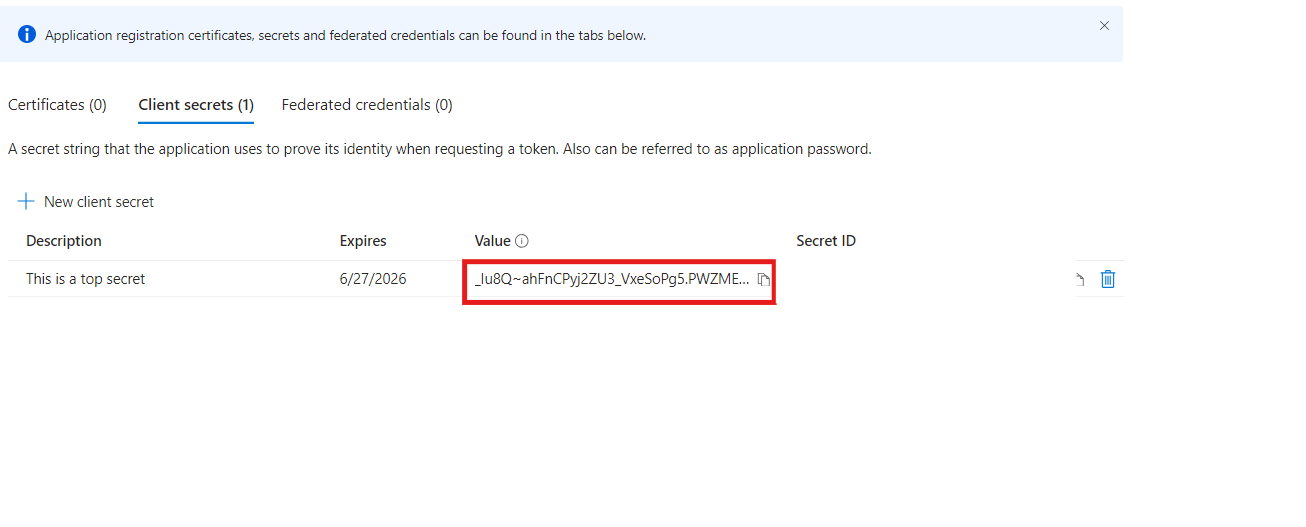
After the client secret is created, it will display to clinet secrent list from here copy the client’s secret value(It is 1 time copyable) for OAuth.
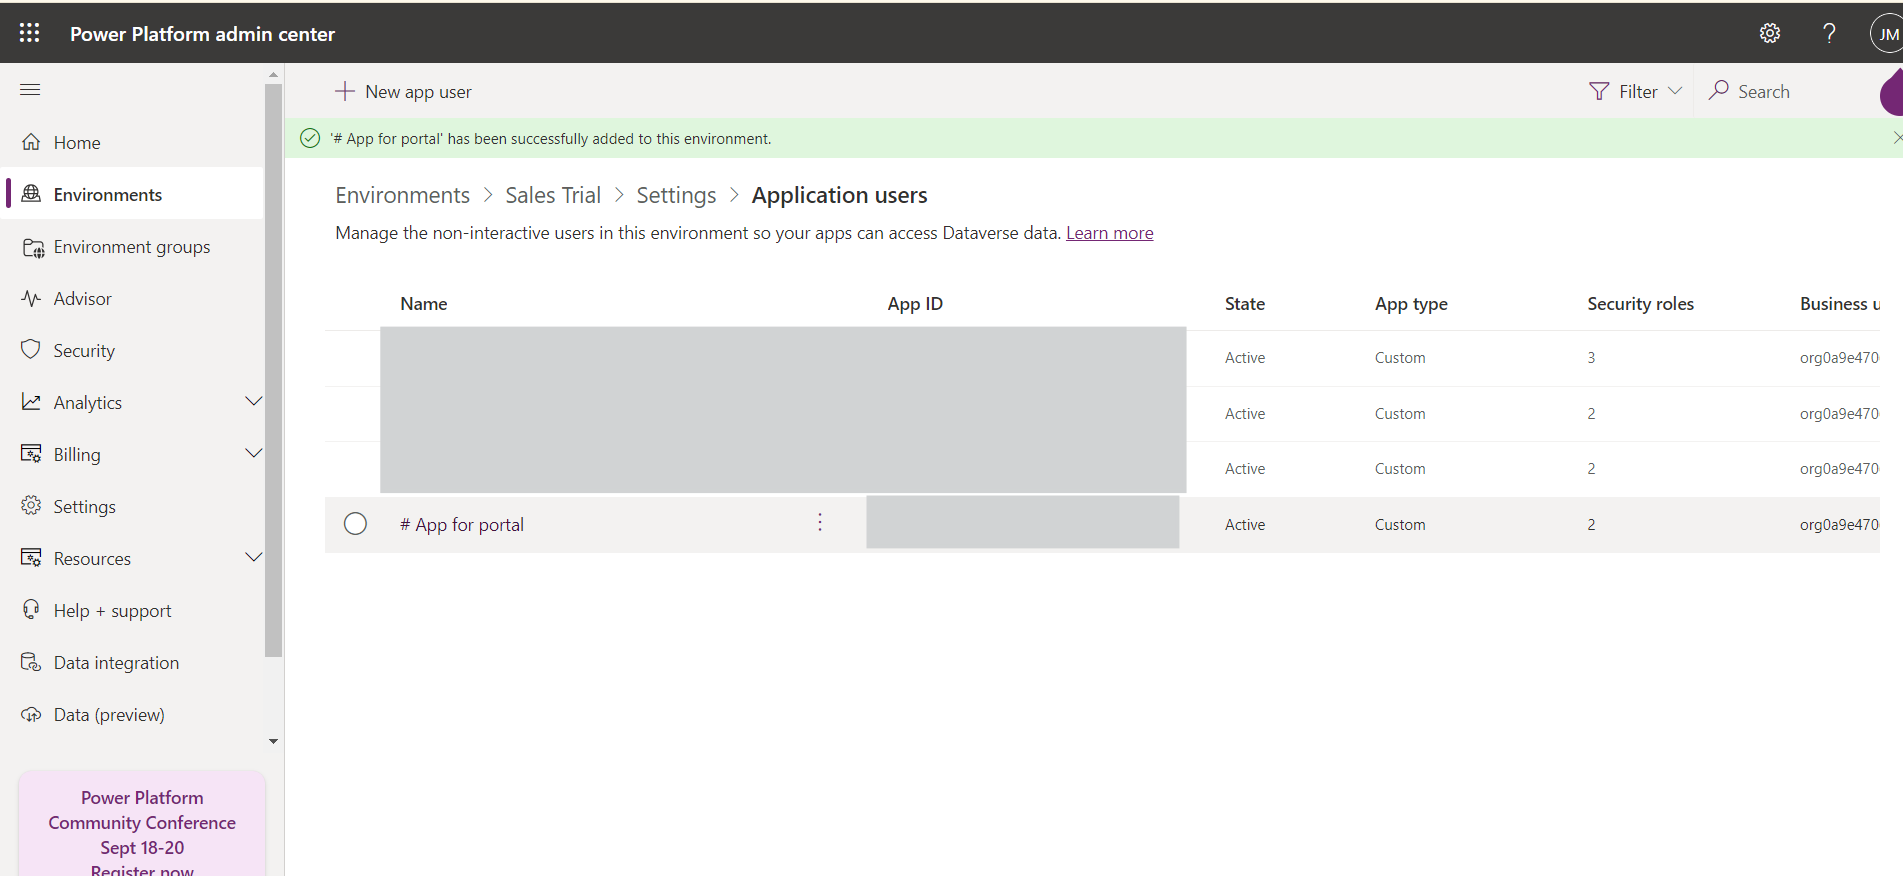
Create Application User :
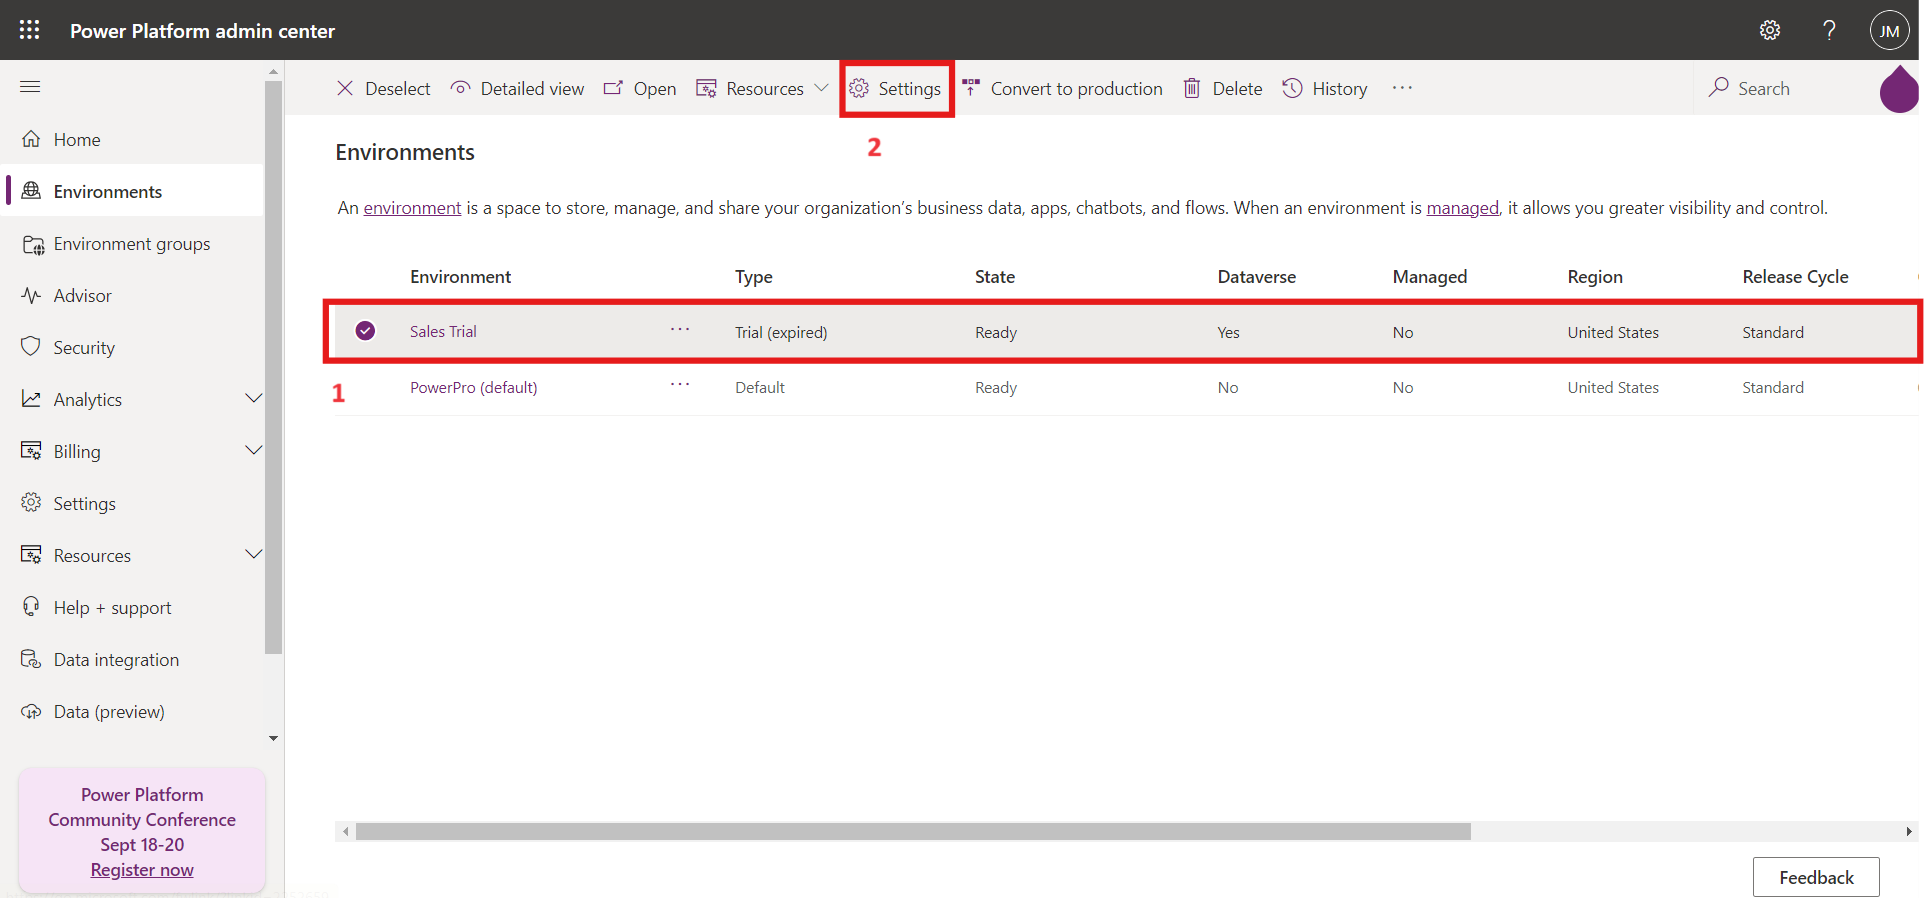
Log in to Power Platform Admin Center.
Select the Dynamics 365 Environment, then click Settings
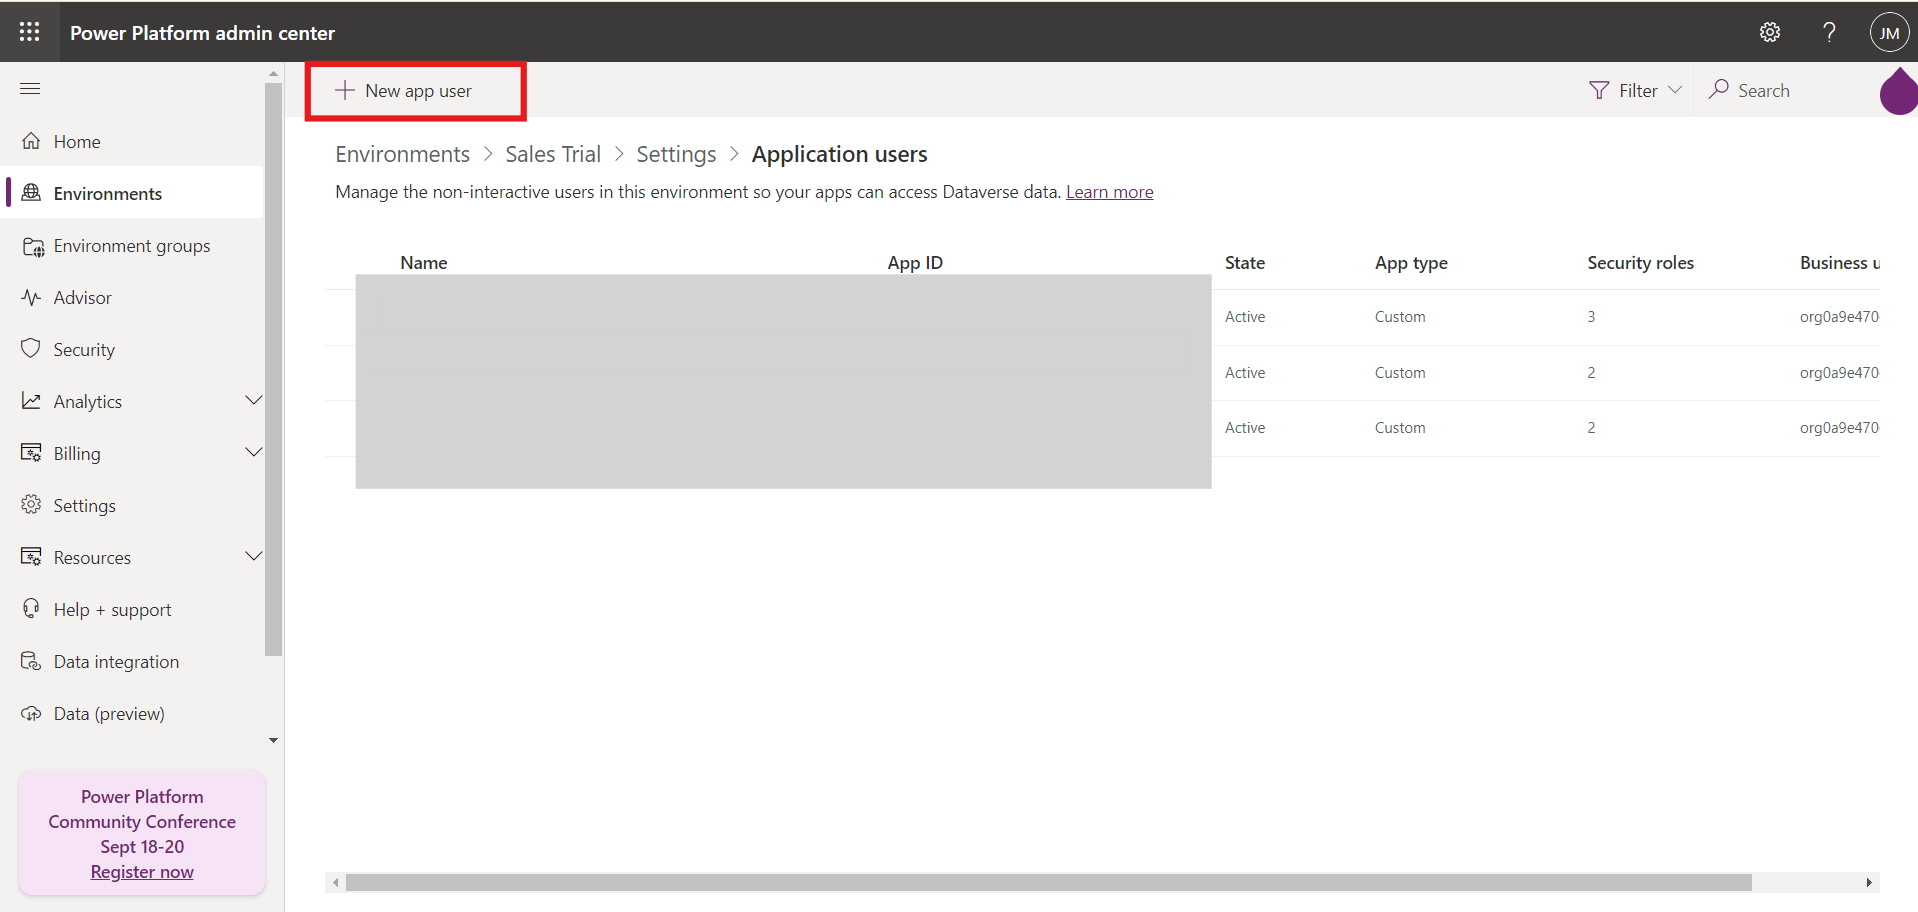
Navigate to Application users under Users + permissions.

Click on New app user from the list of Application users.
In the Create a new app user form, click Add an app and select the app you created earlier.
Select the Business unit to add the app user, then assign the Security roles to the user.
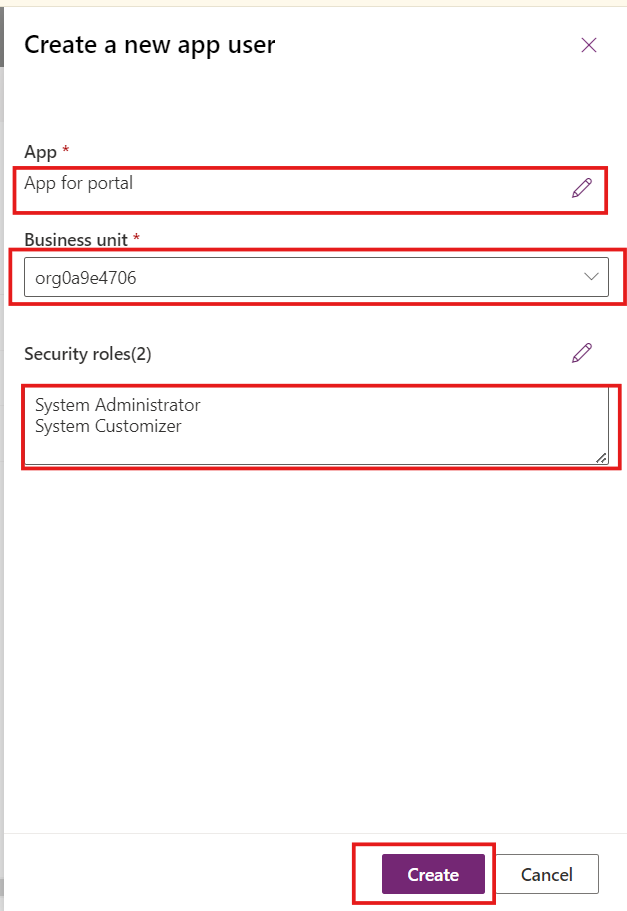
Click Create to add the user to your environment.