


To enable the Add/Edit option for the portal users, go to the Portal User Management ➤ Roles , you will land on the “Roles” page. Here you can add or manage roles for your portal.
Add/Edit Access for the New Roles
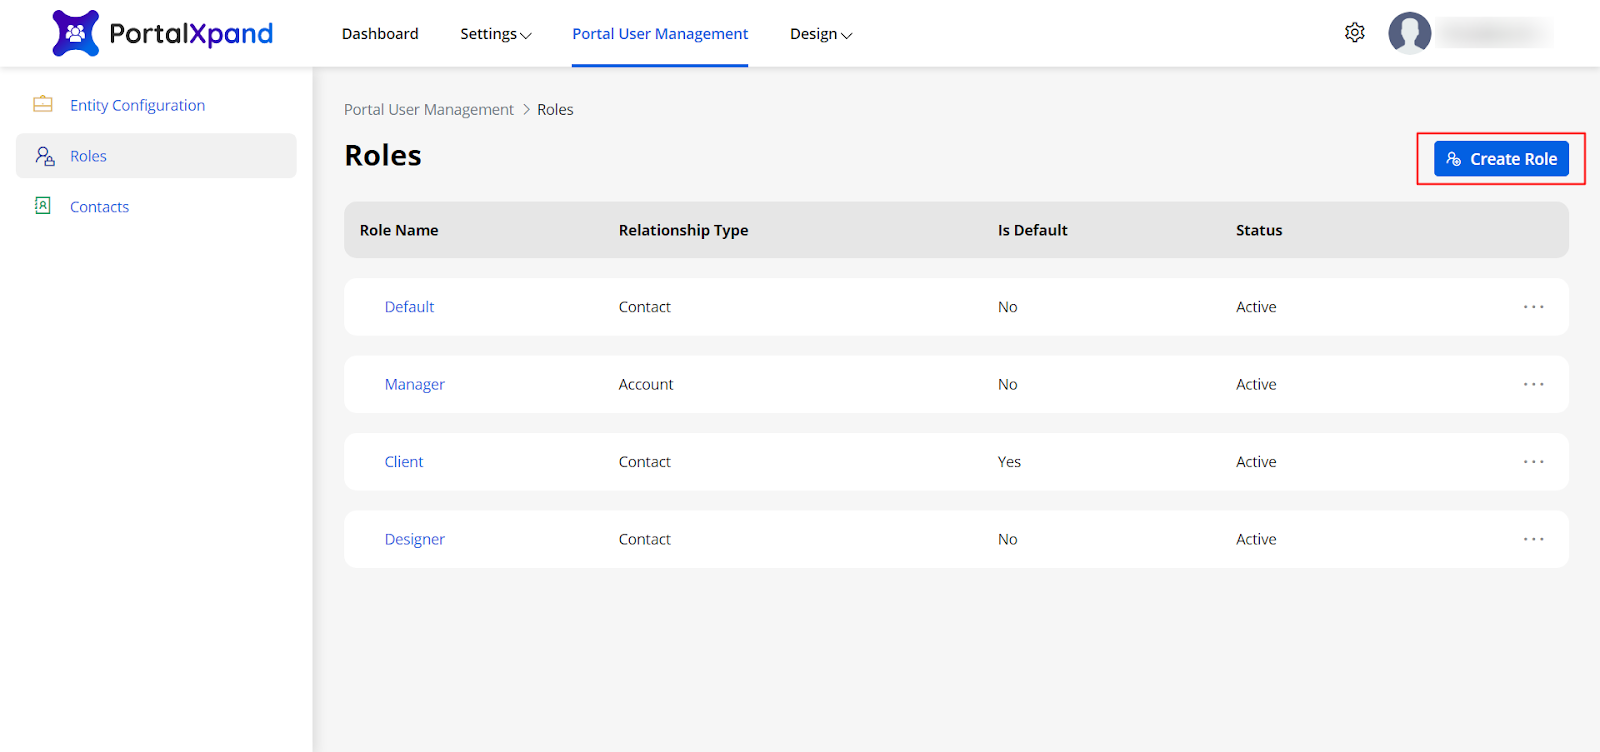
- By clicking on Create Role, you can add a role for the portal users. Insert the Role details and select the Relationship Type to select the relationship associated with the Role.
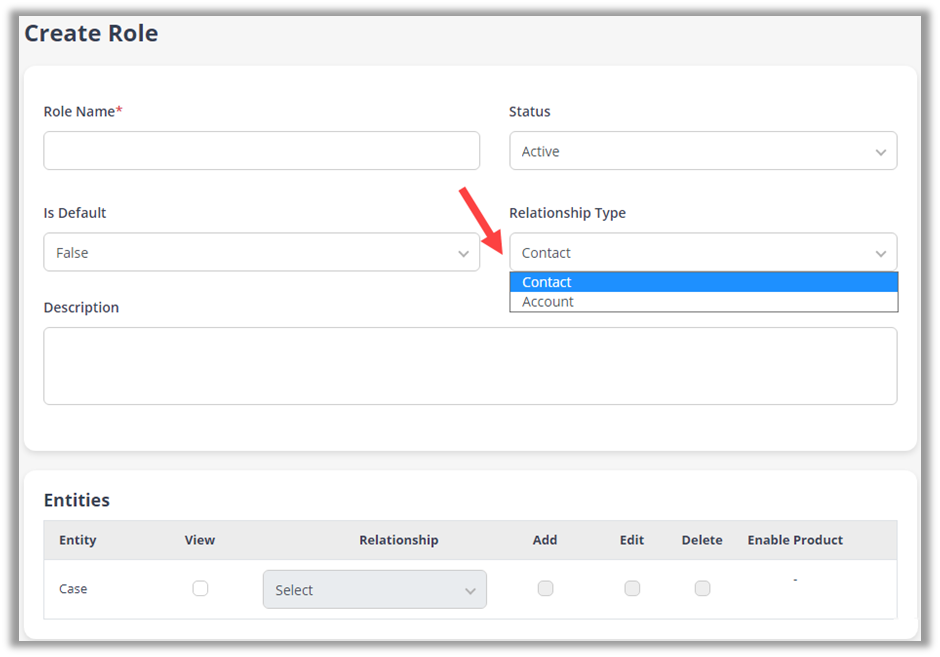
- Enable the entities that you want to enable for the portal users. You can enable the product for Order & Quote entities.
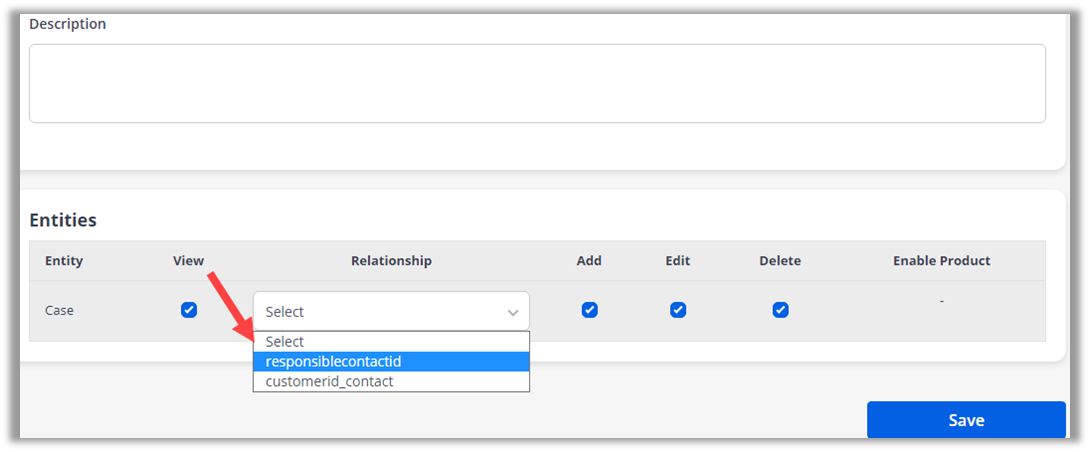
- The Relationship selection is provided to select the relationship that is created in CRM between contact/account and the entity.
- Tick Mark the Add, Edit, Delete fields to enable the following access to the users.
- If you have authenticated SharePoint in the CRMJetty Portal, you can manage the Document sharing rights for the Portal Users of the customer portal.

- From here, you can enable “Document Access” and allow users to Add the Files & Folders to the portal users from the Customer portal. Now you can enable the Delete option if you want to give the permission to delete.
- After configuring the Role details, save the details and the newly added portal user role will be listed under the Roles.
Note: If admin has enabled the entity for SharePoint from the Dynamics 365, it will be listed under the Document section.
After configurations click on the “Save” button to save the create the role.
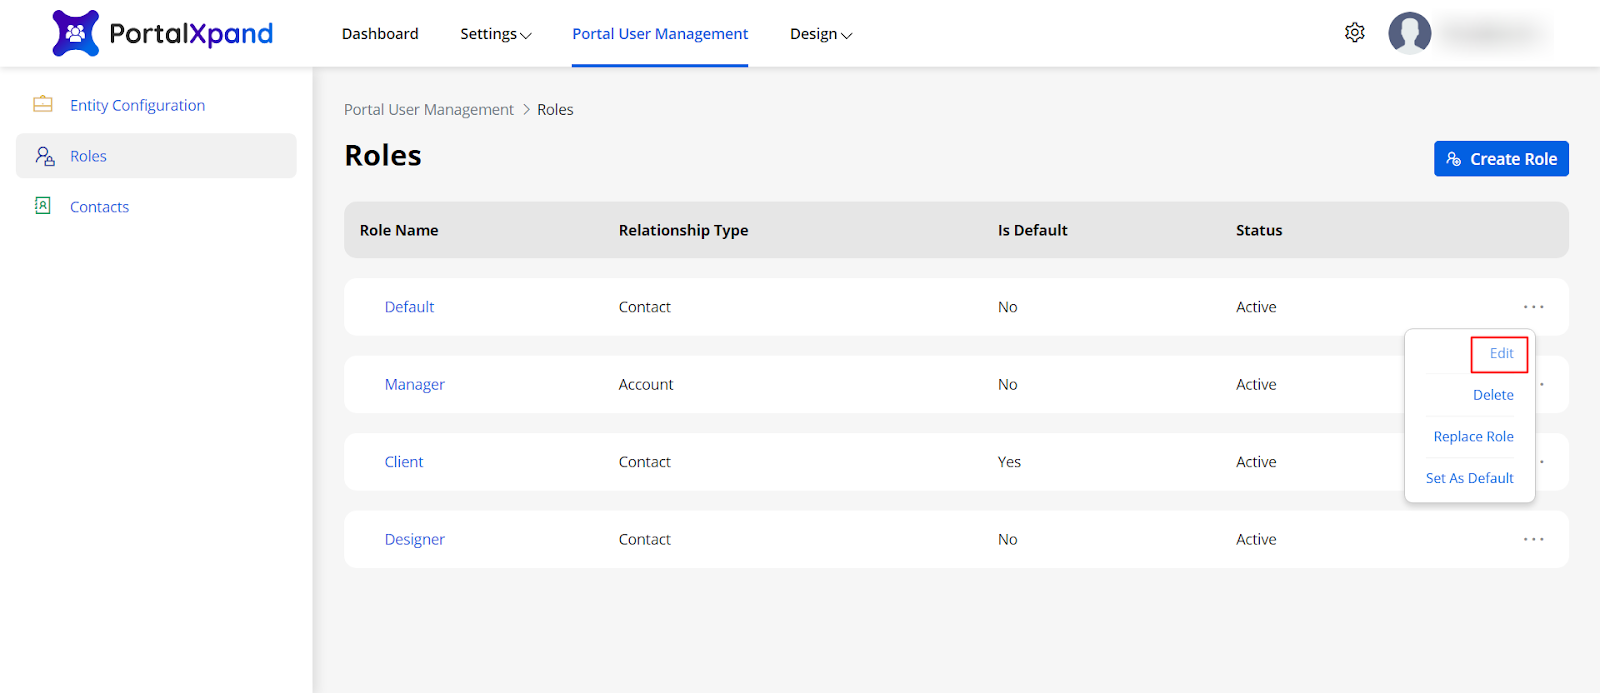
Add/Edit Access for the Existing Roles
To give the “Add/Edit” access to the existing roles, open the role in “Edit” mode.
Once the “Update Role” page opens up, scroll down to the “Entity” section and check the “Add/Edit” field of the particular entity. This will enable delete access to the entity.
After configuring the details, click on the “Save” button to save the configurations.