


The sub-grid can let you design the layout of the entity form. You just have to drag and drop the sub-grid to the layout area. Follow the below steps to do so.
Login to Backend
Go to Design ➤ Form Builder, you will land on the “Forms” page. Now open the required form to add the sub-grid.
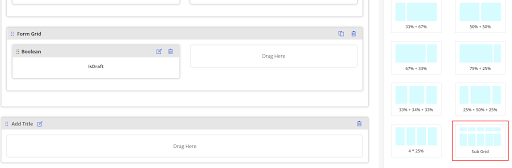
You will get the sub-grid under the Layout tab. You just need to drag and drop the sub-grid layout in the panel and add the following details.
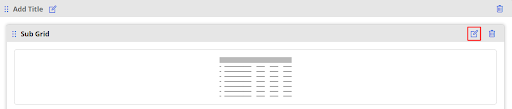
Click the Setting button in the box as shown in the image, and the Sub Grid Configuration panel will open up.
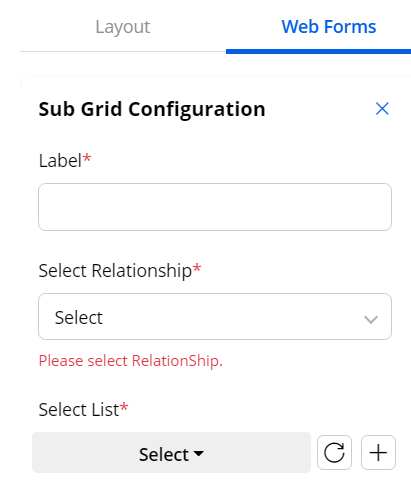
Label: Enter the label for the sub grid layout.
Select Relationship: Select the relationship from the list.
Select List: Select the list form by clicking on the “Select” button or add the list form by clicking on the “+” button.
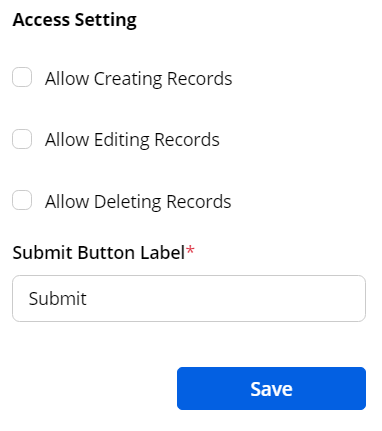
Allow Creating Records: Tickmark to allow creating records.
Allow Editing Records: Tickmark to allow editing records.
Allow Deleting Records: Tickmark to allow deleting records.
Submit Button Label: Enter the button label that will be displayed on the frontend.
After configuring all the information, click on the “Save” button and Publish the form.