


To configure the languages in the portal, you need to do the following configurations.
Login to Backend
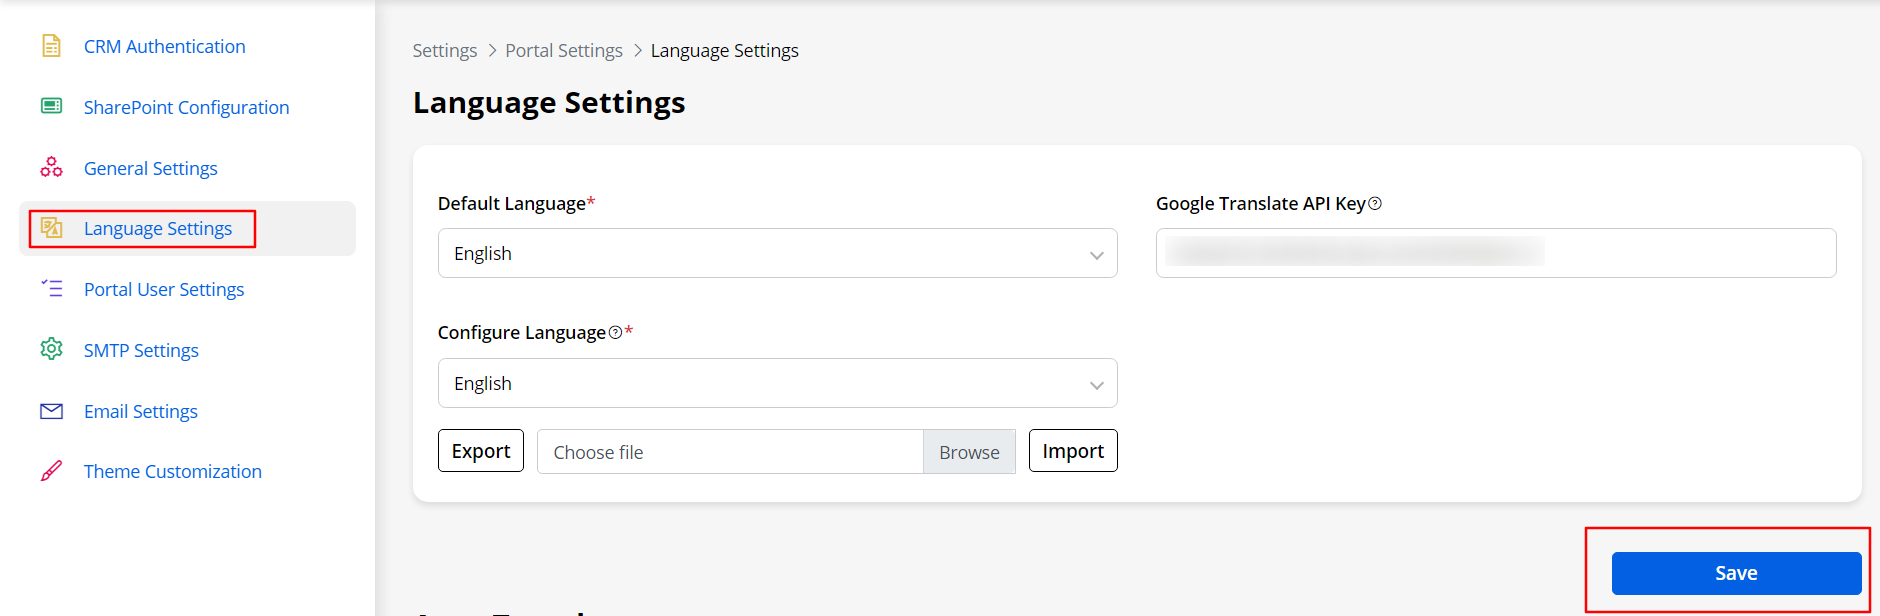
Navigate to the Settings ➤ Portal Settings ➤ Language Settings, you will land on the “Language Settings” page.
Default Language: Select the Default Language from the drop-down list that will contain all CRM-enabled languages. The customer portal will be displayed as per the default language selected here.
Note: Here, only those languages will appear that are configured from the CRM side.
Configure Language: Translate the customer portal content using xlsx (excel). Here, Portal admin users can translate the content by exporting an excel file and importing the translated file (excel sheet).
Select the Language that you want to translate and Export the xlsx by opening the xlsx file, you can translate the labels & text message of the CRM into another language.
You need to translate all the content manually in the xlsx file. Once the content is translated, select that xlsx file & Import it to the configured language.
After importing the translated files, you need to click on the Save button to apply the changes and update the translated content.
Google Translate: Insert the Google Translate API key to translate the labels & content for the Customer Portal.
Note: You must enable the “Translate API” from the Google developer console for the website domain (Portal Domain).
After importing the translated files, you need to click on the Save button to save the changes and update the translated content.