You will get the two different instances for the live and for the sandbox (testing purpose). You can manage both instances separately and the settings will be common for both as per Portal Settings. You can manage the live site and sandbox site separately from their domains, respectively.
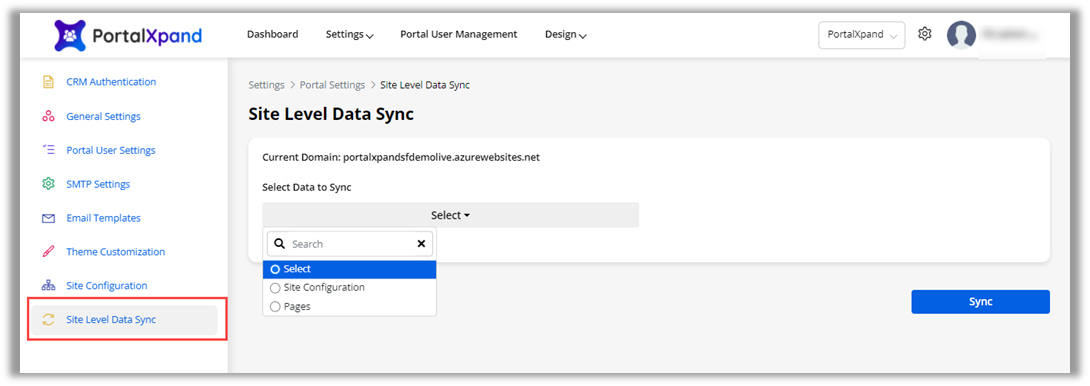
You can Sync data from Live to Sandbox or Sandbox to live by navigating to the Settings → Portal Settings → Site Level Data Sync. Here you will find the Sync Data section where you can select a module to sync data like pages, forms, lists, etc.

If you have made any changes by creating a new record or editing an existing record, you will get the option to sync the data.
When you select any module, you will get the records for that module that are changed/updated, you can select the required data to sync and all related data to those records.
If you have made any changes by creating a new record or editing an existing record, you will get the option to sync the data.
Select Data to Sync: Select any data (Module) from the drop-down selection to sync the recently added/updated data.

When you select the data (module), you will get all the records of the selected module in the Tabular format which will also get synced with the added data on live or sandbox instances.
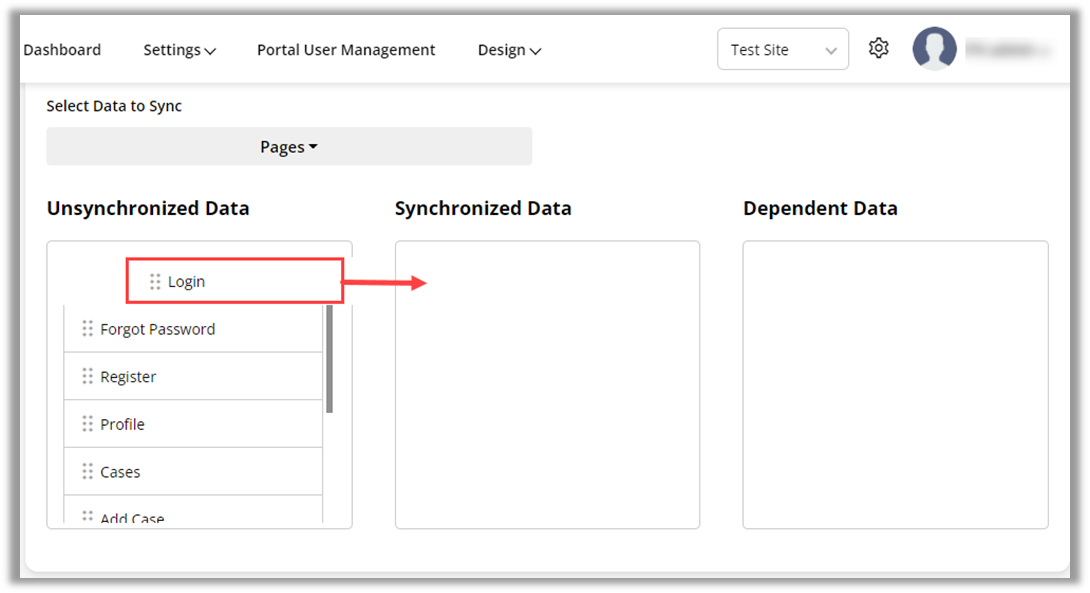
Unsynchronized Data: You will get the records of the selected module in a tabular format that needs to be synced.
Synchronized Data: You need to simply drag and drop the data from the “Unsynchronized Data” table and add it to the “Synchronized Data” table.

Dependent Data: Once you drag and drop data to sync, you will get the dependent data for the same module that will be listed in the “Dependent Data” table.
You will see all the “Dependent Records” in full detail in the tabular format that will be synced.
When you click on the Sync button, all the selected data and dependent records will be synced to the other instance (Live or Sandbox).


