


To integrate Sharepoint in the customer portal you have to install the Sharepoint add-on on both the customer portal and the Dynamics CRM. First of all, install the Sharepoint package in the CRM and install the plug-in for Sharepoint in your Portal. Now follow the below steps to integrate Sharepoint in the Customer Portal.
Once the CRM is authenticated with necessary credentials, you can configure the “MS Office SharePoint” for document management in the customer portal.
- You need to authenticate the following configurations:
- Connection Type: Select the type whether it is Online or On Premise (IFD).
- Protocol: Select the protocol that is configured. i.e., https.
- Authentication Type: Select the type for authentication whether it is Credential or OAuth.
- If you have selected the “Credential”, insert your credentials Username & Password.
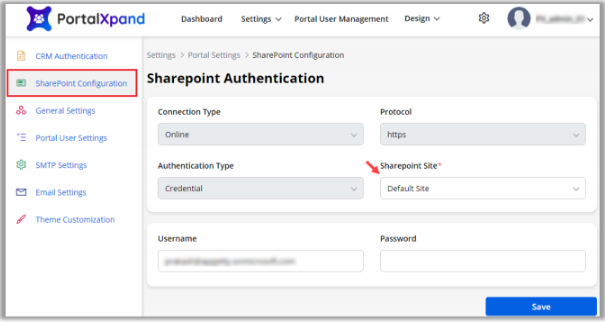
Note: If you are using a third party with limited access use OAuth, you must insert the App ID & the Client Secret.
- SharePoint Site: You will get the list of the SharePoint Sites that are integrated in the Dynamics 365 and configured in the MS Office SharePoint. Select the SharePoint site in which you want to manage the Portal Documents.
- Enter the Username and Password to configure the SharePoint.
- Once all the details are selected and inserted, click on the Save button to authenticate the SharePoint. To enable the Document management & sharing functionality for the Customer Portal, you can manage that from the Portal User Rights. (Portal User Management -> Roles)