To avail Salesforce modules into your WordPress portal, it is mandatory to set Portal Layouts for each accessible module. Customer Portal plug-in provides the facility to set Portal Layouts for any module from Salesforce.
Please follow the below steps to set up ‘Portal Layout’ for Salesforce Classic & Lightning modes.
For Salesforce Classic
- For layout settings, click on the ‘All Tabs’ icon and you will be redirected to the All Tabs screen. Now click on ‘Layout Settings’.
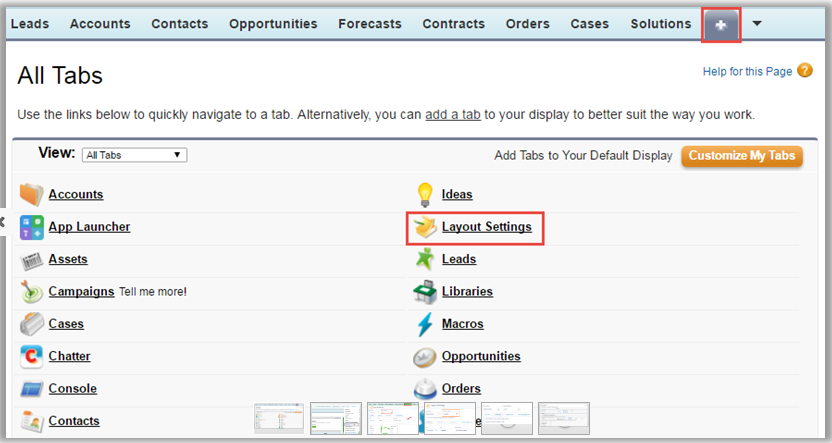
- By clicking on the ‘Layout Settings’ link you will be redirected to the Layout Settings screen.
OR
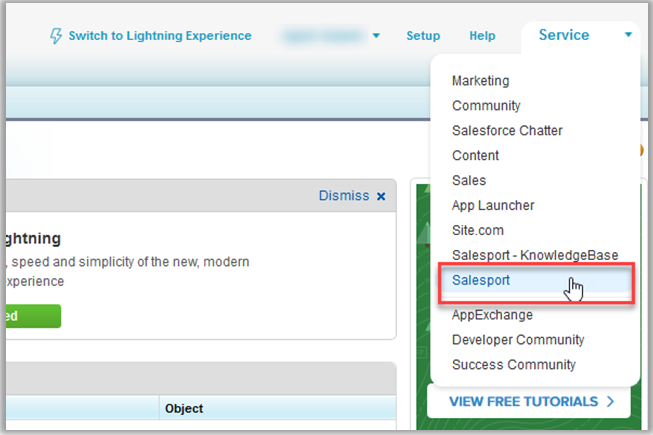
- Click on the ‘App Menu’ icon and the App Menu screen will open.
- Select the ‘SalesPort app’ from the app menu.
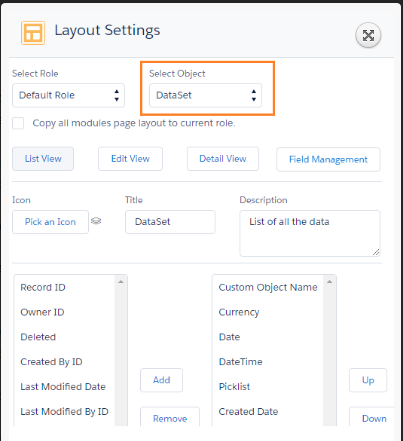
- You can select the desired role and module from the ‘Select Roles’ and ‘Select-Object’ dropdown list. You can set the portal layout of the objects as per user role selection.
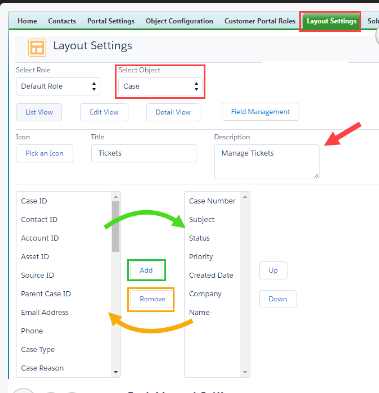
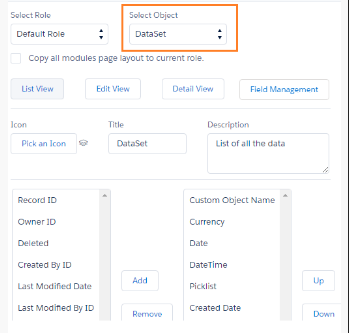
- Set Object’s layouts for List view, Edit view, and Detail view. Select the fields from the left column and click on ‘Add’. After populating the layout, click on the ‘Save’ button to save the layout.
- You can rearrange the order of fields by clicking on ‘Up’ and ‘Down’ icons beside the right column populated with the selected fields.
- You can set the Icon, insert the Title and the Description for ListView, Edit View and Detail View individually that will display in the portal.
- You can set the Layout for the custom object as well.
Note: You cannot set layout for the Attachment and Call module.
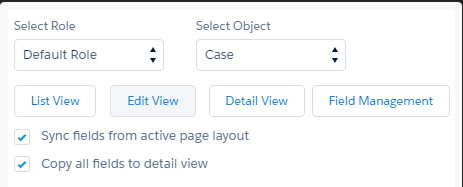
- Sync fields from active page layout
Sync fields from active page layout will allow the user to copy fields from default salesforce record page layout to portal module layout. By selecting this option, it will load fields to the Selected fields list in the dropdown.
This will be helpful for users who want to provide the same fields to the portal end the same as salesforce module record page fields.
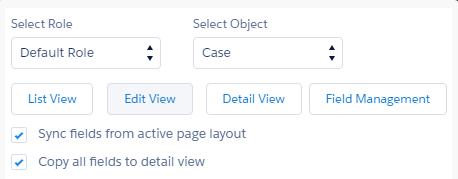
- Copy all fields to detail view
By ticking the “Copy all fields to detail view” option, the fields will be selected for the detail view as selected for the edit view.
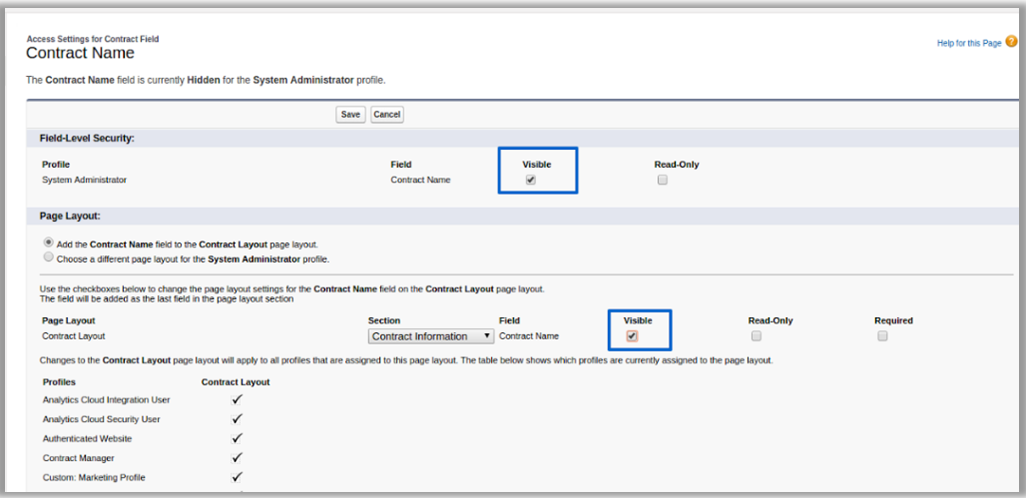
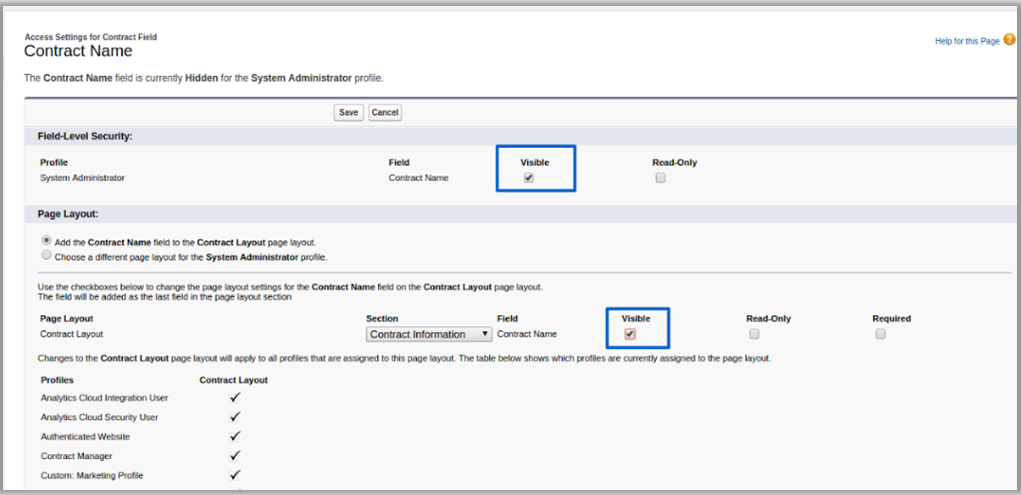
Note: Layout settings page, in selected fields, each field should be accessible or have read-only permission only then it will be visible in front.
To avail of Salesforce modules into your WordPress portal, it is mandatory to set Portal Layouts for each accessible modul.
For Salesforce Lightning
- Customer Portal plug-in provides the facility to set Portal Layouts for any module from Salesforce.
- For layout settings, click on the ‘App Launcher’ icon, and the App Launcher screen will pop up on the screen.
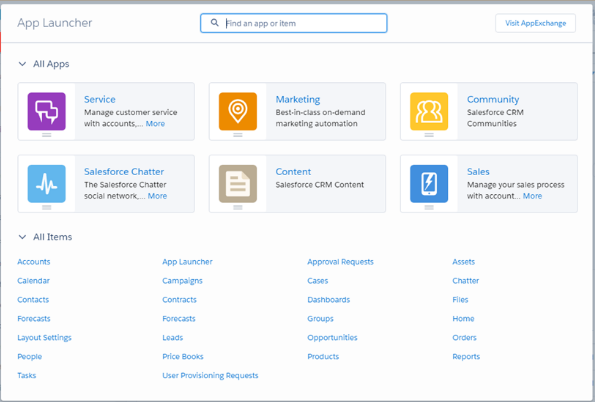
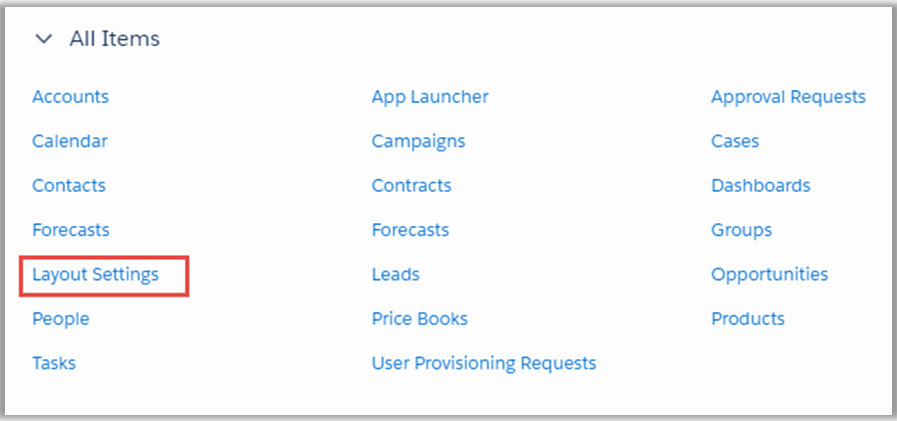
- Now click on ‘Layout Settings’ under ‘All Items’
- By clicking on the ‘Layout Settings’ link you will be redirected to the Layout Settings screen.
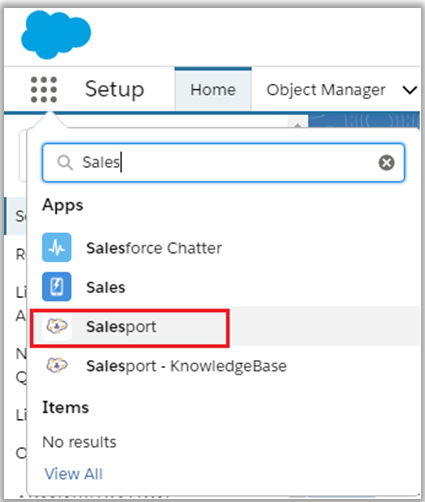
- Click on the ‘App Launcher’ icon and search the Salesport. You will be navigated to the Salesport dashboard.
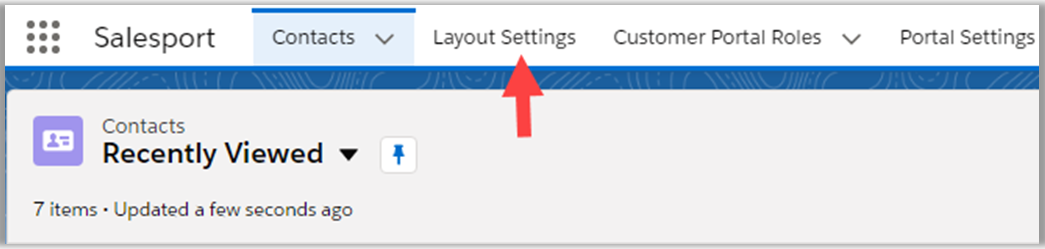
- Now, by clicking on the ‘Layout Settings’, you will be navigated to the Layout Settings page. From here you can set the portal layout of the objects as per user role selection.
- You can select the desired role and module from ‘Select Roles’ and ‘Select Modules’ dropdown list and set the layout for the selected module.
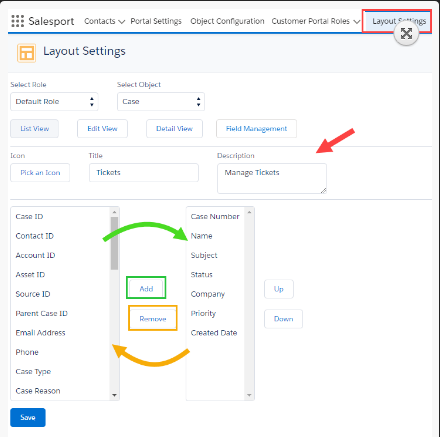
- Set Object’s layouts for List view, Edit view, and Detail view. Select the fields from the left column and click on ‘Add’ After populating the layout, click on the ‘Save’ button to save the layout.
- You can rearrange the order of fields by clicking on ‘Up’ and ‘Down’ icons beside the right column populated with the selected fields.
- You can set the Icon, insert the Title and the Description for ListView, Edit View and Detail View individually that will display in the portal.
Mass Settings:
From the Mass Setting, you can configure the fields of the selected object and it will be displayed on the portal.
– Field Label: Insert the desired ‘label’ of the field so portal users can easily recognize the fields.
– Help Tip: Insert a short/instructive message regarding the field.
– Required: If any field is mandatory from the portal side, tick the ‘Required’ option. The portal users will get it as a mandatory field.
– Read Only: If you want to provide a field that should not be editable for the portal user but just want to display there, tick the ‘Read Only’ option.
– Searchable: The portal users can filter the records as per the search option. If you want to add the field in the search option in the portal, select that field as ‘Searchable’.
- You can set the Layout for the custom object as well.
Note: You cannot set layout for the Attachment and Call module.
Sync fields from active page layout:
‘Sync fields from active page layout’ will allow the user to copy fields from default salesforce record page layout to portal module layout. By selecting this option, it will load fields to the selected fields list in the dropdown.
This will be helpful for users who want to provide the same fields to the portal end the same as salesforce module record page fields.
Copy all fields to detail view:
By ticking the ‘Copy all fields to detail view’ option, the fields will be selected for the detail view as selected for the edit view.
Note: Layout settings page, in selected fields, each field should be accessible or have a read-only permission only then it will be visible in front.