


Load data workflow helps you in filtering the data in the customer portal and lets you show the limited data to the portal users as per requirement. The data will be sorted and filtered in the List View, Data Card, Recent Activity, Counter, Chart, etc as per the configured condition.
Note: This workflow condition for rights will be only applied if the user has those rights from the user’s role. (Portal User Management → Roles)
Login to Backend
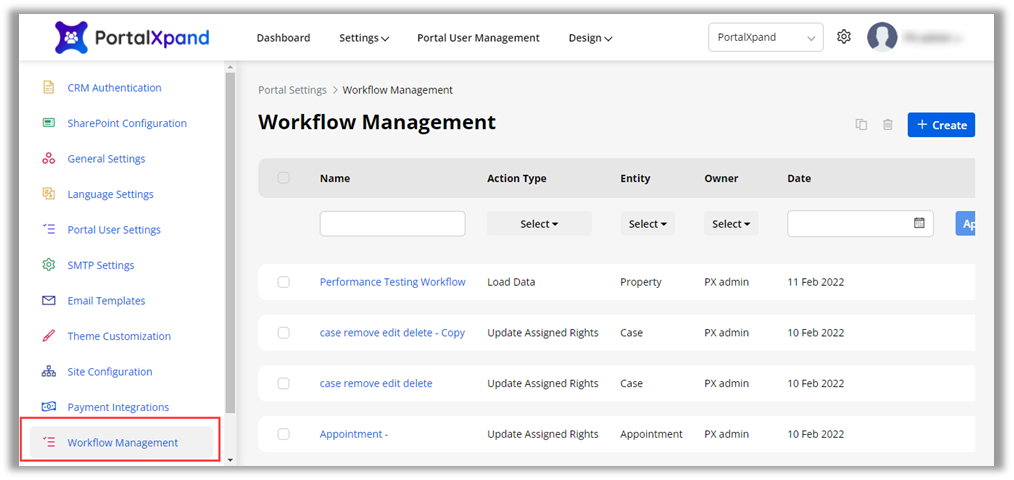
Navigate to Settings ➤ Portal Settings ➤ Workflow Management, you will get the list of the created workflows. Now click on the Create button, from here you can configure and set the conditional rules for the workflow to sort and filter the specific entity data.
You need to configure the following options for the workflow:
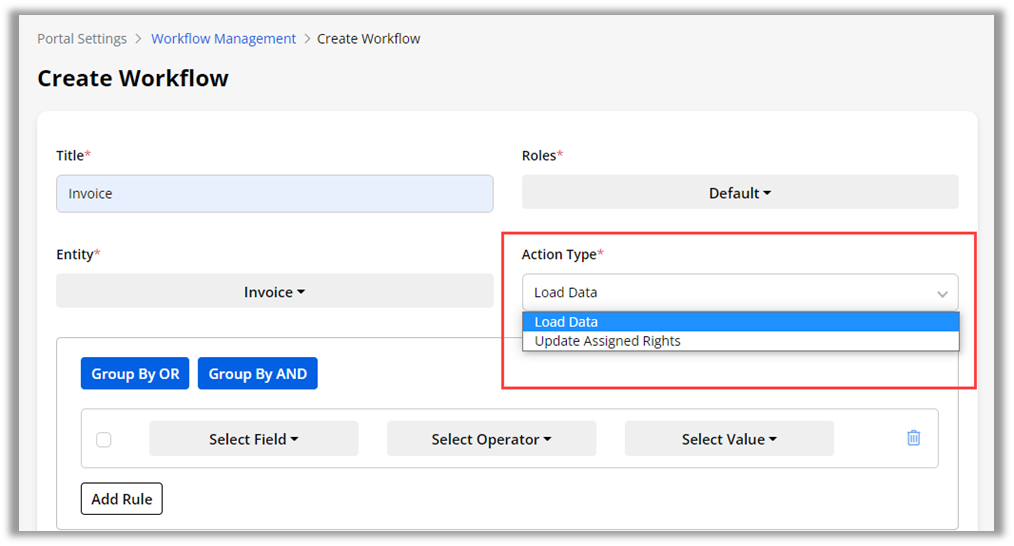
Title: Insert the relevant name to identify the workflow.
Roles: Select the roles on which you want to make this workflow function.
Entity: Select the entity for which you need to create the conditions.
Action Type: You will get two options (Load Data & Update Assigned Rights) to act on the data in the customer portal from that select Load Data.
Once the entity is selected you will get the options to set the conditions for the selected entity. You will get the list of the fields as per the selection of the entity.

As per the field selection, you will get the operators and selected field values. You can also create a group of conditions with AND and OR.
Now, you need to select the ‘Field’ from the drop-down selection to filter the entity data based on that.
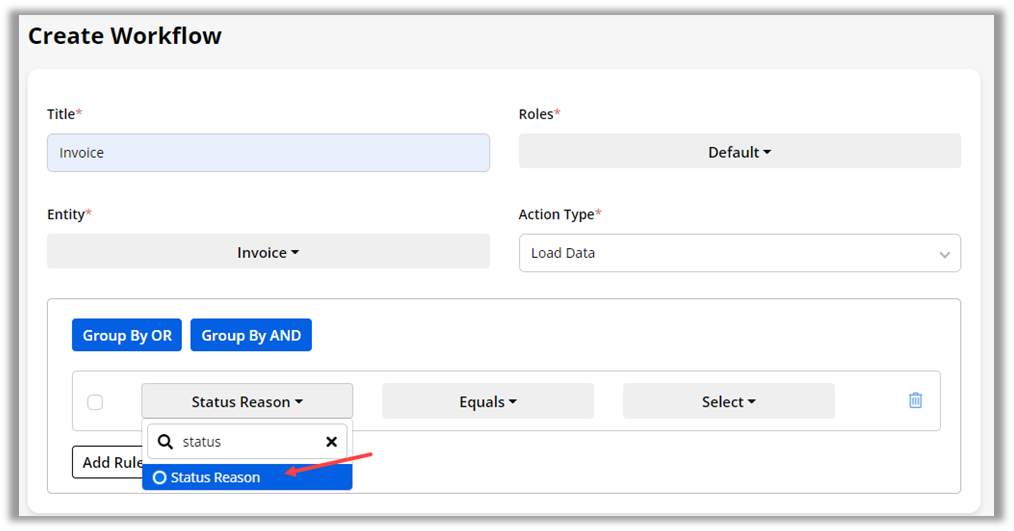
You will get the fields of the selected entity as per configuration in the Dynamics CRM.
Here, the field is selected (i.e. Status Reason). It means the entity data will be accessible to the portal users as per the condition has set.
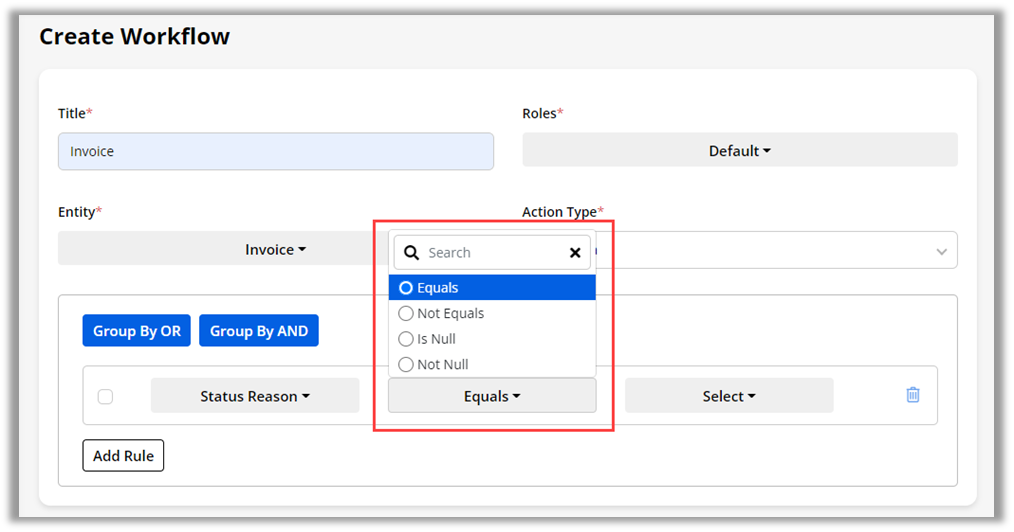
Once the field is selected, you need to select the ‘Operator’ option to match with the field’s value (attribute).
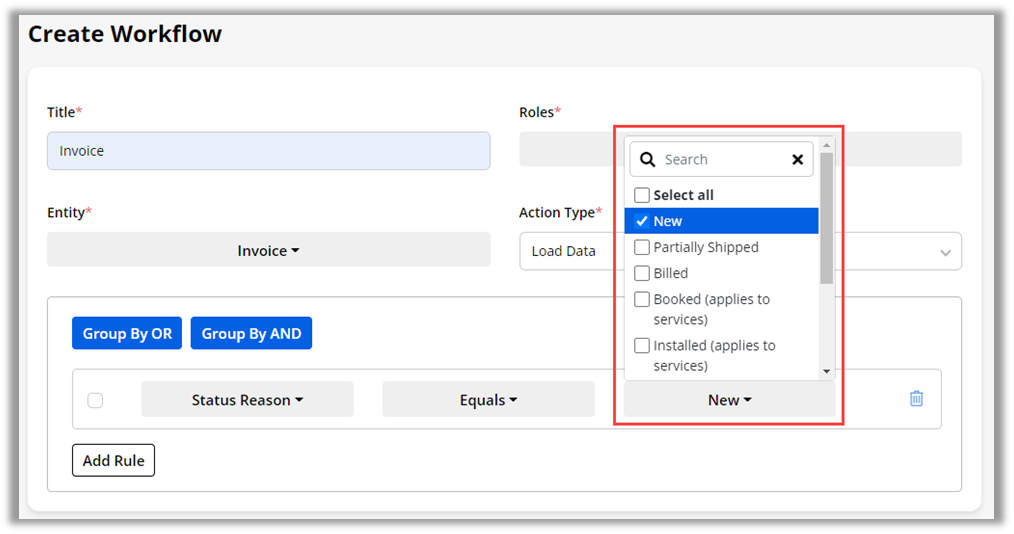
Once the operator is selected, you need to select the field’s value (attribute). You can select multiple values for the field. Here, the “New” field’s value is selected.
Note: You will get this option as per the selection of the Field. If you have selected the Account field, you will get an invoice related to the selected account. So, it depends on which field is selected.
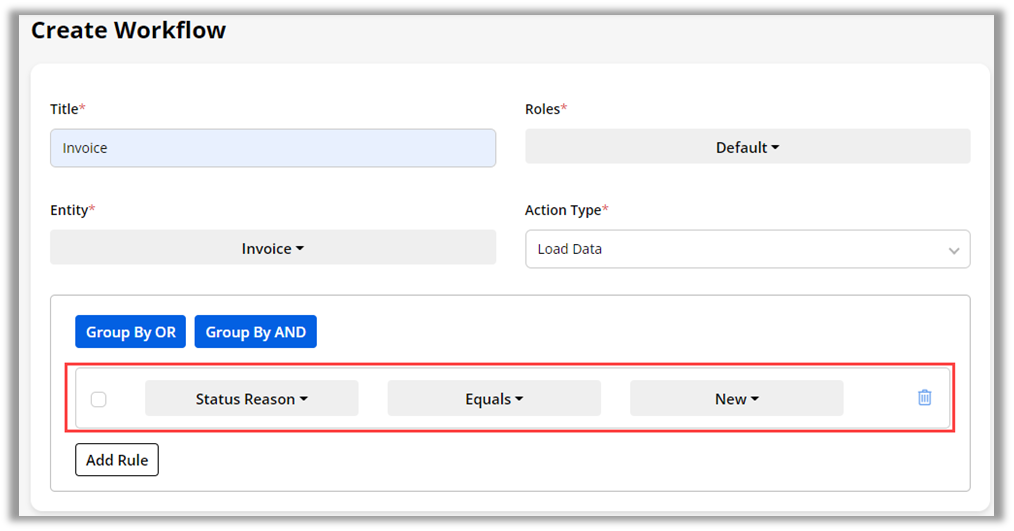
Once the conditional rule is added, click on the Save button.
The following condition is set for the Invoice entity:
– Entity: Invoice
– Field: Status Reason
– Operator (match): Equals
– Field’s value (attribute): New
Note: Here, you can also select the multiple values as per your requirement. You will get the field’s value selected based on which field you have selected. In some of the fields, you will get only one option to select (radio button).
So, based on the condition, the portal users can see only those records of the invoice entity whose Status Reason is” New”.
Customer Portal
If you have set up the workflow to filter and sort the entity records, the portal users will get the entity records, the portal user will get the entity records as per the condition that is set from the admin side.
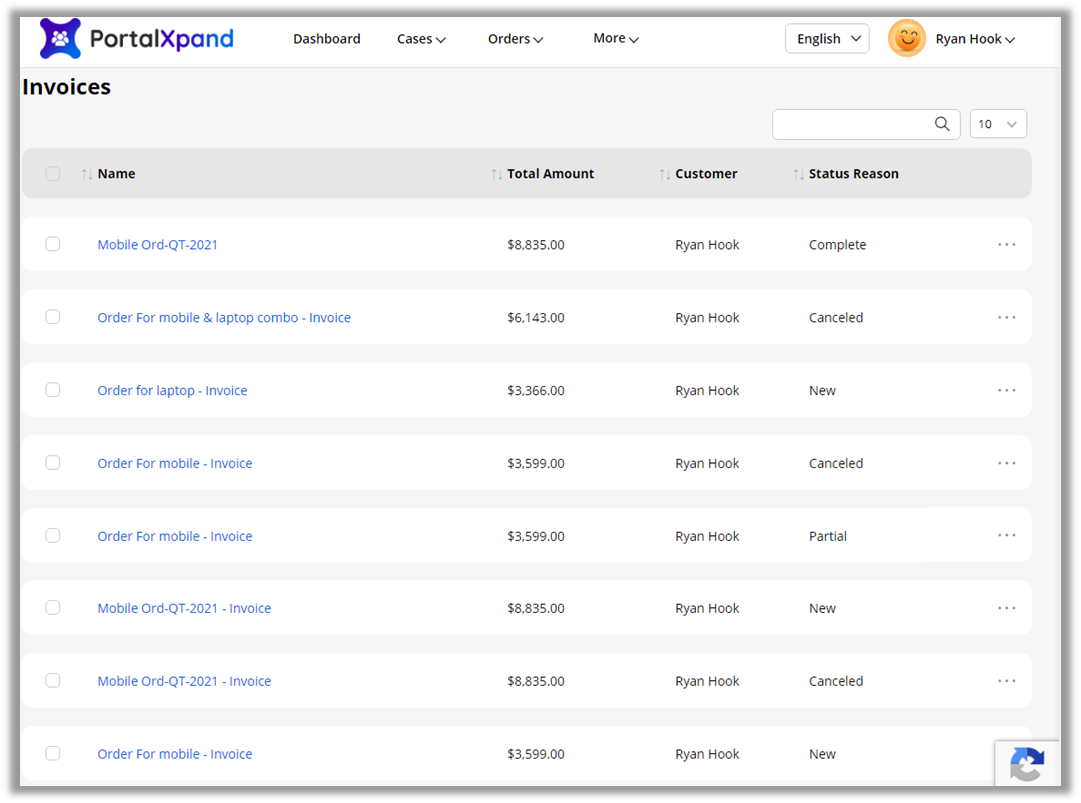
Before Condition Applied
The portal users can see every record of the invoice entity.
After Condition is Applied
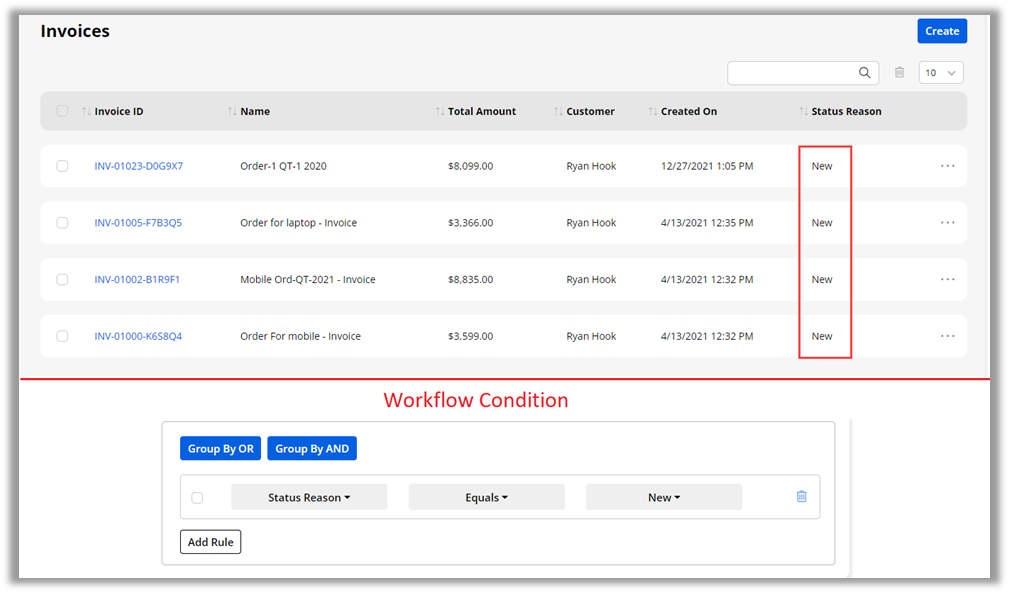
As per the workflow condition of the invoice entity, the portal user can only see those records whose “Status Reason” is New.
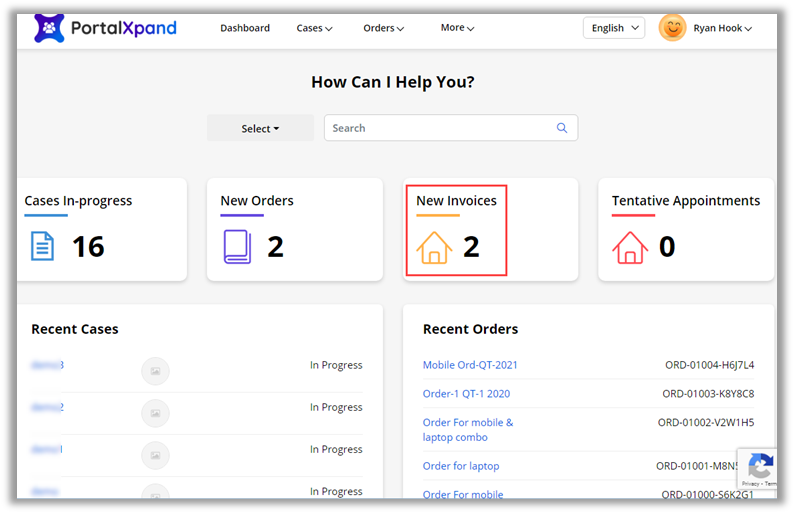
You can also see the entity records in the data card view and in the dashboard details (Count & Recent Activity) as per the condition set.