


You can create multiple sites in your Portal by following the below steps.
Login to Backend
Site Name: Enter the name of your site.
Portable Enabled Language: Select the language you want to enable for your Portal.
Default Language: Select the default language for your site.
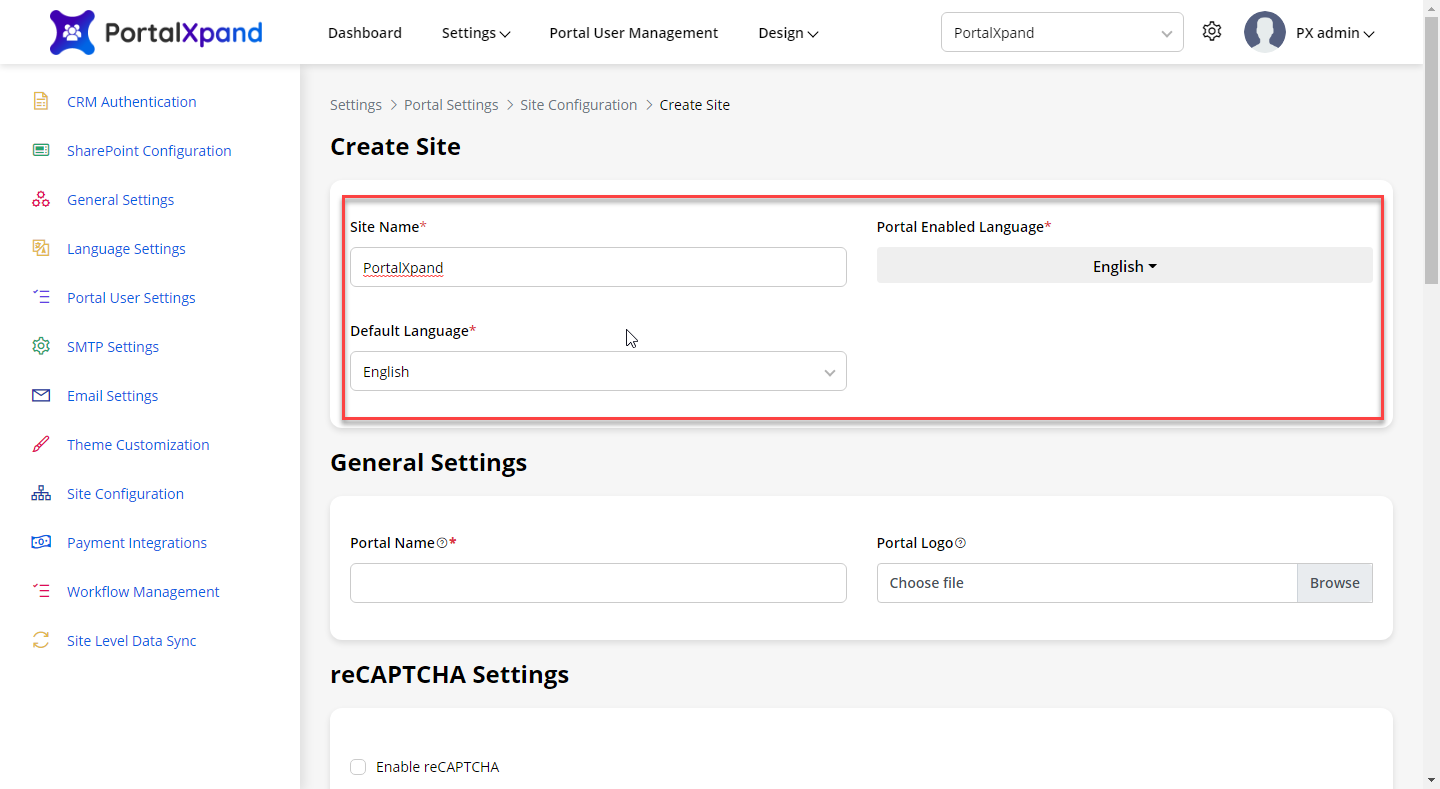
General Settings: Enter the name and upload the logo of the portal.
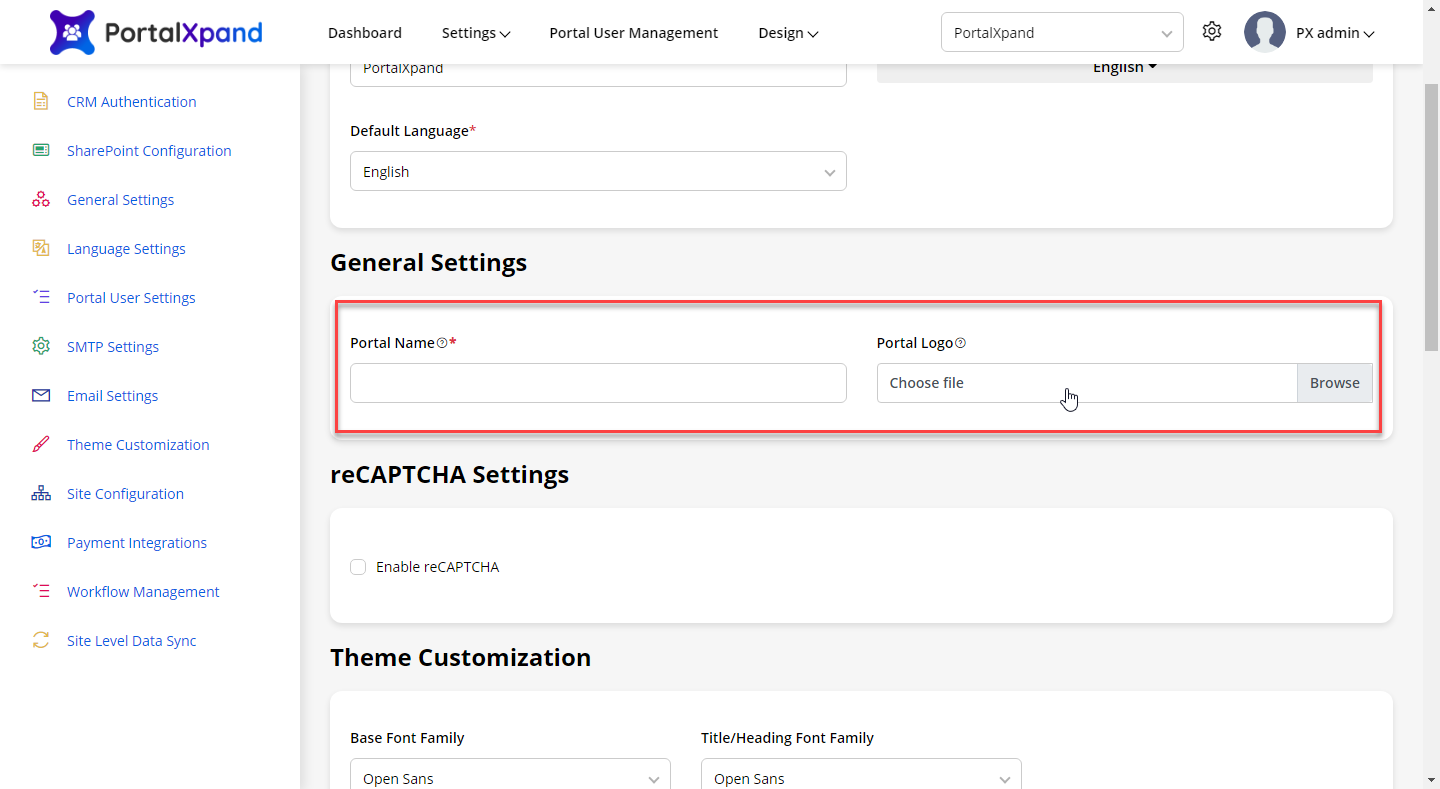
reCaptcha Settings: Configure the reCaptcha settings by following this article.
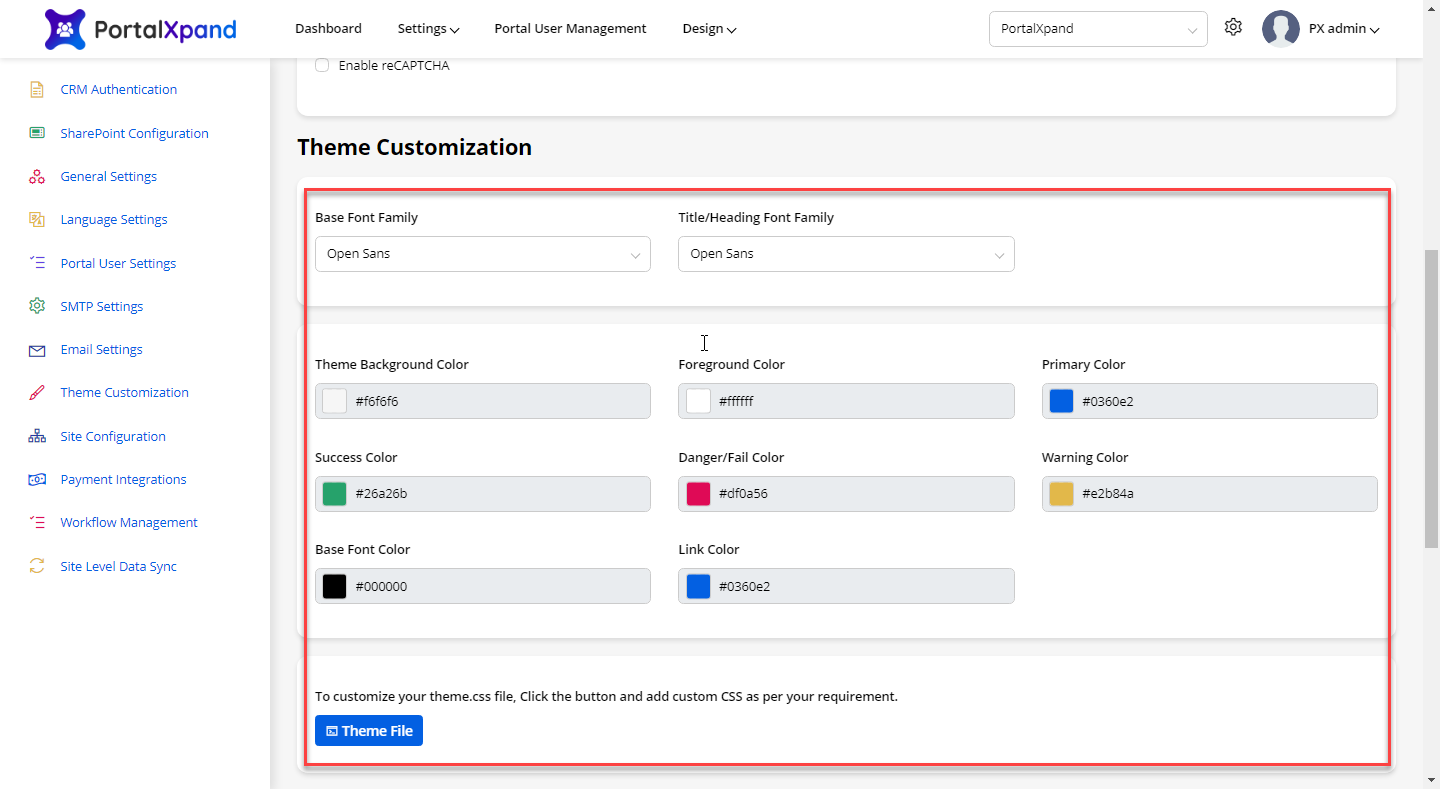
Theme Customization
- Base Font Family: Choose the font to use for the main body text and for the menus.
- Title/Heading Font Family: Choose a font to use for all the headings and titles of the portal.
- Theme Background Color: Choose the color to display as the background of the theme.
- Foreground Color: Choose the color to display the content background color.
- Primary Color: Choose a primary color to be displayed most frequently across all the modules. This color will appear for text/iconography.
- Success Color: Choose the color to display when the action is performed and gets success.
- Danger/Fail Color: Choose the color to display when the action performed gets failed, or any error occurs.
- Warning Color: Choose the color to display the warning.
- Base Font Color: Choose the color for body text and description of Portal main content.
- Link Color: Choose the color for all text to which links have been added.
- Theme File: You can customize your Portal’s UI & appearance by updating the theme CSS file.
Customer OnBoarding Setting: In this section, you can offer various login options like Gmail, Facebook, and Microsoft to your customers at the login page. Read this article to enable those.
Customer OnBoarding User Validation Settings
Two Factor Authentication: Enable this option to enable two-factor authentication when the portal user’s login to the portal.
- Set OTP Timer: Set the timer that will be displayed in the Login page. It will show the reverse countdown in minutes that is inserted in the set OTP timer.
- No. of Wrong attempts: Enter the number of attempts your user can enter the wrong OTP.
- Display Resend OTP: Set the periods for which you want to display the Resend OTP option after a while, when portal users enter the wrong OTP (n) times.
Verify Email: If you have enabled the Verify Email, the new users who have registered from the customer portal will get an email verification link to their registered Email ID to verify their portal account.
User Approval: If you have enabled User Approval, the admin must approve for the login to the portal users created from the portal. The users who have logged in with any social media platforms must approve for the login once they successfully authenticate with any social media login.
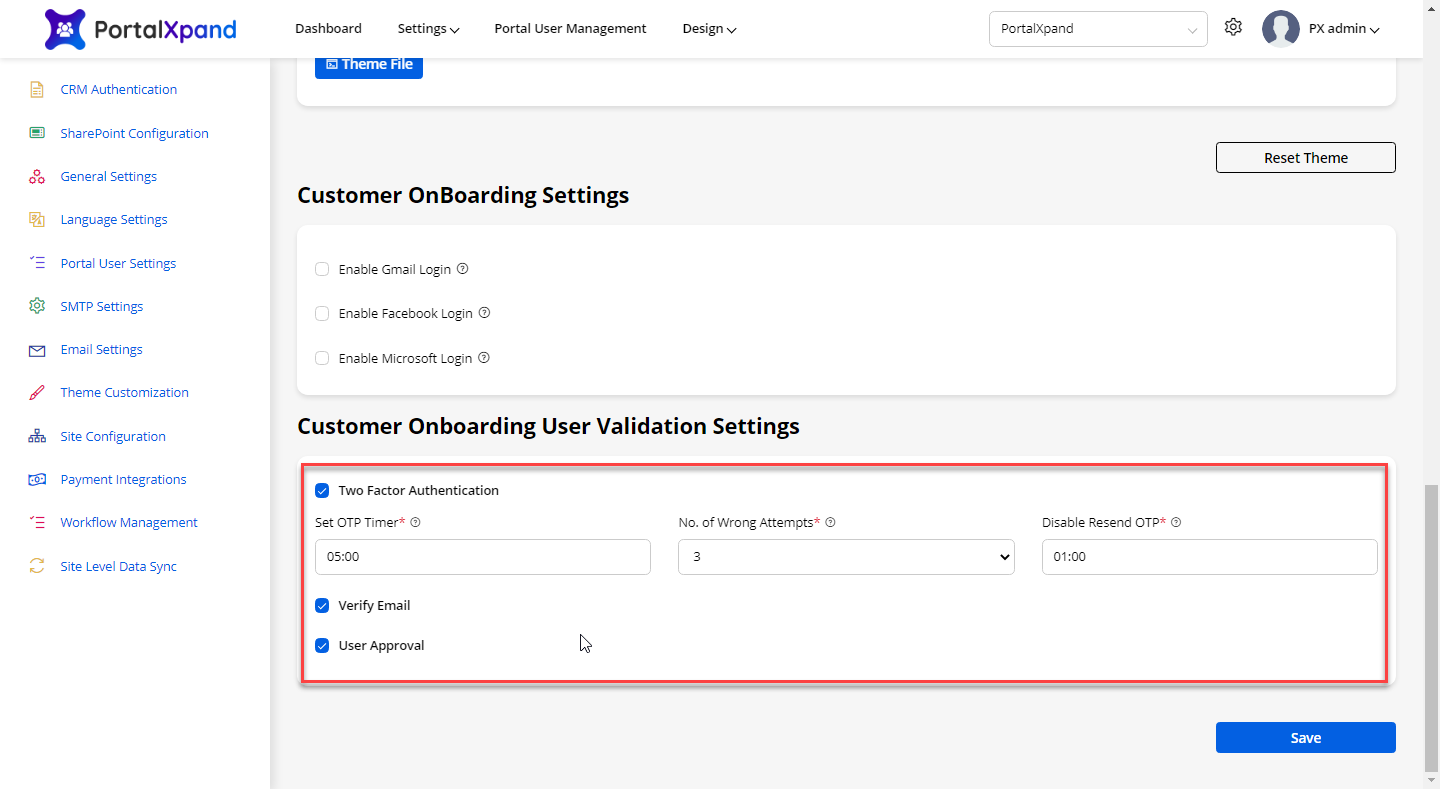
After configuring all the details, click on the Save button to save the configurations.